My whole family struggles with food allergies, so I’m well-versed in the power of substitutions. And just like swapping butter for applesauce allows me to bake banana bread that everyone in the family can (pretend to) enjoy, Mailchimp merge tags let you change one ingredient in your email so that it works for everyone.
Here’s how to use merge tags in Mailchimp to create delicious—er, engaging—emails.
Table of contents:
What are Mailchimp merge tags?
Mailchimp merge tags are placeholders you can insert in an email for subscriber-specific information. These placeholder tokens can pull the first name, last name, email address, home address, favorite movie star—or any other information you have on record for that subscriber. That means you write one email, but each subscriber gets a personalized version of it.
Some common examples of merge tags include *|FNAME|*, which inserts the subscriber’s first name, *|LNAME|* for the last name, and *|EMAIL|* to—surprise—display the subscriber’s email address. As long as a field has a label, you can use that label as a merge tag. And you can always view and edit these fields in the contact’s profile.
How to add merge tags in Mailchimp
-
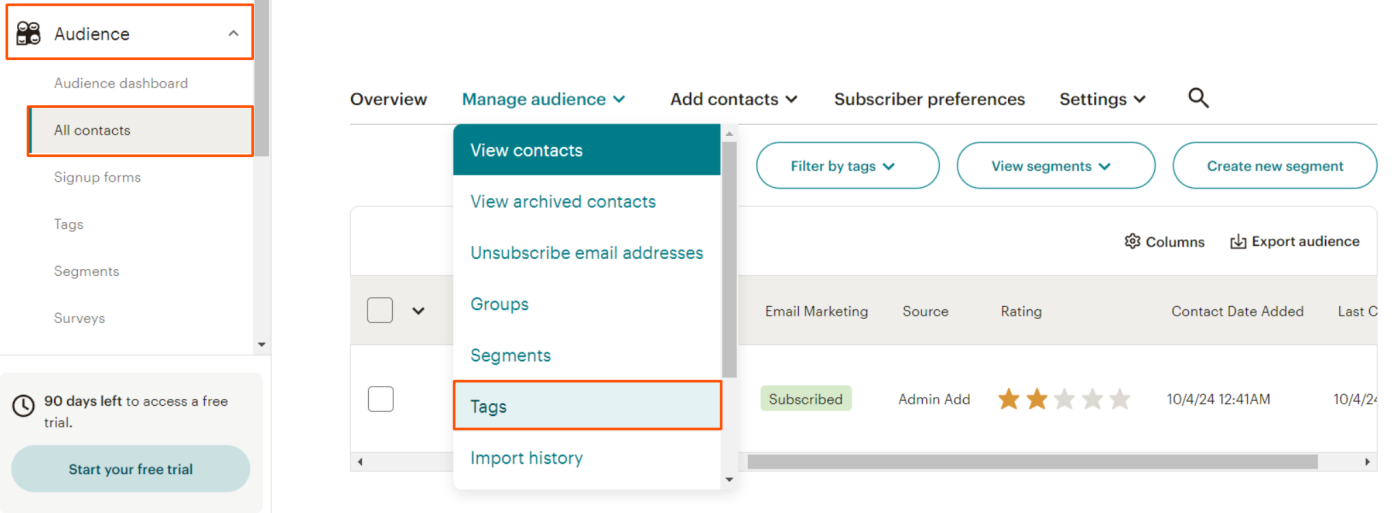
From the main dashboard, go to Audience > All contacts > Manage audience > Tags.
-
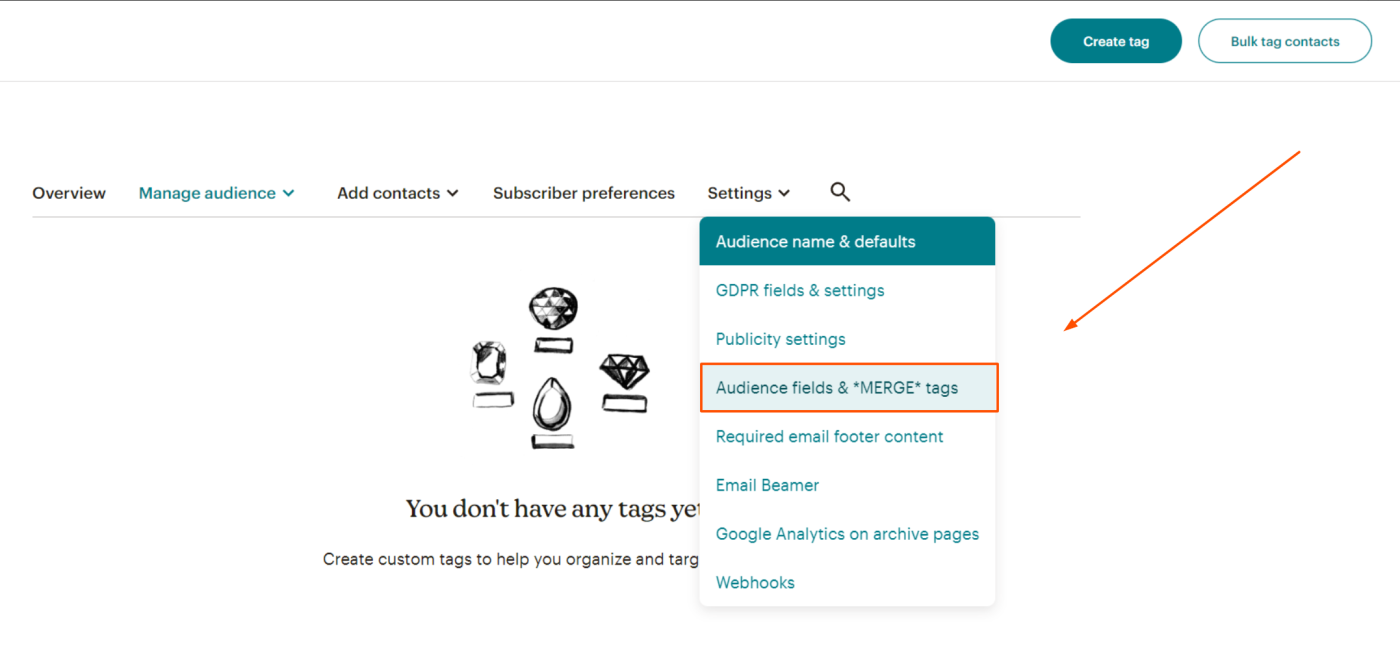
From the Tags page, click the Settings dropdown, and select Audience fields & *MERGE* tags.
-
Review the merge tags currently set up, which include common tags like *|EMAIL|*, *|FNAME|*, and *|LNAME|* by default.
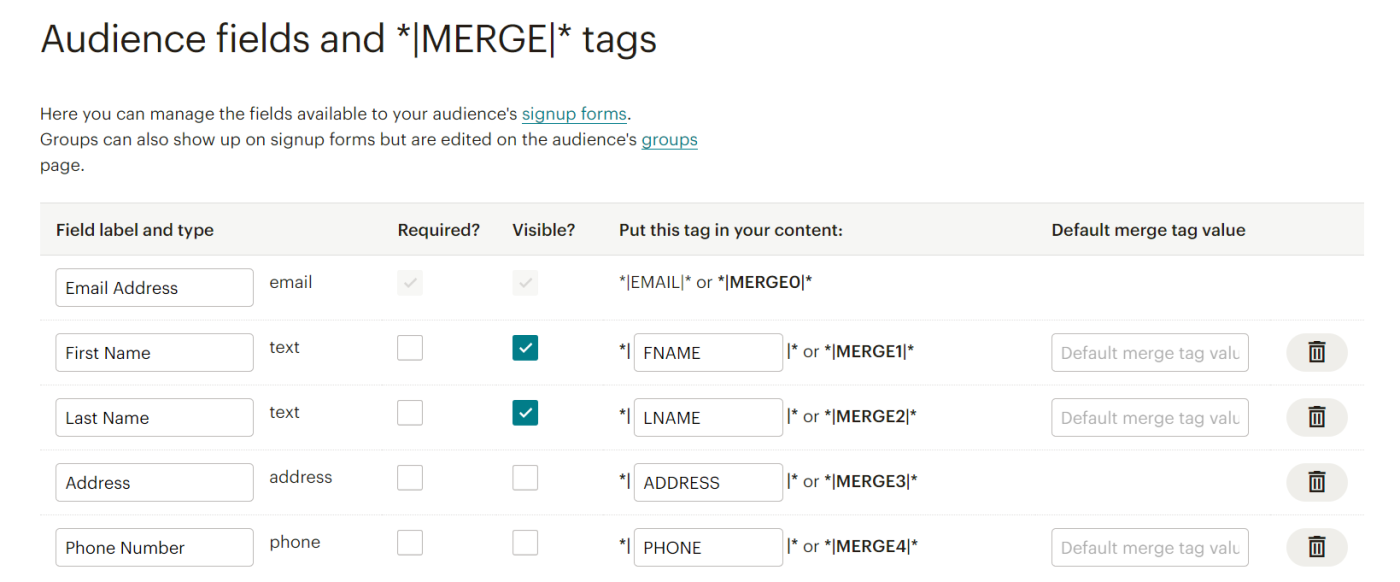
Note: The checkmark “Required?” indicates whether contacts must have this field in their contact record, and “Visible?” indicates whether that tag is visible in the editor’s dropdown menu. If there’s a field you no longer want to use (like “MySpace profile”), you might leave that box unchecked.
-
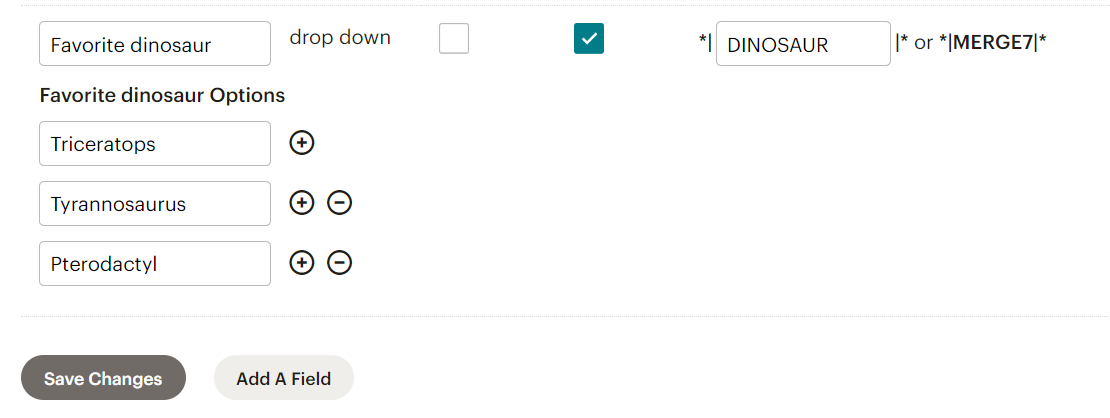
To add a custom merge tag, click the Add A Field button.

-
Select the field type.

-
Label your new field, fill in any relevant options, and enter the keyword you’ll use in the merge tag.
-
Click Save Changes.
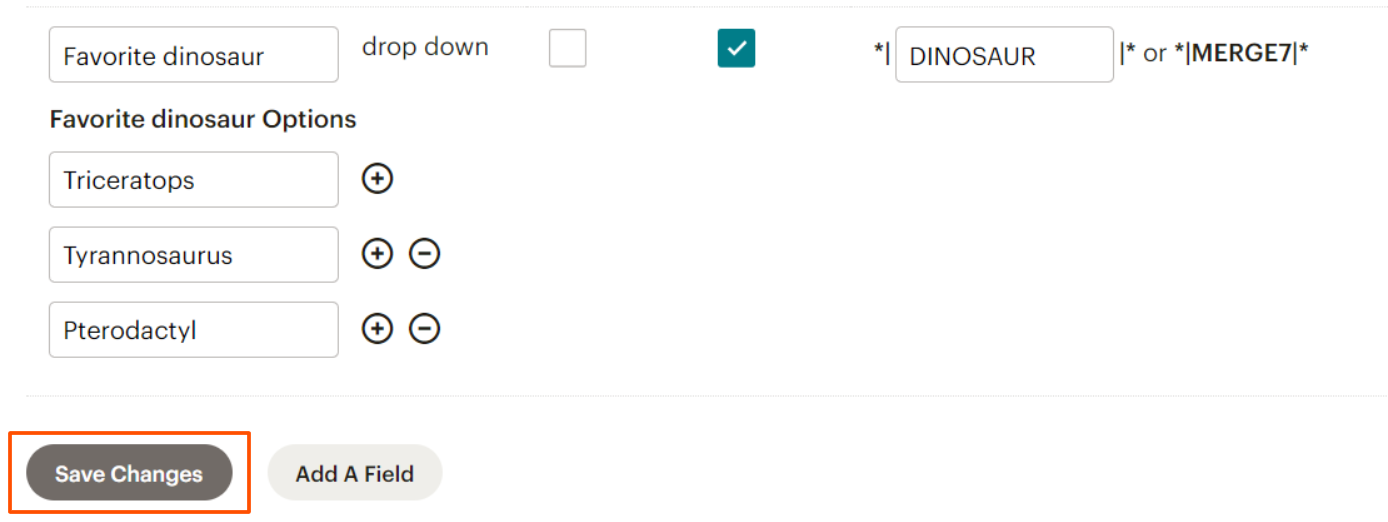
When new subscribers sign up using a Mailchimp form or are added to your database manually, this field will appear, allowing you to pull that data into your email with the associated merge tag.
-
Finally, set a default value in the Default merge tag value field so that your emails display professionally even when information is missing. For example, you might set the default value for First Name to “Valued customer” (or ideally something more specific to your company).

How to use merge tags in Mailchimp
Including merge tags in an email is just as simple as creating them in the first place. I’ll illustrate with a staple tactic of email personalization: adding a name to a welcome email.
-
Place your cursor in the text where you want to add the merge tag.
-
Type
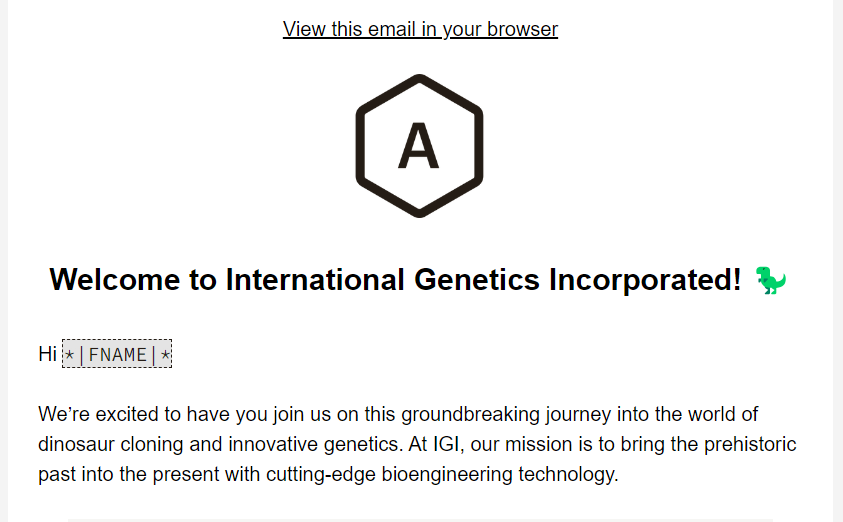
*|, and the closing|*will appear to create the merge tag field. For this example, we want to add the first name of our subscriber, so we’ll typeFNAMEin the middle. Alternatively, you can use the Merge Tags dropdown menu and select from all the tags you’ve already added.
Once you type or select the merge tag, it will look like this:
-
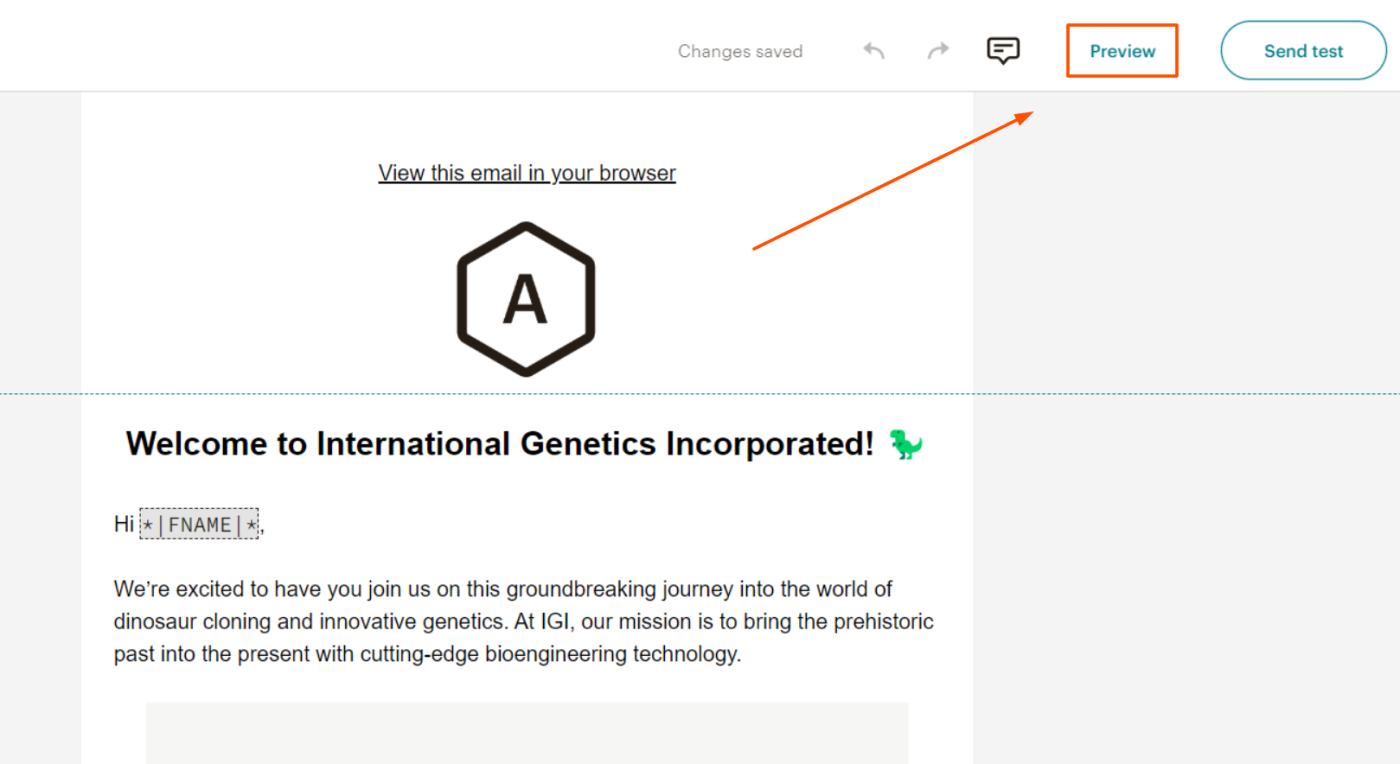
Click Preview.
-
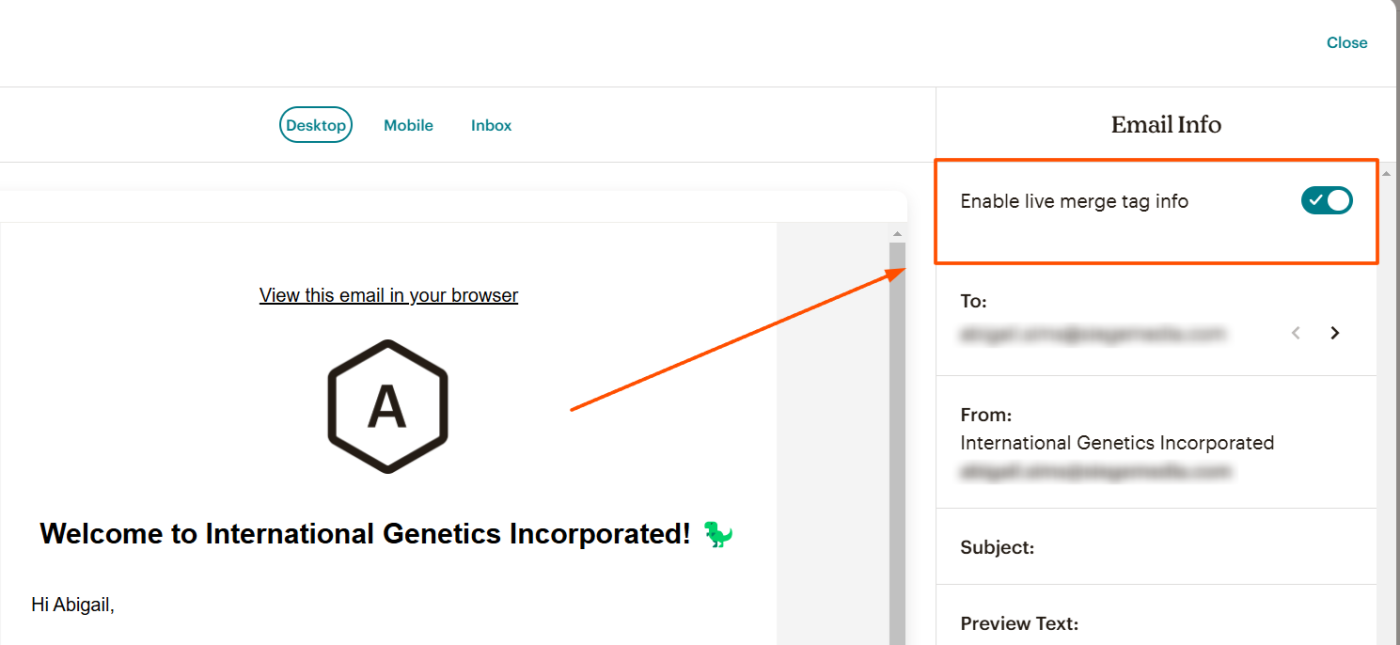
Be sure the option Enable live merge tag info is toggled on.
-
You should now be able to see how the merge tag will appear to your subscribers.
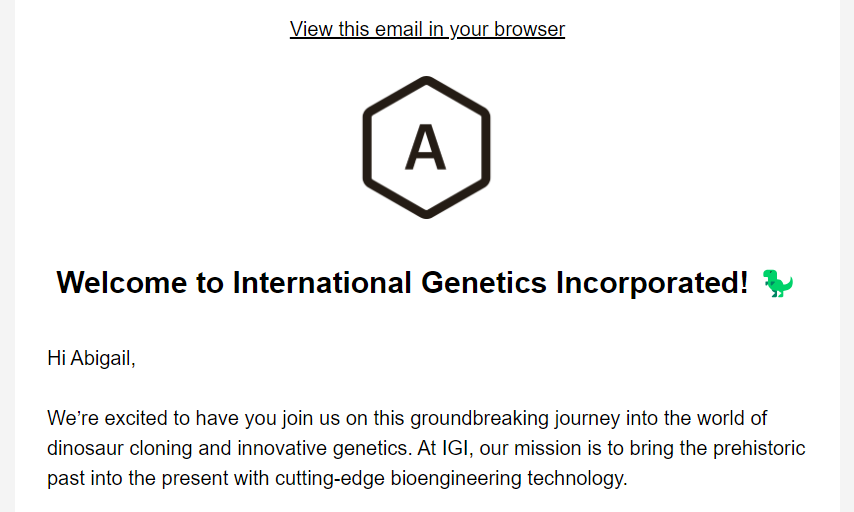
Now, when you click send, every subscriber whose first name has been shared with you will see their own name in the email. (If they haven’t shared their first name, the default you set will be used.)
More Mailchimp merge tag uses
Merge tags in Mailchimp aren’t limited to regular emails—you can also use them in other parts of your campaigns.
-
Within sequences: You can add merge tags to automated emails like drip campaigns, abandoned cart recoveries, and other triggered workflows. That way, every email you send—even the ones a robot sends for you—always has a human touch.
-
SMS campaigns: Mailchimp lets you use merge tags in SMS. Reaching someone on their phone is infinitely more personal than their inbox, so don’t sleep on using merge tags in your next SMS campaign.
-
Subject line: Merge tags can also elevate your subject line copy. Calling a subscriber by name in the subject makes your email stand out in a (probably very crowded) inbox.
Tips for using Mailchimp merge tags
Ready to embark on your grand merge tag journey? Keep these best practices in mind.
-
Clean data is good data: Regularly update your contact list—or use automation to update it automatically. Merge tags are only effective if they have accurate information to pull from.
-
Watch out for style sensitivity: Merge tags are style sensitive, so make sure that your data fields and merge tags match the case and formatting exactly. Even something as simple as a lowercase letter in the wrong place could cause display issues.
-
Test before sending, always: Always preview and test emails with live merge tag data to catch and fix any rendering issues before sending them out to your email list. No one wants an email that starts “Hi, *|FNAM|*.”
Useful Mailchimp merge tags
Mailchimp has a comprehensive list of merge tags—and you can create an infinite number of tags yourself—but here are some of the most common merge tags for easy reference.
|
Merge tag |
What it adds |
|---|---|
|
*|FNAME|* |
Subscriber’s first name data |
|
*|LNAME|* |
Subscriber’s last name data |
|
*|EMAIL|* |
Subscriber’s email address |
|
*|PHONE|* |
Subscriber’s phone number |
|
*|ADDRESS|* |
Subscriber’s mailing address |
|
*|BRAND:LOGO|* |
Default logo image. |
|
*|DATE:X|* |
Date that the email was sent to the subscriber |
|
*|MC:TOC|* |
Table of contents |
|
*|POLL:RATING:x|* *|END:POLL|* |
Poll for subscribers to give ratings on a scale of 1-10 |
|
*|UNSUB|* |
Link to unsubscribe from your email list (required by law in most areas). |
Automate your Mailchimp campaigns with Zapier
Merge tags are one of the simplest marketing automation strategies you can use. If you’re ready for more advanced Mailchimp automation strategies, Zapier can help you create workflows that connect Mailchimp to all the other apps you use.
For example, automatically add new Facebook lead ads to a Mailchimp list or create new subscribers from existing Wave customers. Check out some of our most popular Mailchimp integrations below to get started, and then expand to build fully automated systems.
Zapier is the leader in workflow automation—integrating with thousands of apps from partners like Google, Salesforce, and Microsoft. Use interfaces, data tables, and logic to build secure, automated systems for your business-critical workflows across your organization’s technology stack. Learn more.
Mailchimp merge tags FAQ
How do merge tags work?
Merge tags are dynamic commands that draw subscriber-specific details from subscriber profiles to personalize emails and SMS campaigns. Functionally, a robot is designing custom portions of text for every single subscriber in your database—all in less than a second.
Why aren’t my merge tags working in Mailchimp?
If your merge tags aren’t working, check that they match your audience fields exactly. That’s the most common reason merge tags fail—you may be just one character off from your actual field. Also, make sure that your subscribers actually provided data for the field you’re trying to use. To avoid this issue, make any field you want to use a merge tag for required in all contact acquisition forms.
Related reading: