Raise your hand if you’ve ever entered data into Excel and immediately asked yourself, “Wait. Didn’t I already type that?” Whether it’s an import error or human error, duplicate data makes your spreadsheets less useful.
Here’s how to find duplicates in Excel, so you can delete them yourself. Plus, I’ll show you two ways to remove duplicate rows in one fell swoop.
How to remove duplicates in Excel
Here are two ways to automatically remove duplicates in Excel (without having to manually review them first).
Use the remove duplicates feature in Excel
-
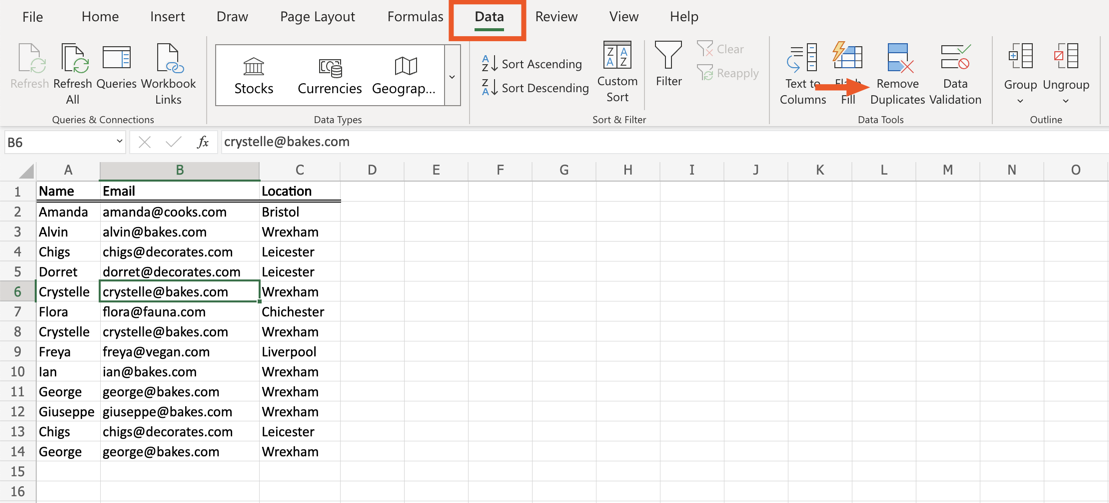
Click any cell that contains data.
-
Click the Data tab, and then select Remove Duplicates.
-
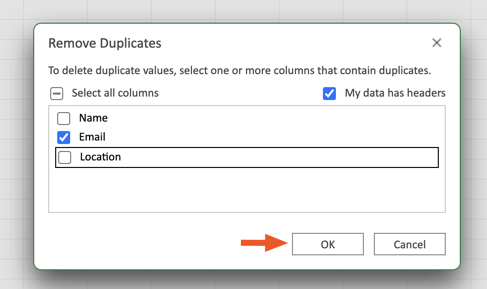
From the Remove Duplicates window that appears, select which columns you’d like to include in your search for redundant data. Click OK. (The Remove Duplicates tool will permanently delete duplicate data, so it’s a good idea to copy the original data to another worksheet for backup.)
-
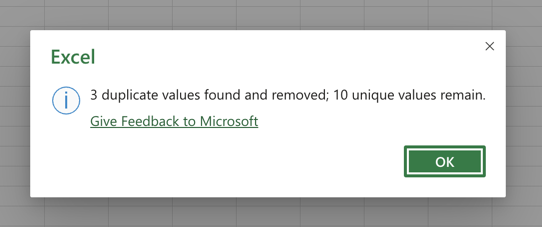
Excel will let you know how many duplicate values were removed. Click OK.
Use the UNIQUE function in Excel
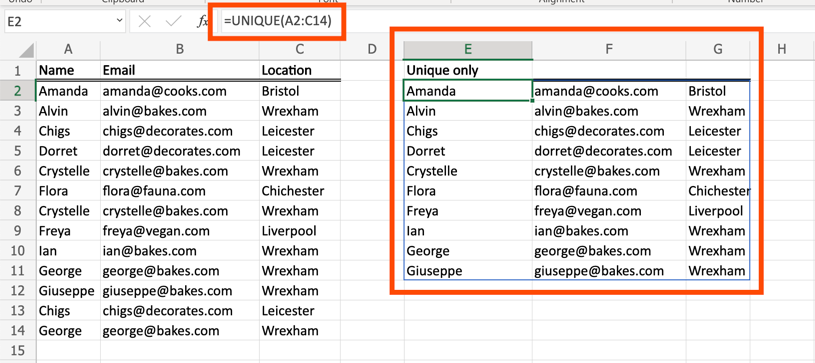
In Excel, the UNIQUE function returns unique values (data that’s not duplicated) from a list or range. The only caveat is that this will not replace your existing data. It exists within the same spreadsheet as the original source of data.
To get a unique list of values, select an empty column of your spreadsheet. Then input the UNIQUE function using the cell range you want to scan for duplicates, leaving behind only unique values. For example, =UNIQUE(A2:C14).
How to find duplicates in Excel
If you simply want to find duplicates in Excel, so you can decide whether or not to delete them, your best bet is to highlight all duplicate content using conditional formatting.
-
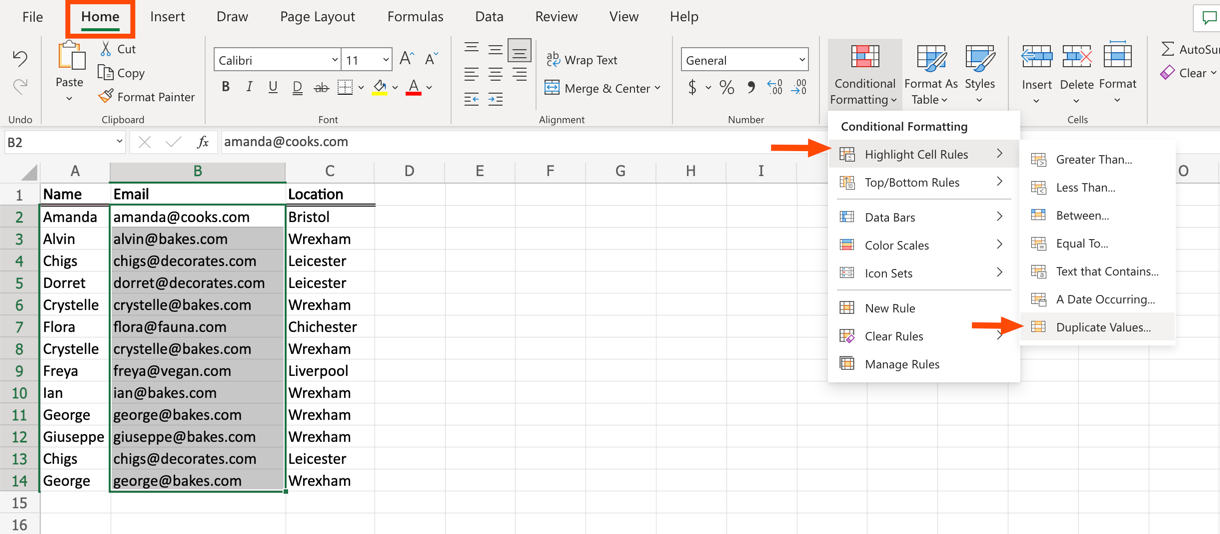
Select the data you want to check for duplicate information. Then, from the Home tab, select Conditional Formatting > Highlight Cell Rules > Duplicate Values.
-
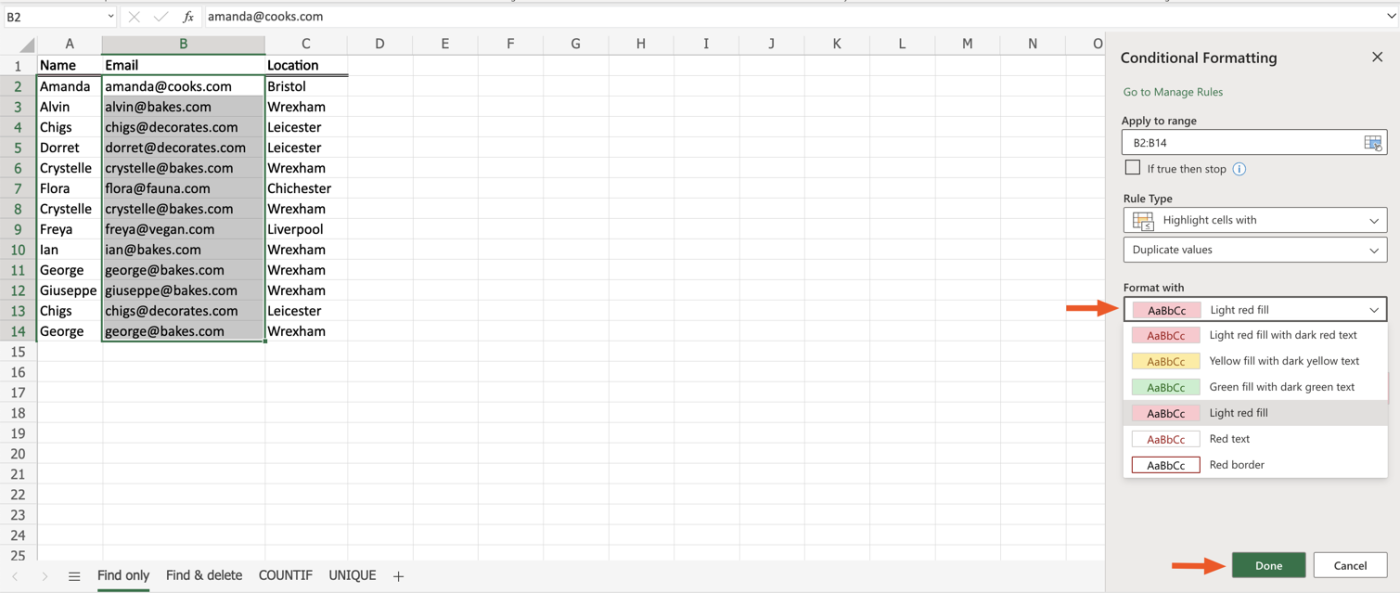
From the Conditional Formatting window that appears, click the dropdown menu under Format with to select the color scheme you’d like to use for highlighting duplicates. Then click Done. (Tip: Choose a high contrast color scheme, such as Light red fill, to improve readability.)
-
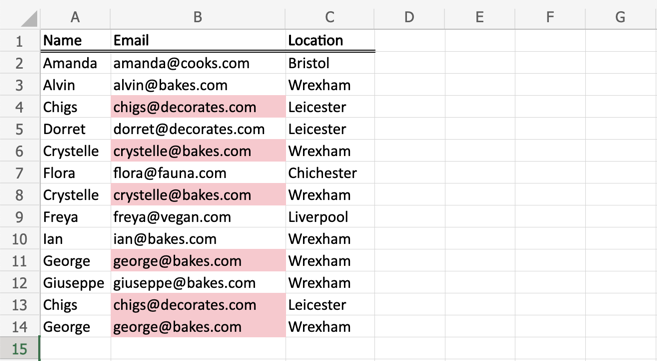
You can now review the duplicate data and decide whether you need to delete any redundant information.
Automate Microsoft Excel
If you’re removing duplicate data in Excel due to human error, you may find yourself questioning the accuracy of everything else in your spreadsheet.
Use Zapier to connect Excel with the rest of your apps, so you can automate your spreadsheet-related tasks and remove the stress of human error. Learn more about how to automate Excel, or get started with one of these workflows.
To get started with a Zap template—what we call our pre-made workflows—just click on the button. It only takes a few minutes to set up. You can read more about setting up Zaps here.
Related reading:
This article was originally published in June 2019 by Justin Pot. The most recent update was in May 2024.