I live by a simple rule: if it’s not written down, it doesn’t get done. (It also doesn’t get remembered—I’m pretty sure they were thinking about me, specifically, when they coined the phrase “in one ear and out the other.”) But that means without an organized note-taking system, my pile of notes can get chaotic fast.
I used to use Evernote to manage everything from quick brainstorms to work-related notes, but since becoming a Notion obsessive, I knew I could recreate my Evernote system in the app I used for everything else. That’s when my Notion notebook was born.
Notion is a little more of a blank canvas than dedicated note-taking apps like Evernote, but that means you can build a custom system that fits your needs and organization style. And this template lets me do everything I loved Evernote for: I can create new notes with a click, access all my notebooks from a sidebar menu, add notes from my browser, and even create tasks inside notes. Here, I’ll share my Notion notes template—my personal Evernote alternative—so you can make it work for you.
Table of contents
Notion note-taking template
If you’re just here for the template, here it is. Click the button below, then click the Duplicate icon in the upper-right corner. The template will be added to your Notion workspace, where you can customize it to your preferences.

How to use the Notion note-taking template
Notion is an incredible mix of freedom and organization, and I leaned into that mix when creating my Notion note-taking system. If I have a quick idea, I can jot it down on the scratchpad and organize it later. Or, if I decide a note belongs in another notebook, all I need to do is switch the labels. In the end, it helps me feel free to brain dump first and get organized later.
Open my Notion note-taking template, and follow along to see how it works.
The central database
My Notion notes system is based on one main database (titled “notebook-database”). Within that database, each note is categorized into a notebook using the dropdown in the Notebook property.

That gives me a set of notebooks that I can access using the navigation panel (each one is just a filtered view of that main database).
For example, I created a notebook called “Personal,” along with a corresponding label in the database’s Notebook property. The notebook contains a filtered view of the database, showing only unarchived notes labeled “Personal.”
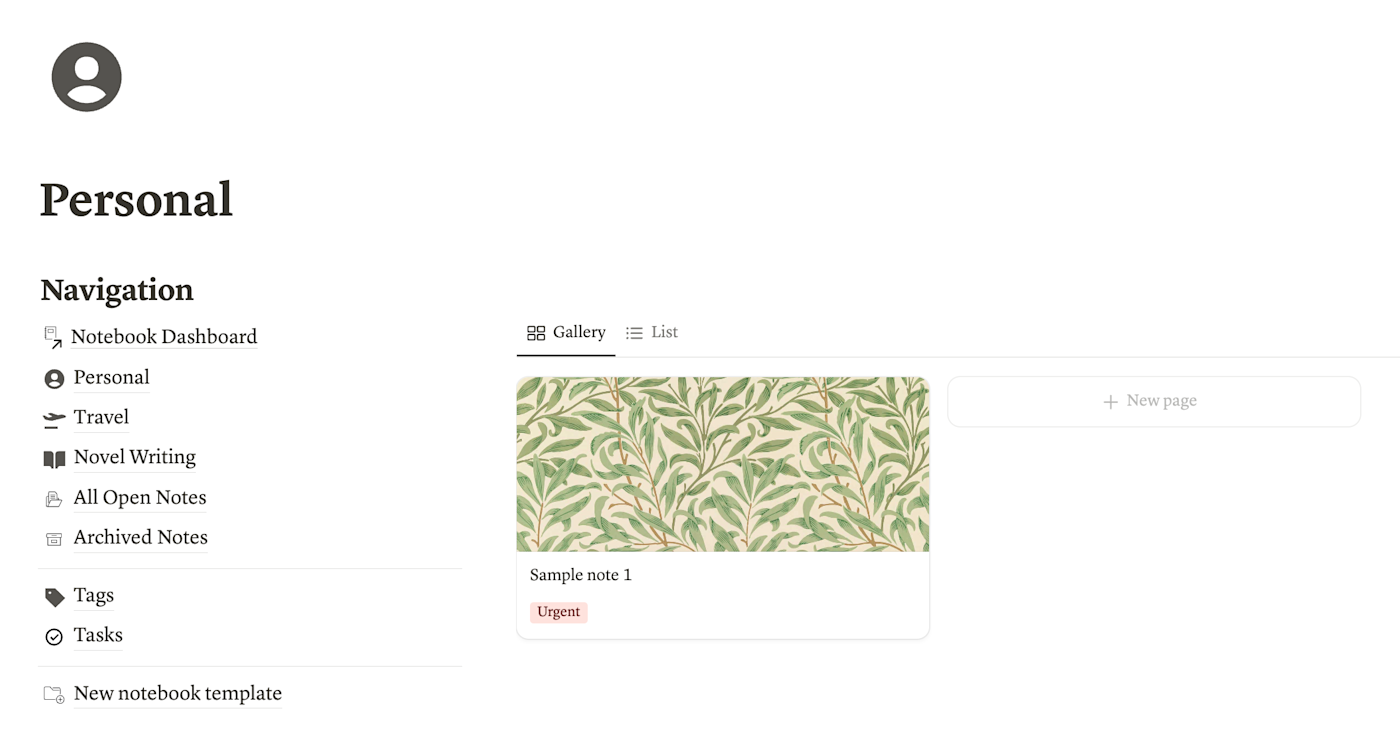
You can create as many notebooks as you want. Simply add a new label to the database property and create a corresponding page (more on that below).
I’ve made it so that each notebook can show notes in either Gallery or List view. I use Gallery because I like to add images to each of my notes, but if you’re a more straightforward note-taker, you can stick with List view for easier skimming. (Or, if you want more of a sticky-note feel, change the gallery view settings so that each card preview is Page content.)

The dashboard
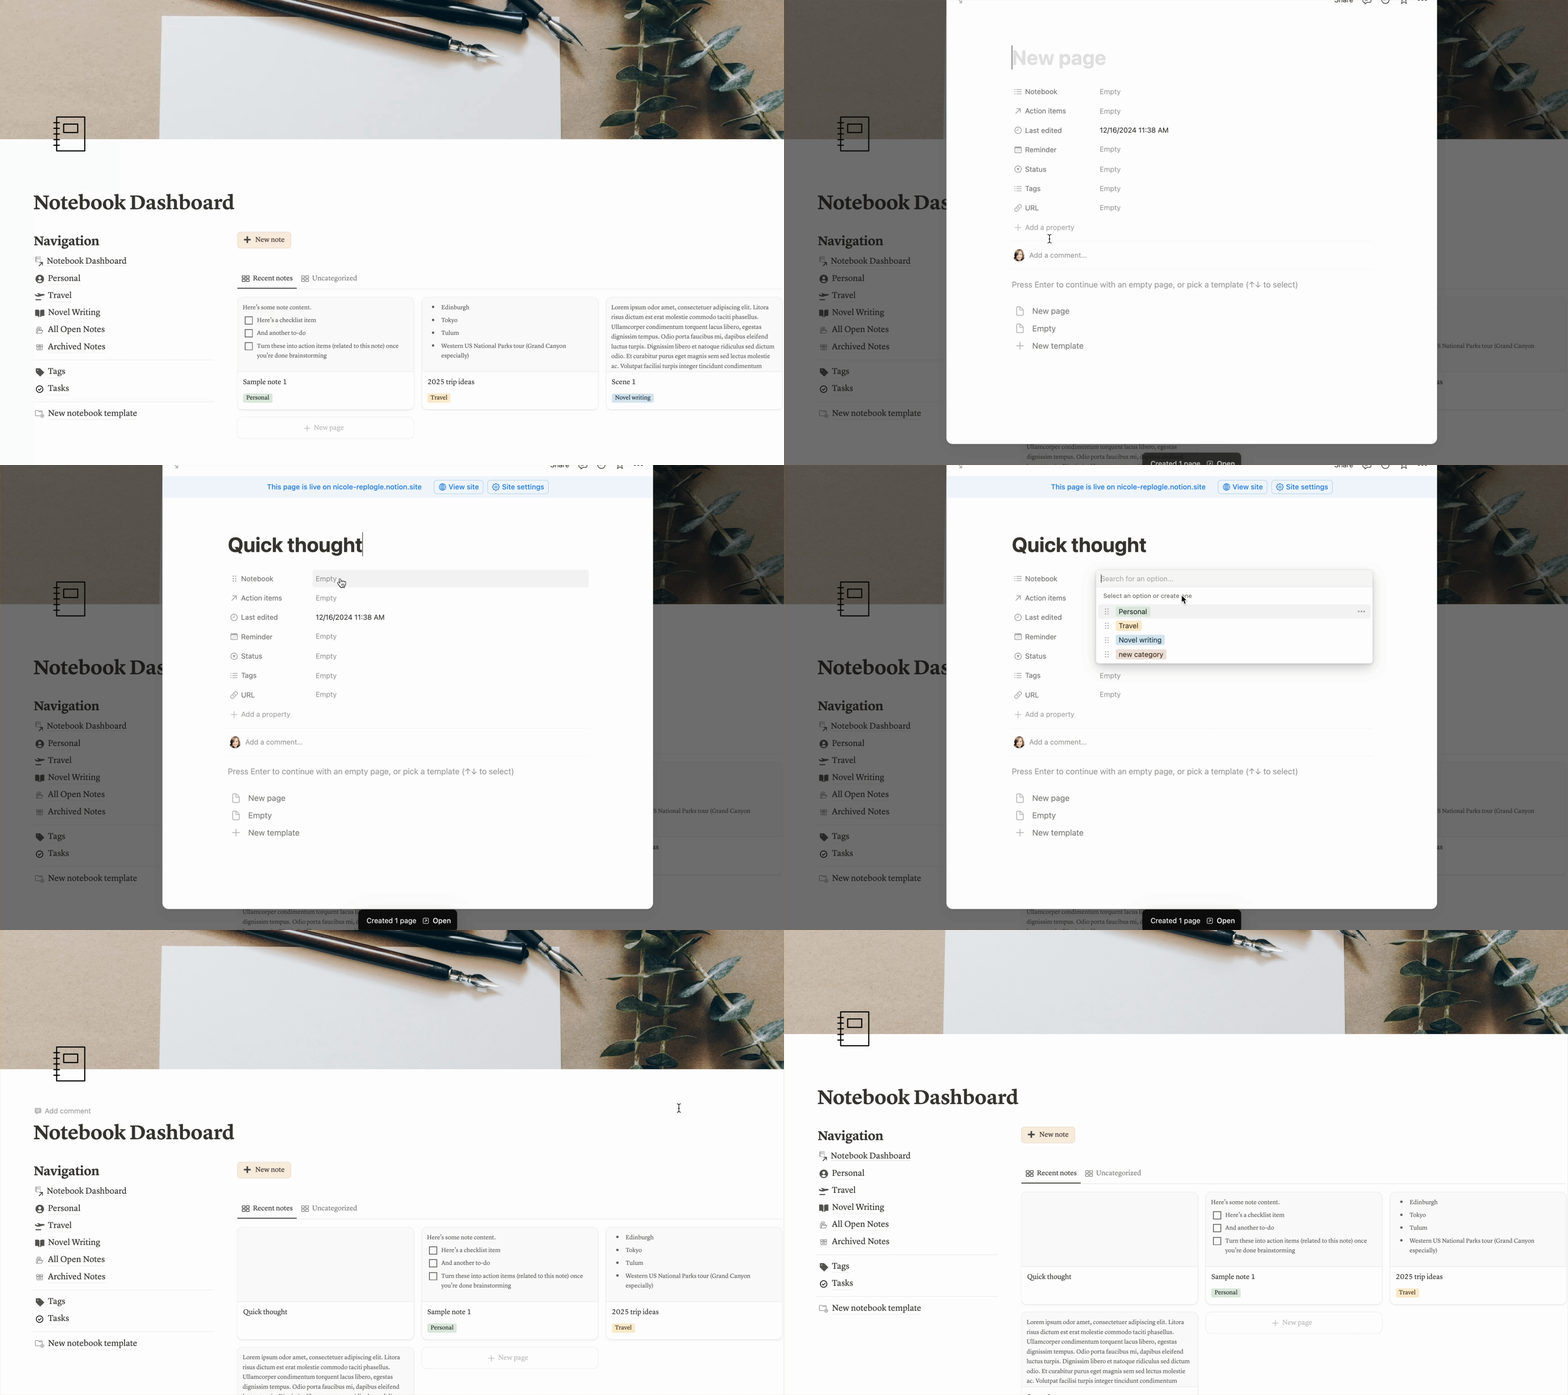
The Notebook Dashboard is the central hub of my template. It displays a navigation panel on the left, where you can quickly access notebooks and other favorite views. The home page also shows a gallery view of any notes you’ve edited in the past week—making it easy to jump back into relevant notes.

The star of the show, though, is the handy New note button that lets you start a new note with just a click. You can add a category while you’re there (which will sort the note into the matching notebook), or leave it blank for now. Once you click out of the note, it’ll appear in the Recent notes gallery (or if you don’t come back to it within a week, it’ll stay in the Uncategorized view) so you never lose it.
Shortcut to create a new notebook
To create a new notebook, right-click New notebook template in the navigation panel, and select Duplicate.

Once you click into your duplicated page, you’ll see the same layout as the other notebooks: a navigation panel and a filtered view of the main notebook database.
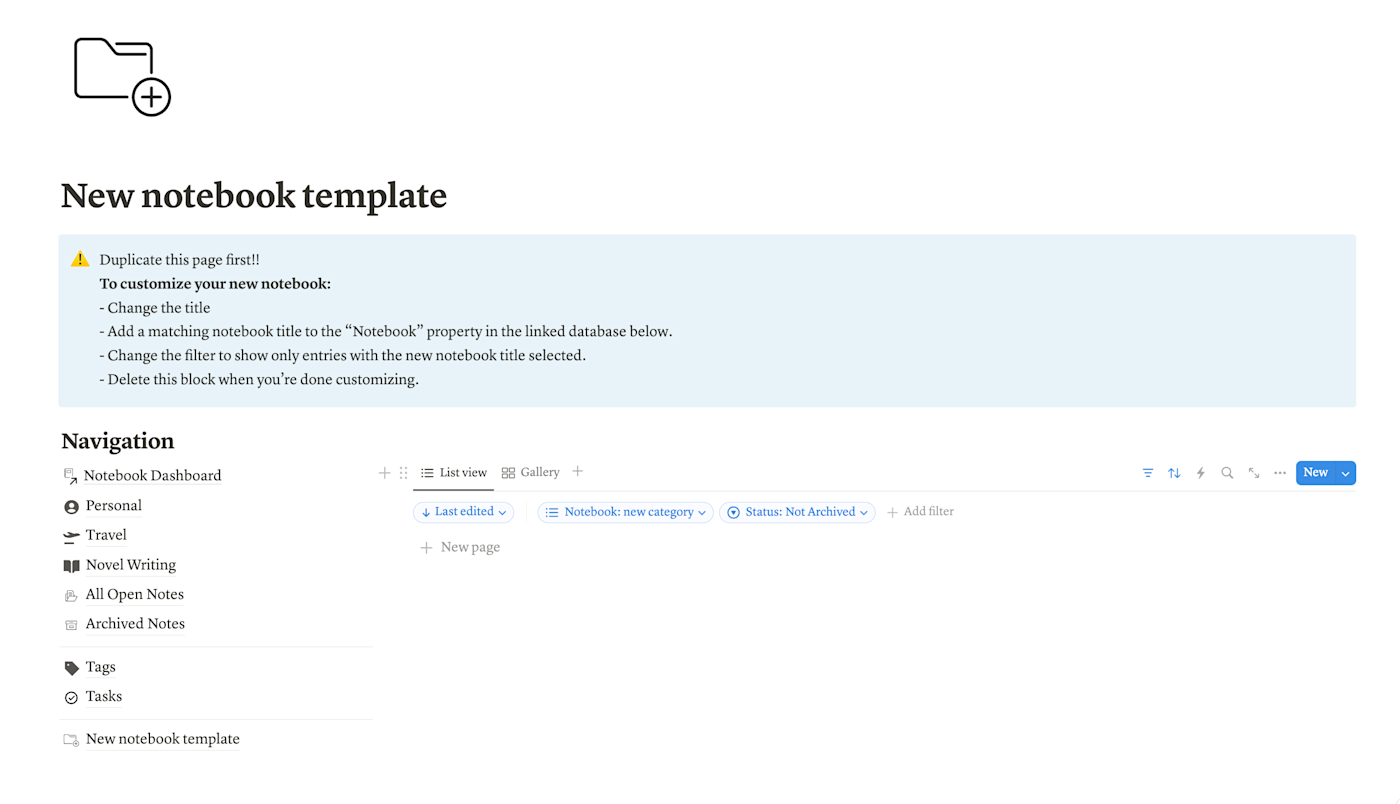
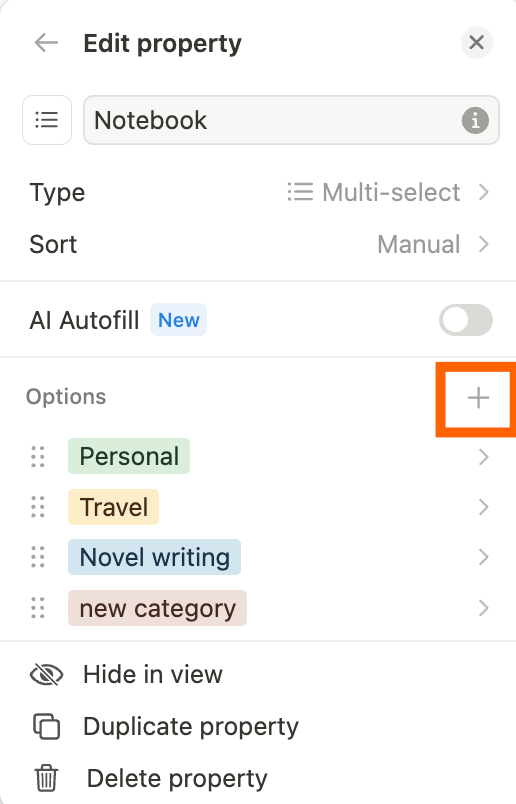
To customize your new notebook, change the title to whatever you’d like (for example, “Fitness” or “Lecture notes”). Then click the three dots in the upper-right corner of the linked database. Click Properties > Notebook, and then click the + icon to add a new Notebook label to match.
Next, click the filter dropdown that says Notebook: new category. Change the filter so that it only displays notes showing the category you just created.

Now, whenever you label a note with your new notebook’s title, it’ll appear here. You can create new notes from within this page, from the main dashboard, or you can reassign notes from other notebooks if needed.
Tags
Categories are great, but one more layer of organization ties it all together.
You can tag notes by whatever makes sense to you, like location, importance, or note type. For example, the “Important info” tag lets me quickly and easily find important notes across all of my notebooks. I could also create an “Urgent” tag (in red, naturally) to be sure I wasn’t missing any deadlines.

Get creative with your tags. Maybe you have an “Ego boost” tag for anything that’ll make you feel good about yourself looking back on it. Or an “Ideas” tag if you’re ever looking for business inspiration across categories.
Tasks
No notebook system would be complete without a way to create to-do lists.
Evernote has a great task management feature that lets you create tasks within notes without interrupting your flow, then view all of your upcoming to-dos in one place. I approximated this feature by creating a to-do list database (titled “notebook-action-items”) that’s linked to the notes database. That way, I can connect tasks to notes—or create and schedule tasks directly from within a new note (including setting reminders).

I should come clean: I don’t actually use this exact feature. If you use Notion for task management more generally (as I do), you need to be sure all your tasks are in one database, as opposed to having notes-based tasks in their own database. Take a look at my Notion to-do list template as a starting point.
Pro tips for Notion note taking
Use Notion AI to enhance your notes
If you haven’t experimented much with Notion AI, I’m here to tell you: it can really level up your productivity within Notion. The Q&A feature is a chatbot that can both answer questions about your docs and generate text. Do things like ask about the content of your notebooks and brainstorm a first draft of a note.
You can also add AI auto-fill properties to your notebook database. These properties can auto-generate a summary of a note, translate text, choose a keyword (either from a list of options you provide, or auto-generated by the AI), or perform a custom action.

I like the idea of using the AI keywords option to let Notion auto-categorize new notes into notebook categories for you (but if you choose this route, you’ll need to update each view to filter by the AI keywords property instead of the Notebook property).
Create your own templates
If you find yourself using the same note layout repeatedly, it could be worthwhile to use note templates. To create a new template, click the carat next to New in any notes database view. Then click New template.

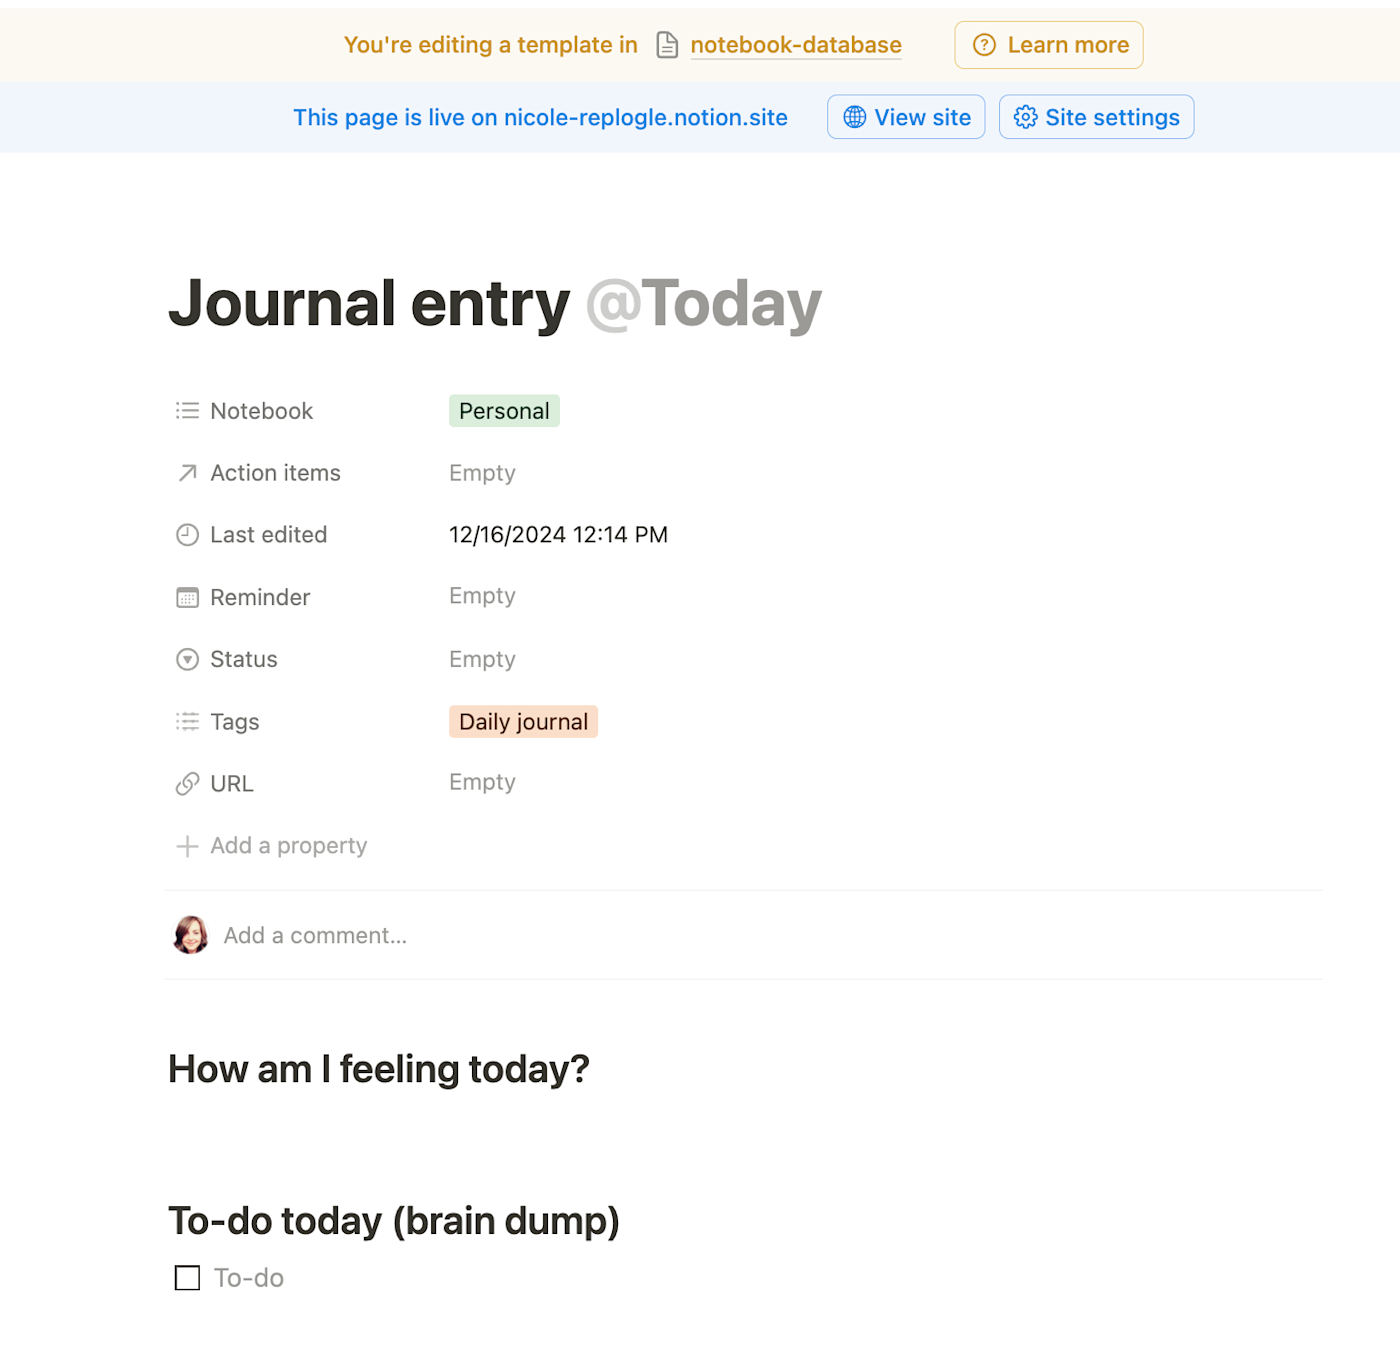
From there, customize the template’s properties or body content. For example, my personal notebook has a template for new journal entries with the right notebook category and tag pre-filled, and a note body containing prompts like “How am I feeling today?” and “To-do today” with a checklist.
Automate your Notion notes
The best systems always give you space to focus on what matters. When you automate your note-taking process, you’ll have more time to consume content and take action based on your notes.
For example, I use the Notion Web Clipper browser extension to add notes from my browser if I get an idea from a page I’m visiting. Just choose your notebook database from the dropdown, and it’ll appear in the Recent notes view in your Notebook dashboard. You can categorize it or add context to it later, but it’s way quicker than a copy/paste.
If you use Notion for note-taking but another app for task management, Zapier makes it easy to create new tasks based on your Notion notes.
Or if you take notes during meetings, you can use Zapier to automatically create new notes for upcoming calendar events—you can even pre-populate them with event details and any other relevant information. Then all you need to do is open the note when the event starts. Learn more about how to automate Notion, or get started with one of these pre-made templates.
Zapier is a no-code automation tool that lets you connect your apps into automated workflows, so that every person and every business can move forward at growth speed. Learn more about how it works.
Customize your Notion notebook
The beauty of Notion is that it’s endlessly customizable. This template is just a jumping-off point for you to get creative and customize a note-taking system that fits your style. The more closely the notebook hub matches how your brain works, the more likely you’ll be to use it successfully and consistently.
For example, I like to sort each of my notebook pages by last edited time so that the most recently edited notes are at the top. But you might find it works better to sort by reminder date, tags, or even alphabetically.
Make it work for you.
Related reading:
This article was originally published in September 2022. The most recent update was in December 2024.