Google Drive killed the concept of collaborating through a series of email attachments. But even a Google Drive folder can quickly get out of hand if the project has a lot of moving parts. That’s when you need a shared drive.
Table of contents:
What is a shared drive in Google Drive?
A shared drive in Google Drive is a collaborative space where teams can manage files. Unlike individual folders, shared drives belong to the team rather than any one person—so if the original creator of the folder runs off to start a ska band in Bali one day, you aren’t left in the lurch.
Note: shared drives are only available for work or school accounts, and you must be an administrator or have been granted permission to create them.
How to make a shared Google Drive
If you have a work or school Google Workspace account and have administrator access, follow these steps to create a shared drive.
-
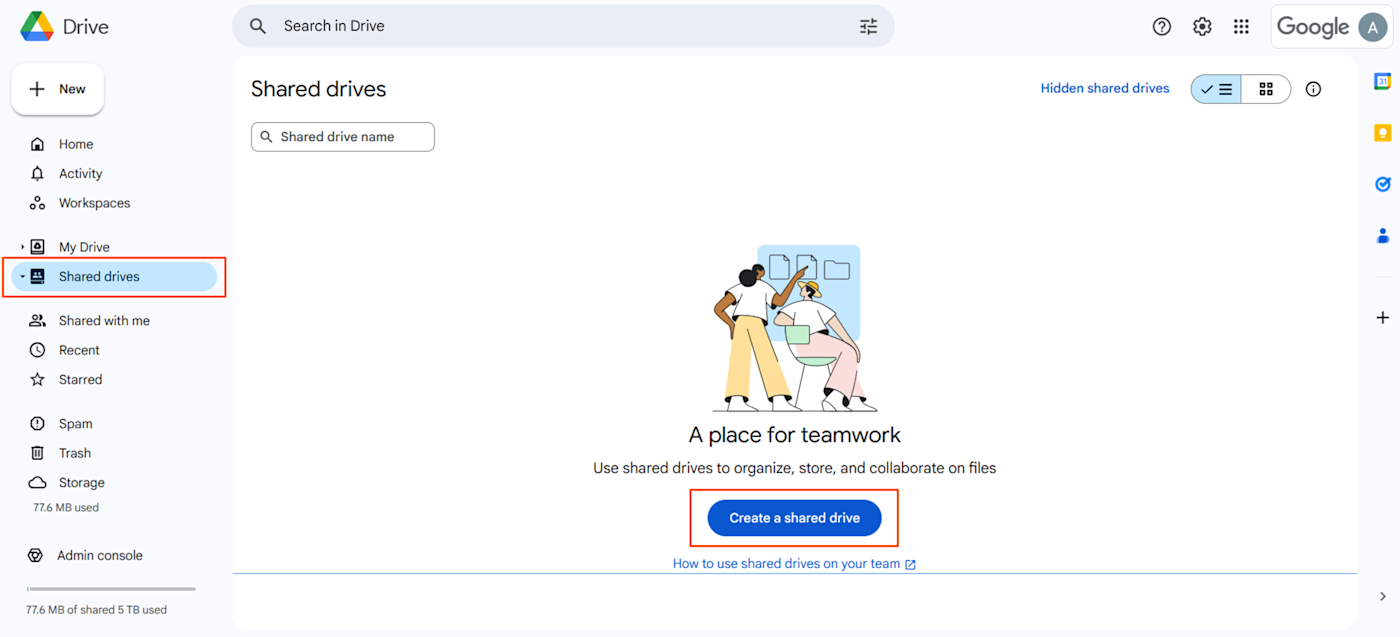
In the left sidebar, click Shared drives, then click the Create a shared drive button.
-
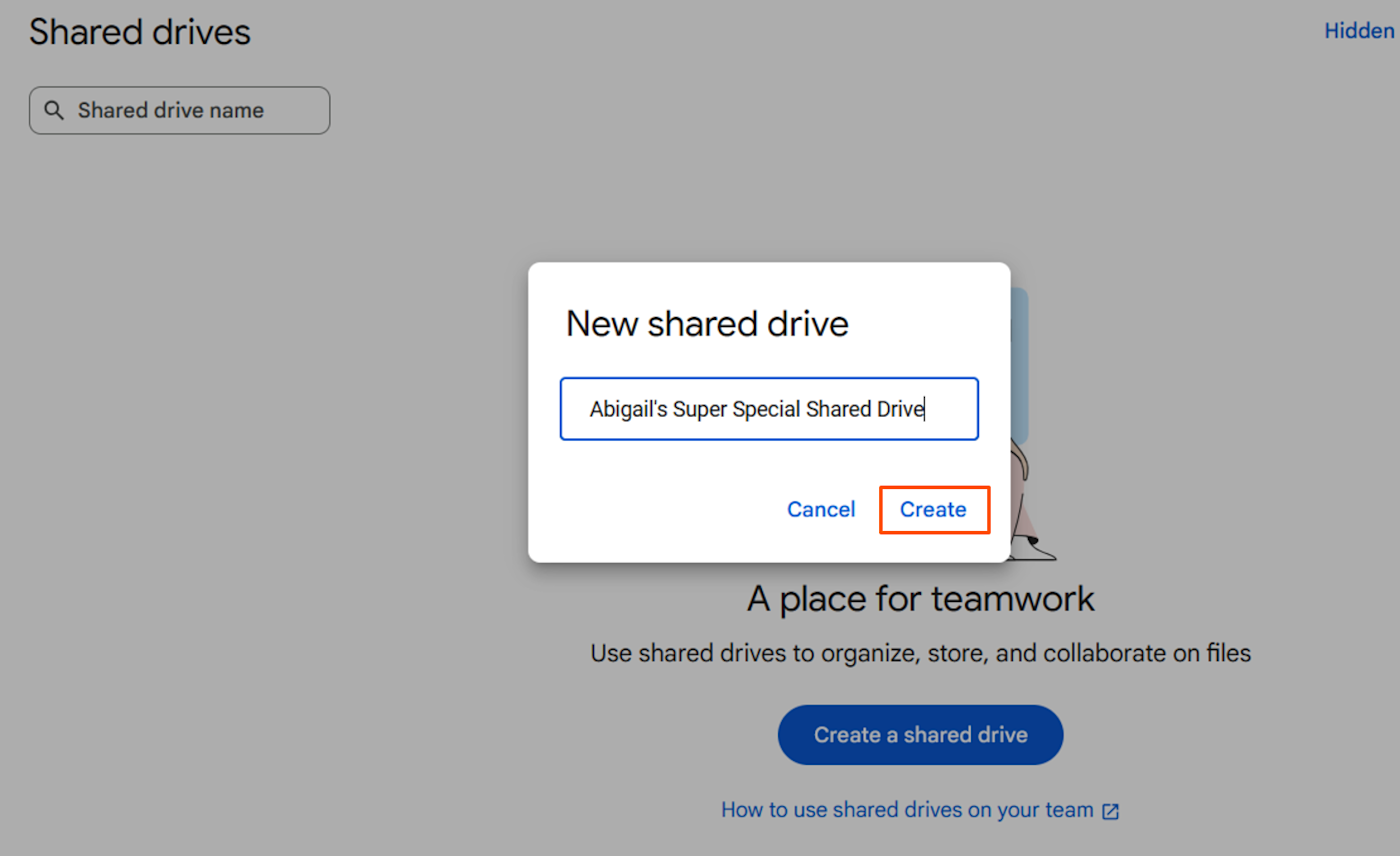
Give your shared drive a unique name. Click Create.
-
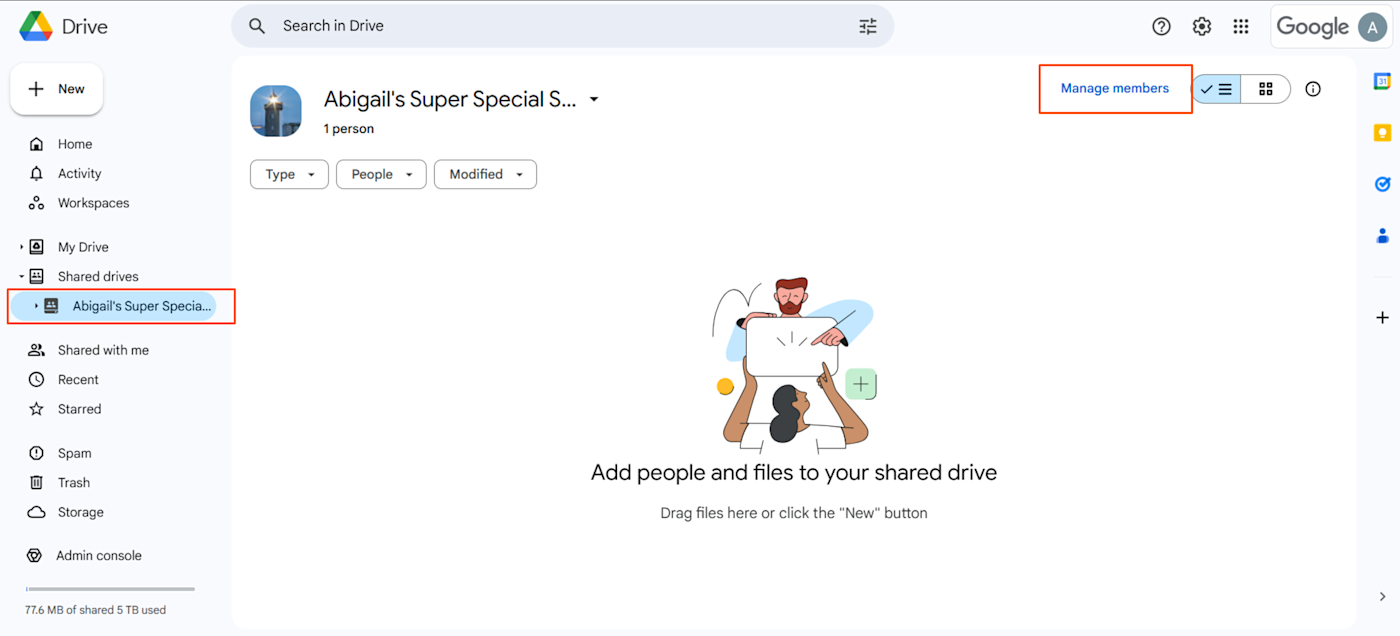
Your new drive will appear on the left under the Shared drives dropdown.
-
To add people, go to your new drive, and click Manage members.
-
Enter the email addresses of the people you want to add, and set their access level to the drive. Click Send to invite them. (You can do this one at a time or in bulk, depending on how many people you want to invite and how granular you want to get with their permissions.)
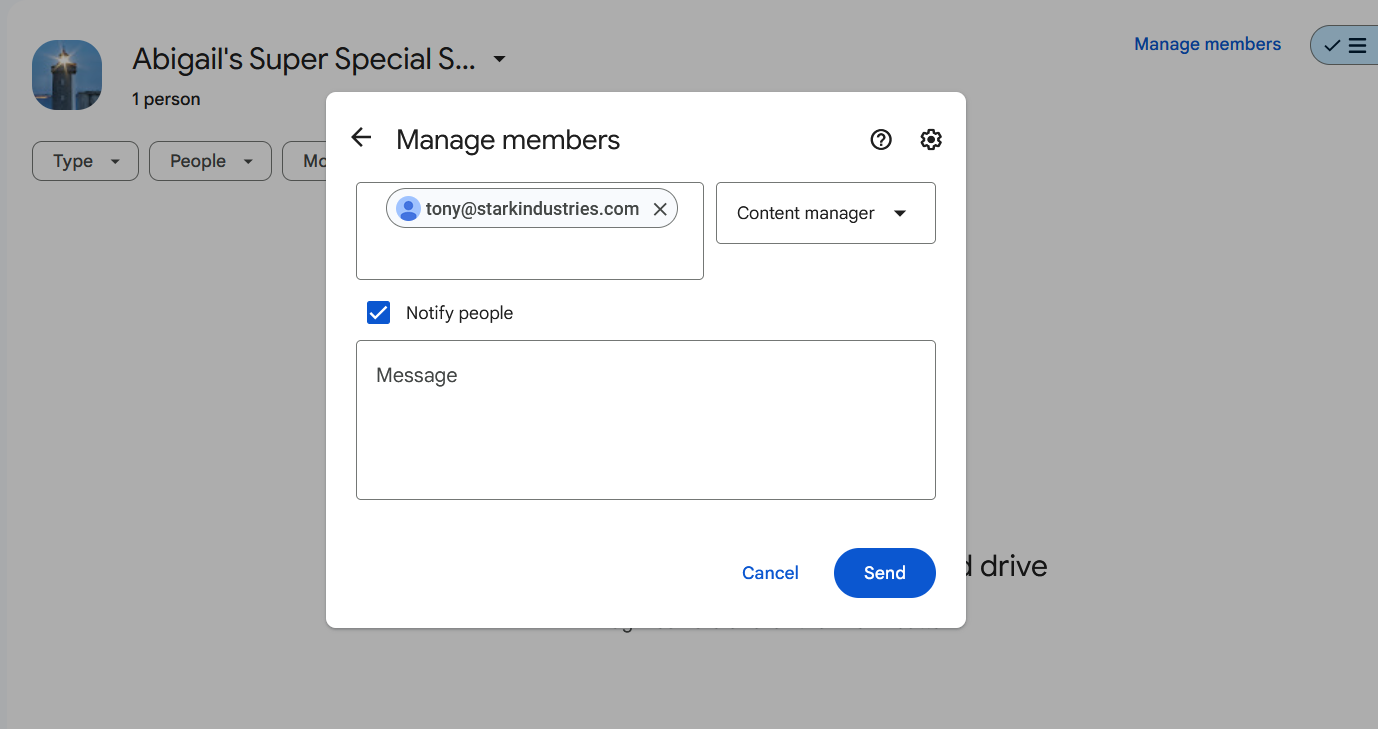
Here, for example, I’ve set Tony’s access to content manager status. He can add, edit, move, delete, and share content but can’t manage anyone else’s content settings.
-
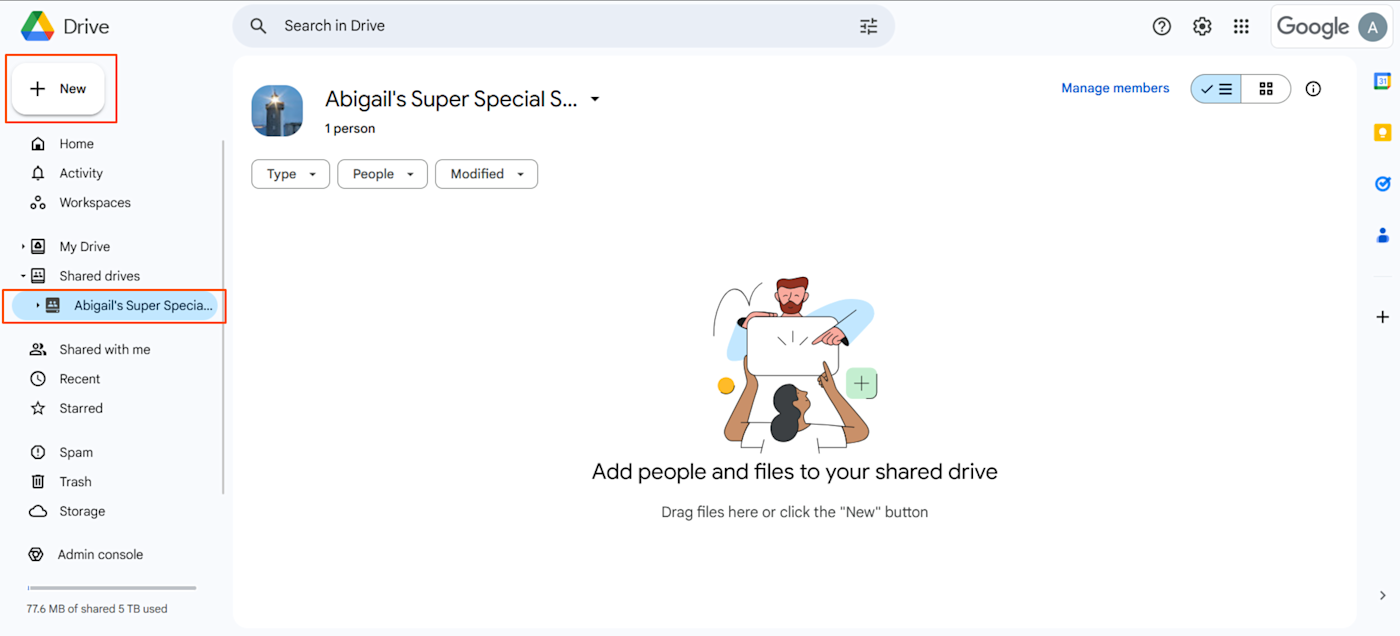
Within your new drive, you can now click New to upload files from your computer or create new files. All the documents in this folder will be accessible to everyone you’ve added to your new shared drive.
How to manage Drive permissions
Now that you’ve created your shared drive and added a few people, you may want to manage permissions globally. This will adjust what other users in the shared drive can do by default—stopping your renegade Bali beachgoer from adding their whole ska band to your drive, for example.
-
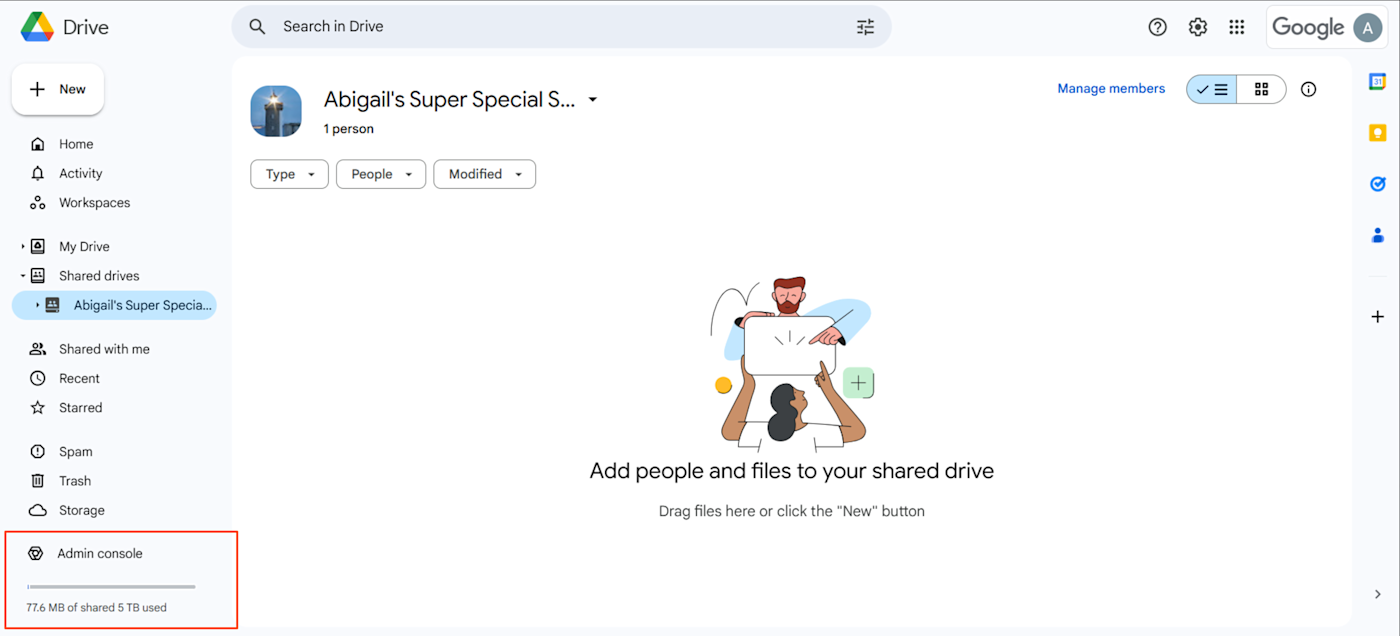
Access the Google Admin console in your Google Workspace account. If you have administrator privileges, it’ll be at the bottom of the screen on the left-hand side.
-
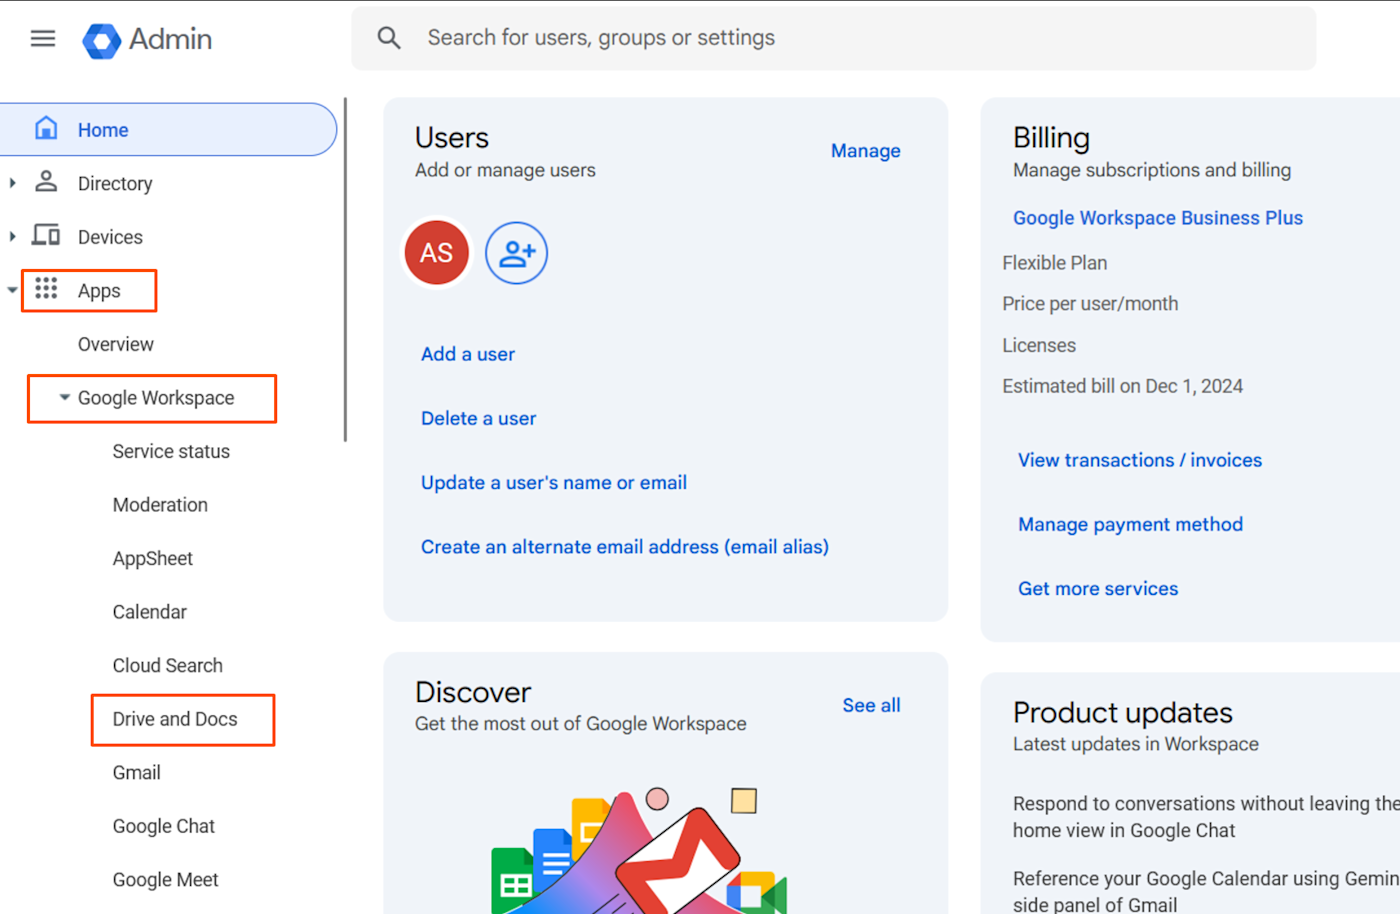
You’ll be prompted to confirm your password to access the Admin console. Once you’re logged in, select Apps > Google Workspace > Drive and Docs from the menu on the left.
-
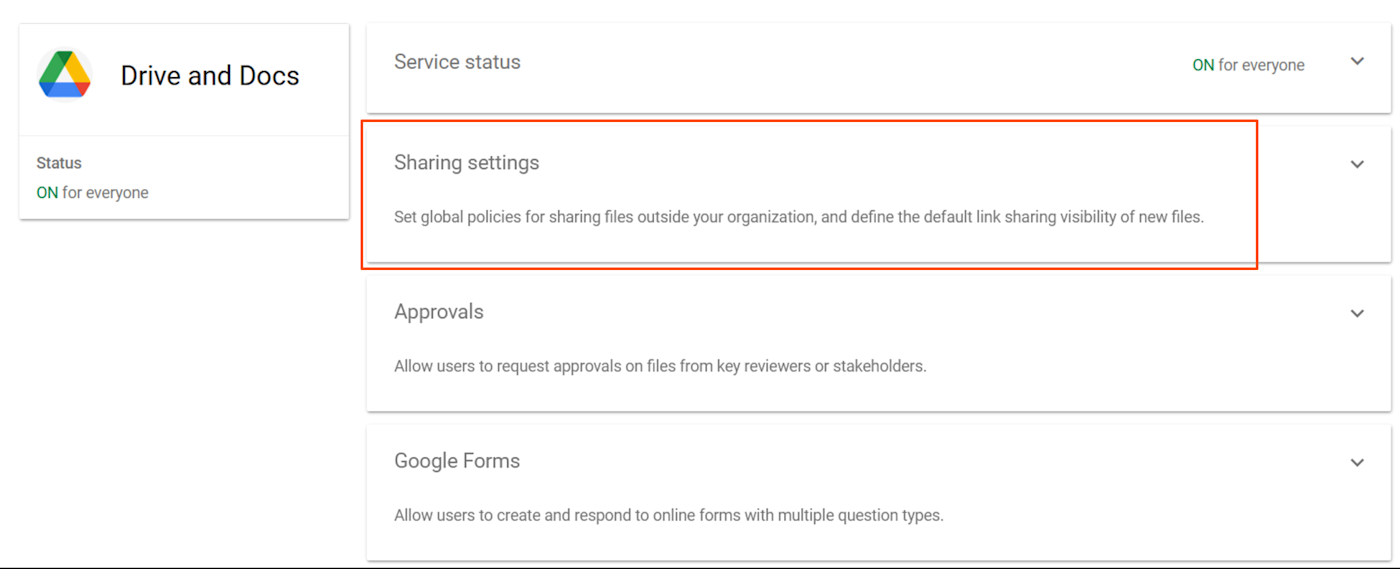
Click Sharing settings to access the settings for your shared drives.
-
Here, you can set the default sharing settings in Drive for new files and folders created by users in your organization under General access default. You can choose between keeping files private to the owner by default, access available via link, or searchable to all users.
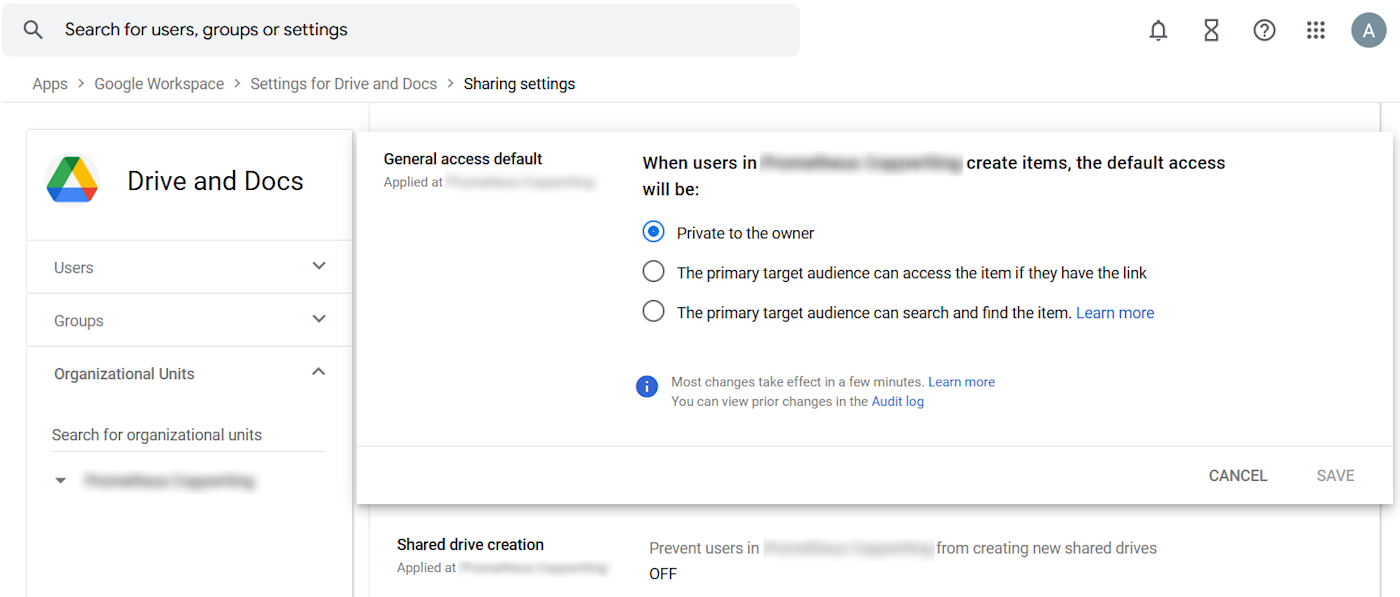
Yes, it’s worth carefully configuring your settings when you create your shared drive. Setting up the permissions correctly to begin with can save you a lot of time and hassle in the long run—plus, it helps keep your files secure.
Google Drive access level permissions
The following Drive access levels determine permissions for individual actions. Google has a more exhaustive list if you’re really worried about who’s restoring files from the trash, but these are some of the most common actions and the permissions you or other users will need to perform them.
|
Viewer |
Commenter |
Contributor |
Content manager |
Manager |
|
|---|---|---|---|---|---|
|
View files |
X |
X |
X |
X |
X |
|
Leave comments |
X |
X |
X |
X |
|
|
Edit files |
X |
X |
X |
||
|
Create and add files and folders |
X |
X |
X |
||
|
Add and remove people on specific files |
X |
X |
X |
||
|
Move files from My Drive to a shared drive |
X |
X |
|||
|
Delete the shared drive |
X |
You can change these settings when you add users or by using the Manage members button. Go forth and set up your shared drives accordingly. And remember: with great permissions comes great responsibility.
Best practices for managing a shared drive
Use these best practices to keep everyone on the same page—and avoid rogue naming conventions.
-
Use consistent naming structures: Have everyone use the same format when they name files and folders. This will make it easy to find the Google Docs, Slides, and Sheets you need quickly.
-
Distinguish between internal and external use: No one wants to accidentally send a client their private notes from the last brainstorming call. A great way to prevent this is to create a shared drive for external use only and another one for internal use only.
-
Manage access mindfully: Set permissions strategically to ensure no one has editing capabilities or access to sensitive information like billing data or passwords when they shouldn’t.
-
Archive unused drives: No longer using a shared drive? Hide it from view and remove access to keep things tidy and workflows streamlined.
-
Communicate changes: If you update naming conventions or access, keep your team informed so you don’t have two separate best practices procedures in use simultaneously.
Automate Google Drive
Whether you need to share a lot of files, manage a large team project, or collaborate more efficiently with all your new ska band members, shared drives are a great solution. Google has made it easy to collaborate on a large number of items all at once—without sharing everything in your personal drive by accident.
You can streamline Google Drive even more with its Zapier intergrations: do things like instantly save email attachments directly to your shared drive or notify your team whenever a new file is added. Learn more about how to automate Google Drive, or check out the automations below to see what you can add to your fancy new shared drive.
Zapier is the leader in workflow automation—integrating with thousands of apps from partners like Google, Salesforce, and Microsoft. Use interfaces, data tables, and logic to build secure, automated systems for your business-critical workflows across your organization’s technology stack. Learn more.
Related reading: