ChatGPT can be a really powerful tool for creating content, given its vast amount of data (knowledge) and its ability to write in different styles and tones. Of course, we’re not saying you should ever rely on AI-generated content as the final product, but it can definitely reduce the burden for content teams.
The problem? By itself, ChatGPT isn’t a great place for your content team to work or stay organized. The output still needs to go somewhere.
That’s where Zapier’s ChatGPT integration comes in. With it, you can integrate ChatGPT with the tools your team already uses to plan and write content. You can collect a blog post topic from the app where you store blog topics or ideas (like Trello or Slack), send it to ChatGPT to write the draft or outline, then share it with your team in another app (like Airtable or Google Docs). All automatically, of course.
Zapier is the leader in workflow automation—integrating with thousands of apps from partners like Google, Salesforce, and Microsoft. Use interfaces, data tables, and logic to build secure, automated systems for your business-critical workflows across your organization’s technology stack. Learn more.
Create blog posts with ChatGPT
We’re using Trello for our project management tool and Google Docs for where we want our final drafts to go, but you can use any other project management or document tools that integrate with Zapier in this workflow.
Zapier offers quick templates to get you started, and we’ve gathered a few options below.
If you’d like to start with a template, click on one below, and you’ll be taken to the Zap editor. You’ll need to create a Zapier account if you don’t already have one. Then, follow the directions below to set up your Zap.
Before you begin: Create your prompt
If you’re trying to generate an entire blog post using ChatGPT, the prompt will be everything. A bad prompt will mean more editing (or something that doesn’t meet your original intent at all).
You’ll want your content team to use a similar prompt format, or template, every time you send a blog post topic to ChatGPT. You can add this prompt to your ChatGPT step (which we’ll show you how to do later) so that it follows the right format every time. Here’s a quick example we put together:
Prompt
You're an experienced writer that always uses these tips:
-
Tip 1: Start with a clear outline to organize your thoughts and structure your content. -
Tip 2: Use active voice to make your writing more engaging and direct. -
Tip 3: Break up long paragraphs to improve readability and keep readers engaged. -
Tip 4: Vary your sentence length and structure to maintain a natural flow. -
Tip 5: Edit and revise multiple times to catch errors and refine your language.
Each of the above tips should be its own section within the blog post. Each section should contain 2-3 paragraphs. The blog post should be at least 1000 words.
You could also include more specific tips on formatting, grammar, or even style—it completely depends on what you’re after. Once you’ve written your prompt, just set it aside and save it for later.
Set up your trigger step
Now you’re ready to set up your Zap. Every Zap consists of a trigger step and one or more action steps. When you publish your Zap, it will run the action steps every time the trigger event occurs.
In this case, it might be when a Trello card moves to a list in your blog queue or when a new blog idea gets added to a new record in Airtable.
To set up your trigger step, head over to the Zap editor and start by searching for and selecting your trigger app and the event. Once you’ve connected your account, you’ll have to set up the trigger step fields.
Depending on the app, you’ll have different fields to customize. For example, that might be selecting the specific Trello board and list where you store your blog ideas or specifying the Airtable base and table where new blog topics are added. If you’re using Slack as your trigger app, you might choose fields like channel and message type to specify which saved messages will trigger the Zap.
Here’s a quick example with Trello:
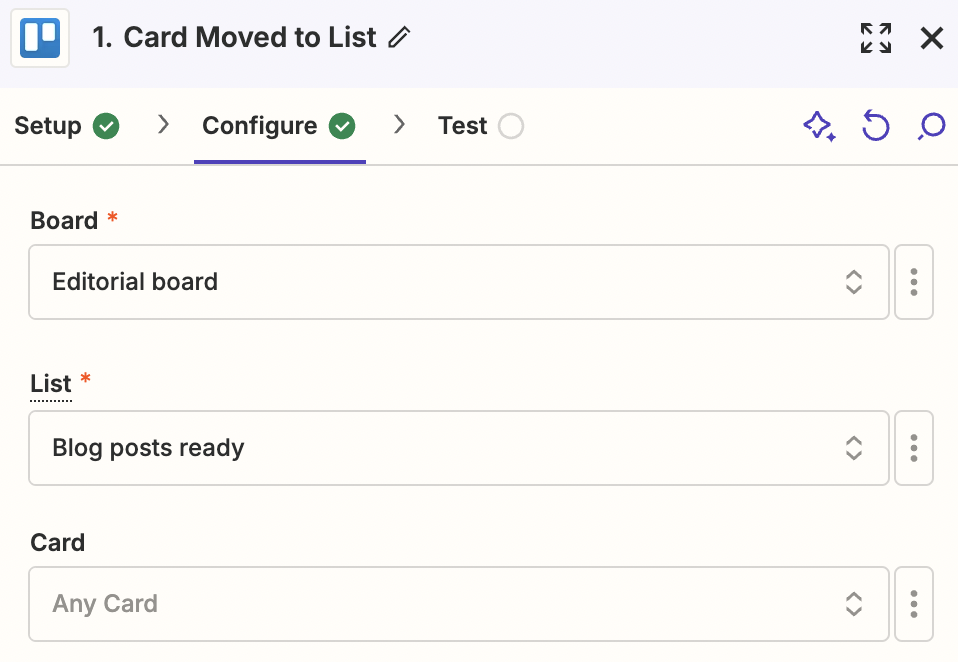
Finally, test your trigger step. The information collected in this test will be used to set up the rest of your Zap. Once your test runs successfully, click Continue to move on to your first action step.
Set up your ChatGPT action
Now it’s time to set up the action to send your blog post idea from your trigger app to ChatGPT. Search for and select ChatGPT for your action app and Conversation for your action event, which will be selected for you if you’re using any of the Zap templates. Then, connect your ChatGPT account, if you haven’t already, and click Continue.
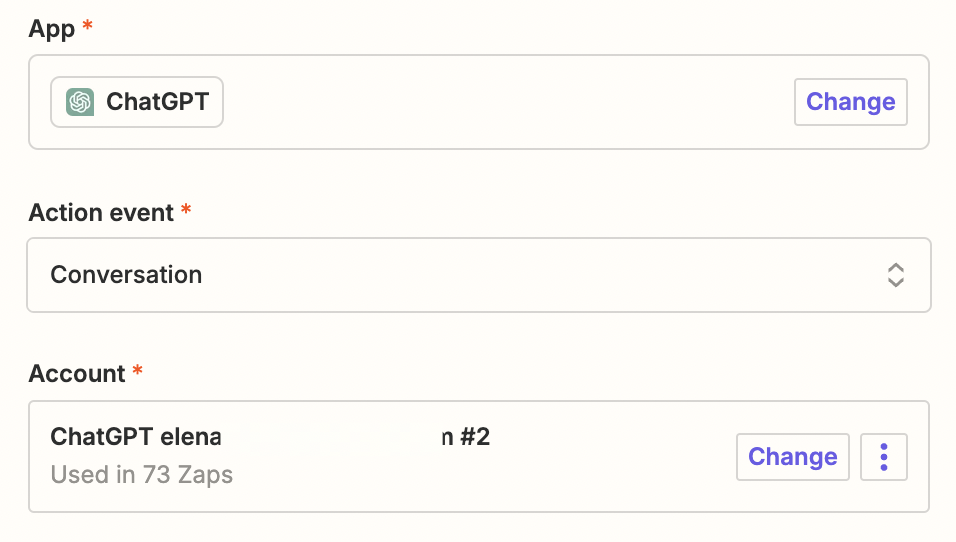
If you haven’t set up your Zapier connection to ChatGPT before, head back over to platform.openai.com to log into your account. At the top-right of the page, click on your profile icon and click API keys:
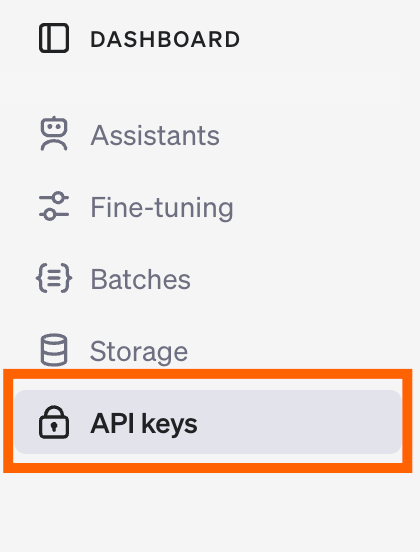
From that page, click on the + Create new secret key button to generate a new API key. You’ll need this key to connect to your ChatGPT account within Zapier. Copy this key and store it somewhere safe.
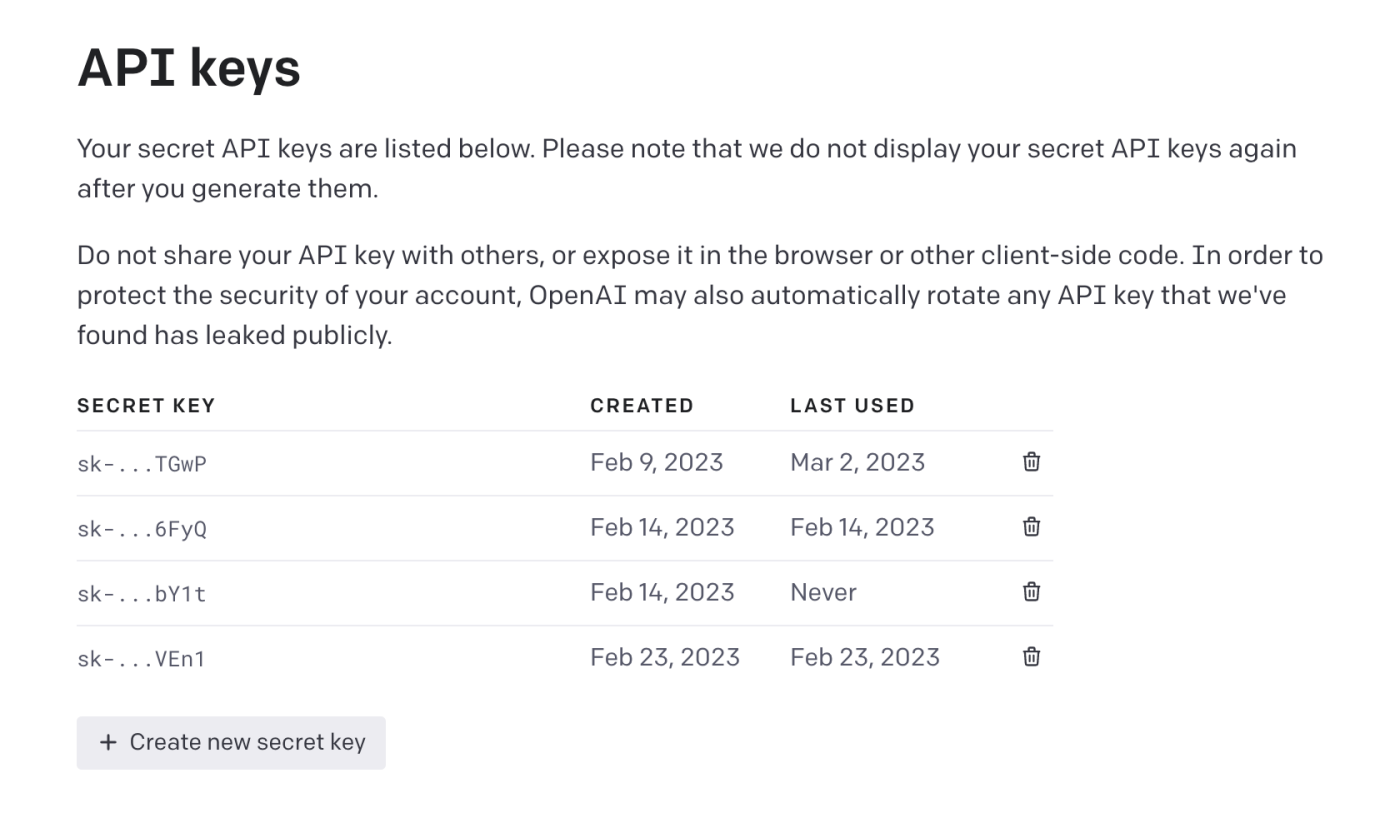
Click on Choose account, and set up a new account by providing the API key you just generated in OpenAI.
Next, we’ll set up the most important part: telling ChatGPT what to do with your blog post topic. First, you’ll want to map the data (in this case the blog post topic) from your trigger step. This is so ChatGPT understands exactly what to write about.
To set this up, click the + icon inside the User Message field where you want the data to go and select the field with the content from the list of options.
Here’s an example of what that would look like with Trello, but the steps would be the same for any other trigger app you’ve chosen:
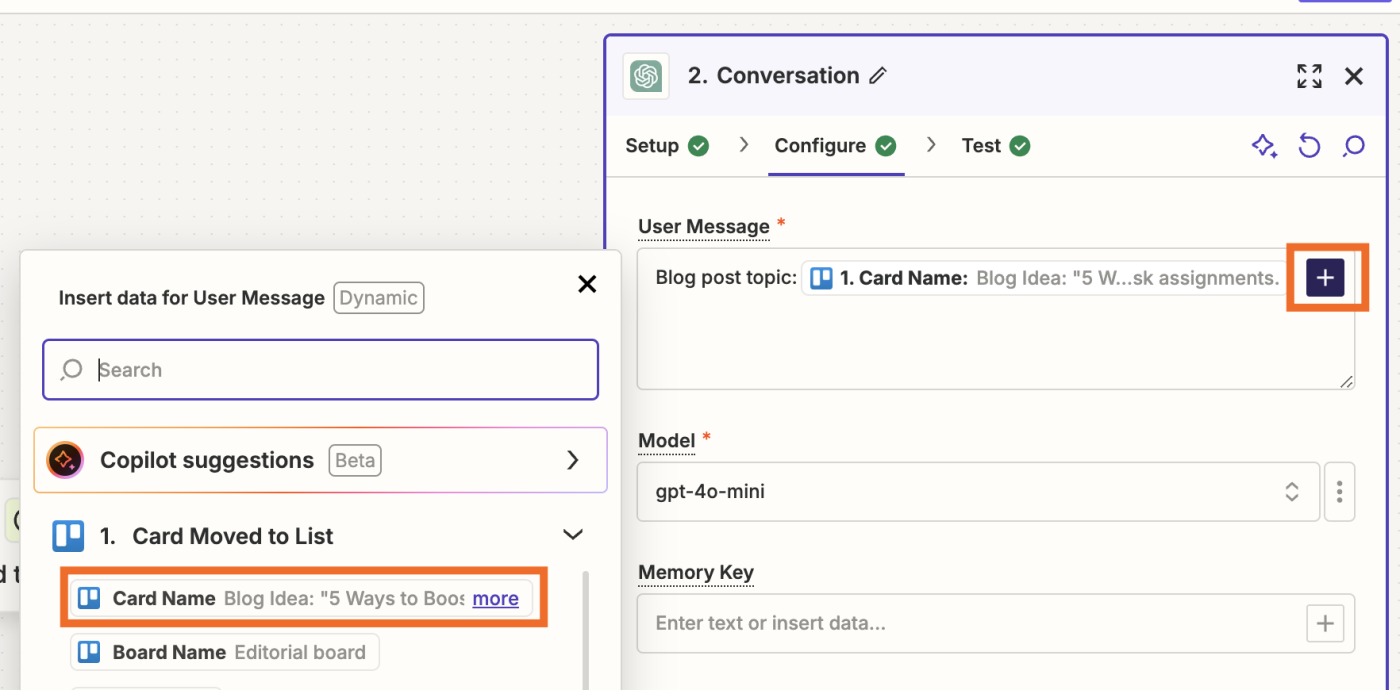
Next, select the ChatGPT model you want to use. Your model will be set by default to GPT-4o mini, which we recommend using as it’s the fastest and cheapest model available.

Now, remember the prompt you prepared earlier? It’s time to paste it into the Assistant Instructions field.
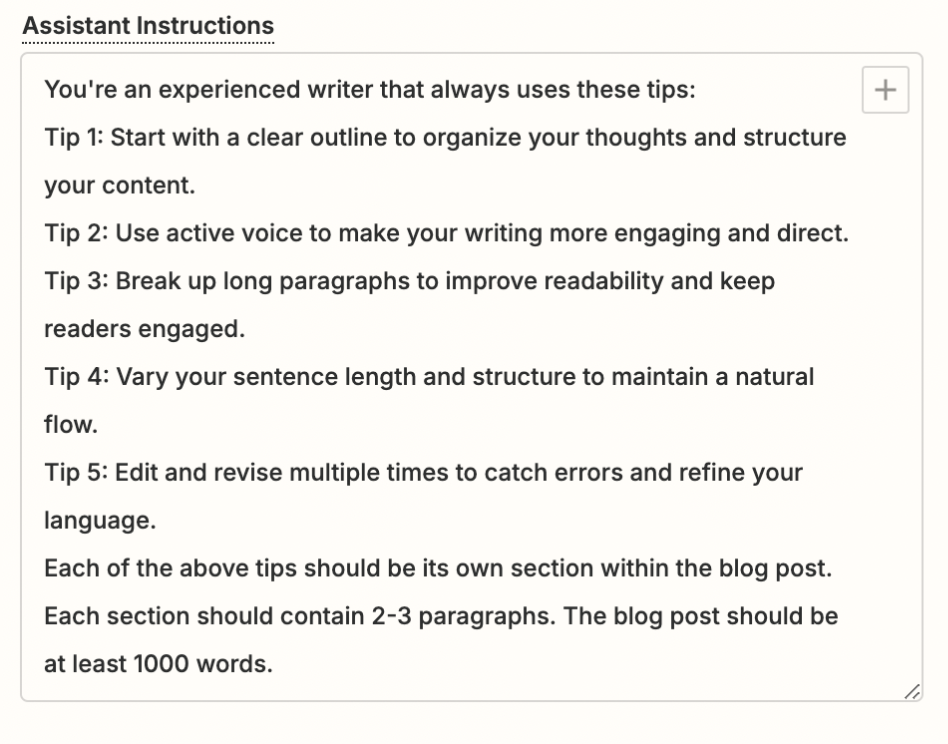
This is so ChatGPT understands the blog post topic from your trigger step and knows the appropriate style and context for writing. (You can tweak these instructions as many times as you like until you get the best output.)
You can also change the default settings for the following fields, if you like, but we’ll keep them as is: Tokens, Temperature, and something called Top P (how the model selects tokens based on their cumulative probability).
Once you’ve finished setting up these fields, remember to click Continue, test your action step, and add an additional step to your Zap.
Send the ChatGPT output to another app
Your previous ChatGPT action step generated a blog post based on your prompt, but you still need to send that output somewhere else. Ideally, that would be the app where you review and edit blog posts, which could be Google Docs, Airtable, or even Asana. Again, it completely depends on where you might do your editing.
Search for and select your action app and event. Once you’ve connected your account, you’ll once again have a few fields to customize—depending on the app. For example, if you choose Google Docs, you’ll need to select the document and location where you want the blog content to appear. Or, if you select Asana, you’ll be asked to pick the project and task where the draft should be stored.
There is one thing this workflow will have in common: the ability to map ChatGPT’s output (marked as Reply from the data dropdown menu) to the right field. Here’s an example with Google Docs:
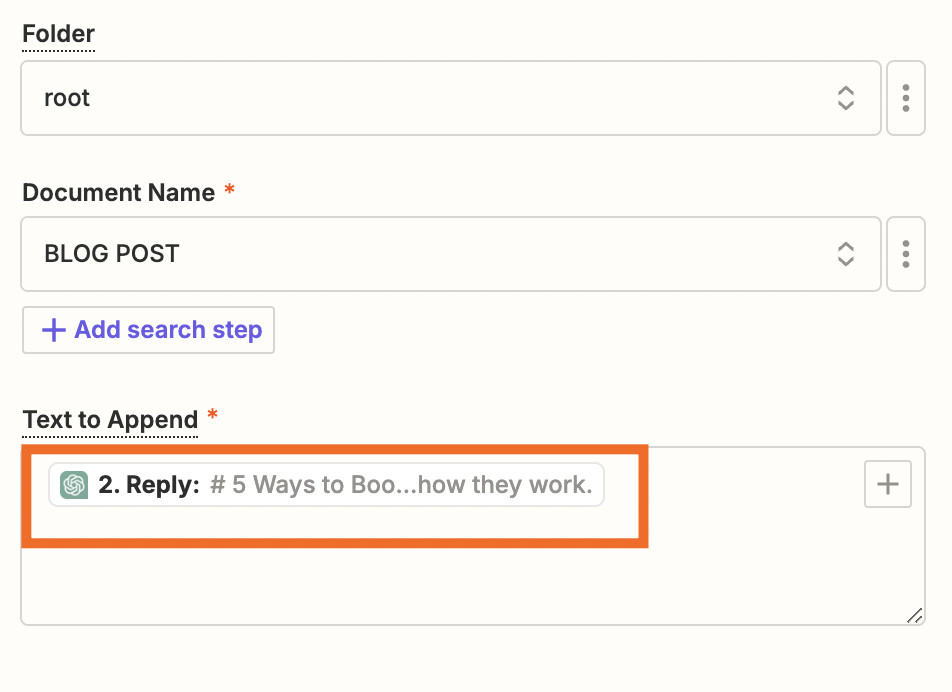
Once you’ve customized all these fields, remember to click Continue and test your step to make sure everything’s working correctly. You can check the destination app to ensure the content has been delivered. Here’s what ours looks like in Google Docs:
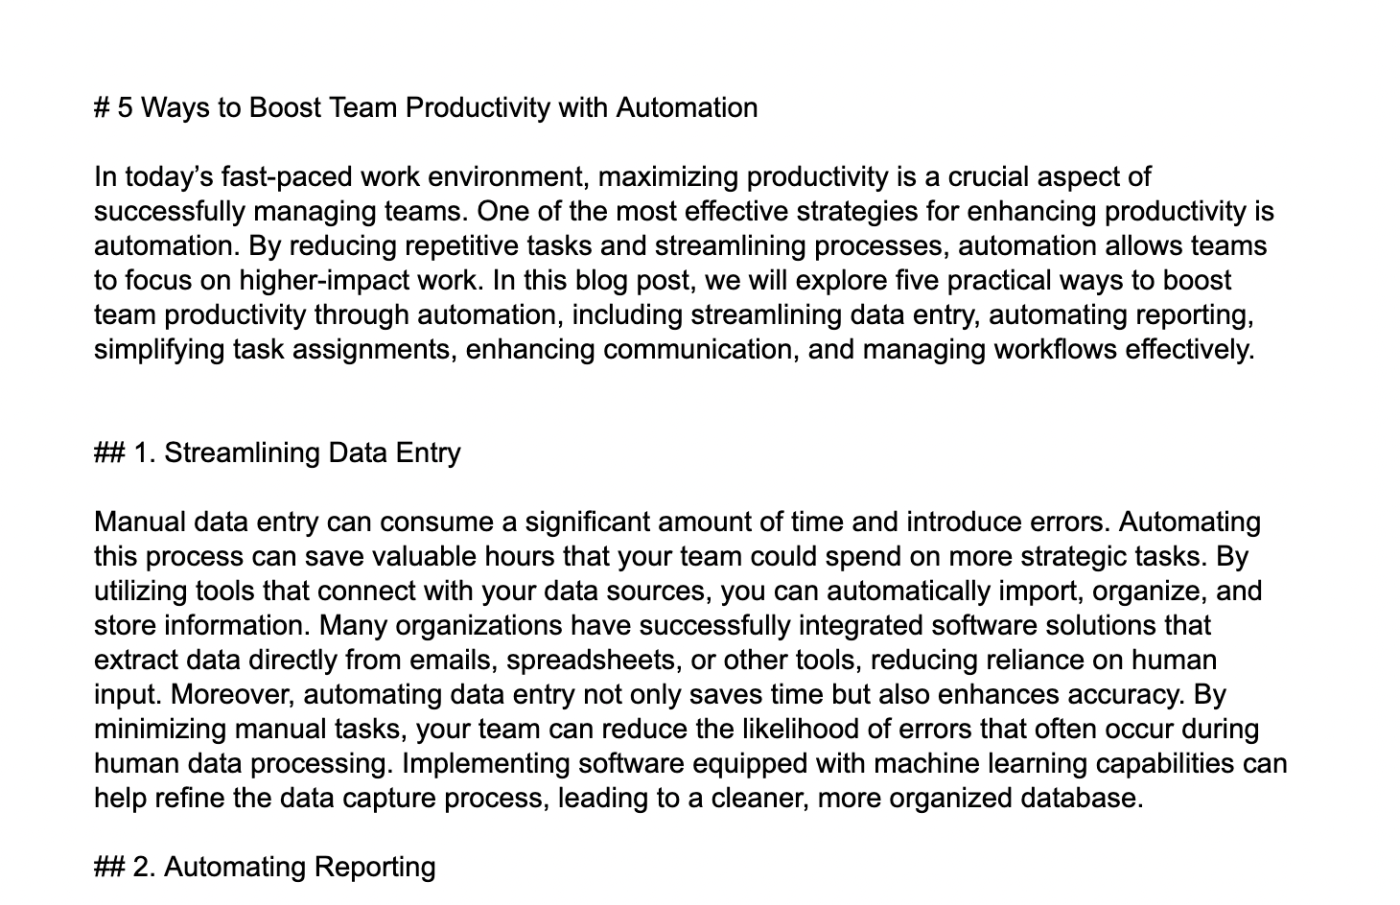
Once everything looks good, your Zap is now ready to turn on!
Bonus step: Add the blog post link to your original trigger app
To close the loop on your content creation workflow, you can also add the blog post link (if you’ve saved it in a tool like Google Docs or Google Drive) back to your original trigger app.
For example, if you use project management tools like Trello, you can update the original card with the link to the final post. If you’re using Airtable, you can add the link to the corresponding record. This keeps everything connected and makes it easy for your team to access the drafted content from the original source.
To do this, add another step to your Zap. Then search for and select your action app and event. Once you’ve connected your account, customize each field and make sure you map the right link to the right field. Here’s an example of adding a Google Doc link back to the original Trello card:
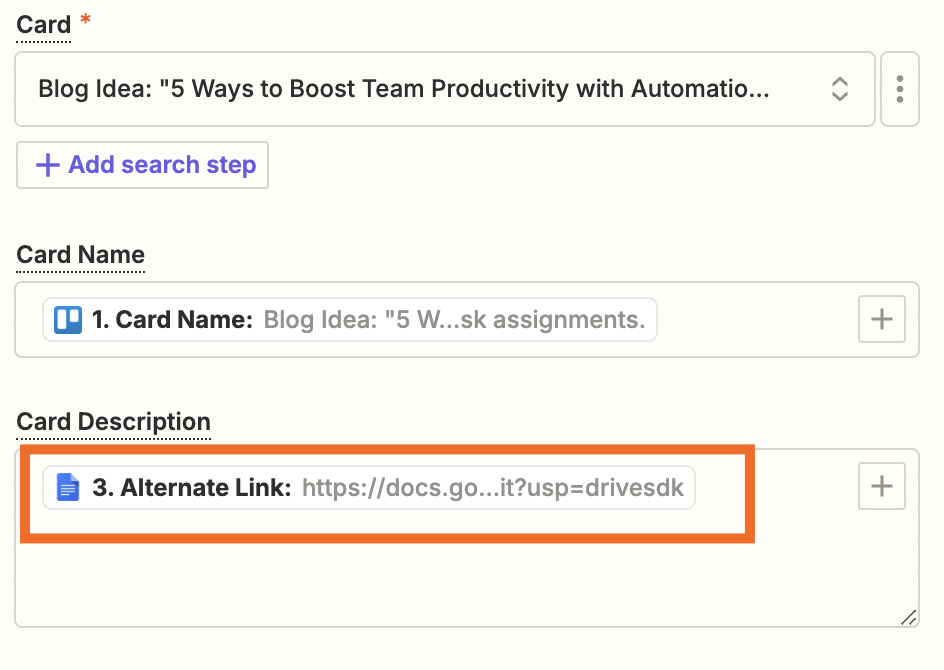
That way, once ChatGPT produces a blog post and sends it to the app to do your editing, it will also add a link to your original app so everyone has easy access to the final product.
Remember to switch on your Zap once you’ve finished customizing and testing this step!
Play with ChatGPT prompt flexibility
With Zapier’s ChatGPT integration, you can build fully automated content creation workflows that save your team time and keep everything organized.
From capturing initial blog ideas in your project management or database tools, to generating drafts in ChatGPT, and storing and sharing the final posts—you can seamlessly connect all the steps in your content pipeline.
By tailoring each step to fit your team’s specific tools and preferences, you’re setting up a system that scales effortlessly. And remember, you can always expand this workflow by adding more steps or incorporating additional apps as your content needs grow!
This article was originally published in August 2023, written by Anna Burgess Yang. It was most recently updated in November 2024, written by Elena Alston.