I recently made the switch from Google Sheets to Notion to plan my vacations for two main reasons. For one, it allows for multi-select properties, which means I can assign multiple tags to properties like locations and food categories. For another, Notion’s interface is prettier.
Now, with the latest advancements to Notion AI, I have a third reason for sticking with Notion: its AI makes it that much faster to plan my trips and quickly pull information that I’ve buried deep within a painfully detailed itinerary.
Whether you use Notion to organize your life, manage projects, or as a CRM, here’s how to use Notion AI to speed up all your workflows.
Table of contents:
What is Notion AI?
Notion AI is a collection of AI features embedded into Notion’s workspace, including an AI assistant you can chat with to get answers about your docs and a text generator that you can prompt to do things like create, edit, summarize, and translate content—even within databases.
Note: Last year, Notion released another AI feature called Q&A (currently in beta). It operates much like the AI assistant, answering questions about your docs.
How to use Notion AI
Here’s a summary of how to use Notion AI.
-
Go to notion.so, and log in or sign up.
-
Interact with Notion AI on the web in one of two ways:
-
Click Notion AI in the sidebar to use the Q&A feature, and enter your prompt in the message bar.
-
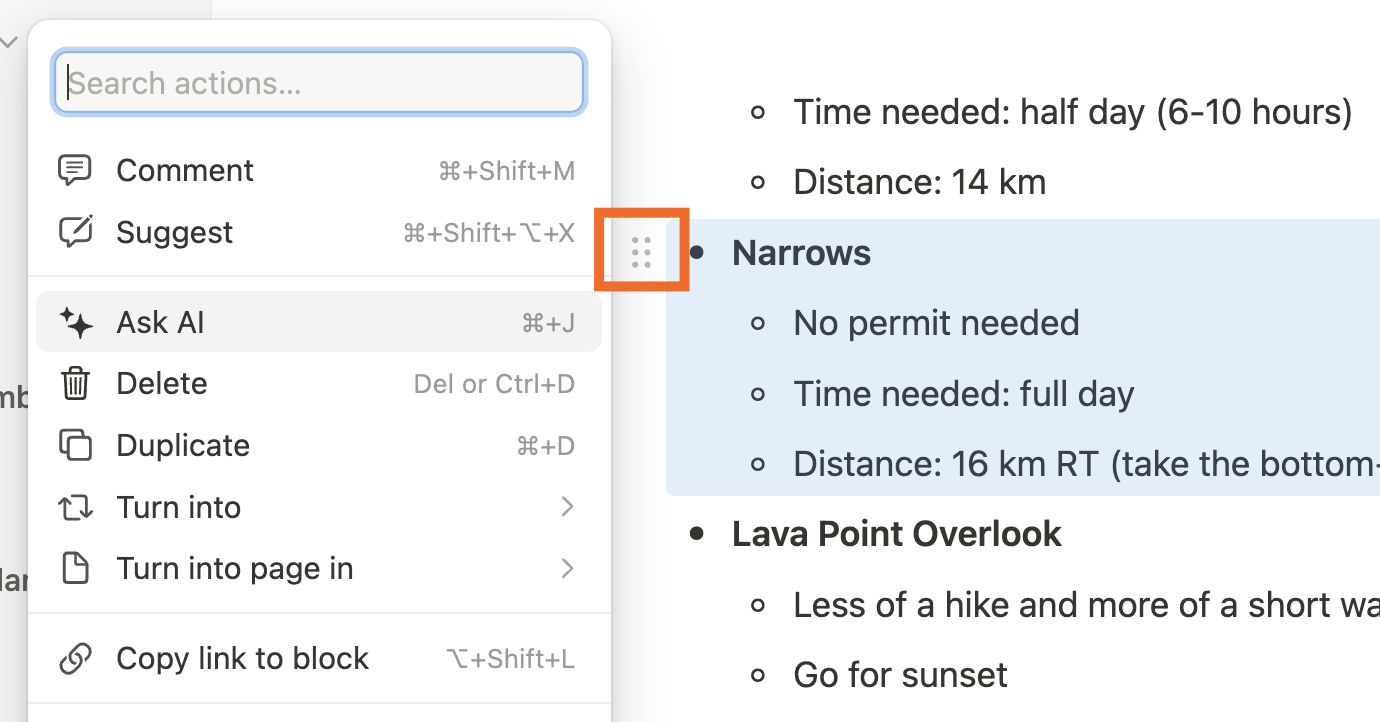
From one of your pages, click the menu icon (it looks like a 2×3 grid of dots) next to the block you want Notion AI to help you with, and click Ask AI. Enter your prompt, or choose from one of the suggested AI actions.
-
-
Once Notion AI spits out a response, you have a handful of options (this will vary depending on how you’re interacting with the AI):
-
Copy the response.
-
Change which page Notion AI looks into to retrieve data.
-
Regenerate the response.
-
Share the response.
-
Accept or discard the response.
-
Mark the response as helpful or unhelpful.
-
Now let’s take a closer look at the finer details of using Notion AI.
1. Sign up for the Notion AI add-on
To get started with Notion AI, you first need to sign up for the AI add-on.
-
Go to notion.so.
-
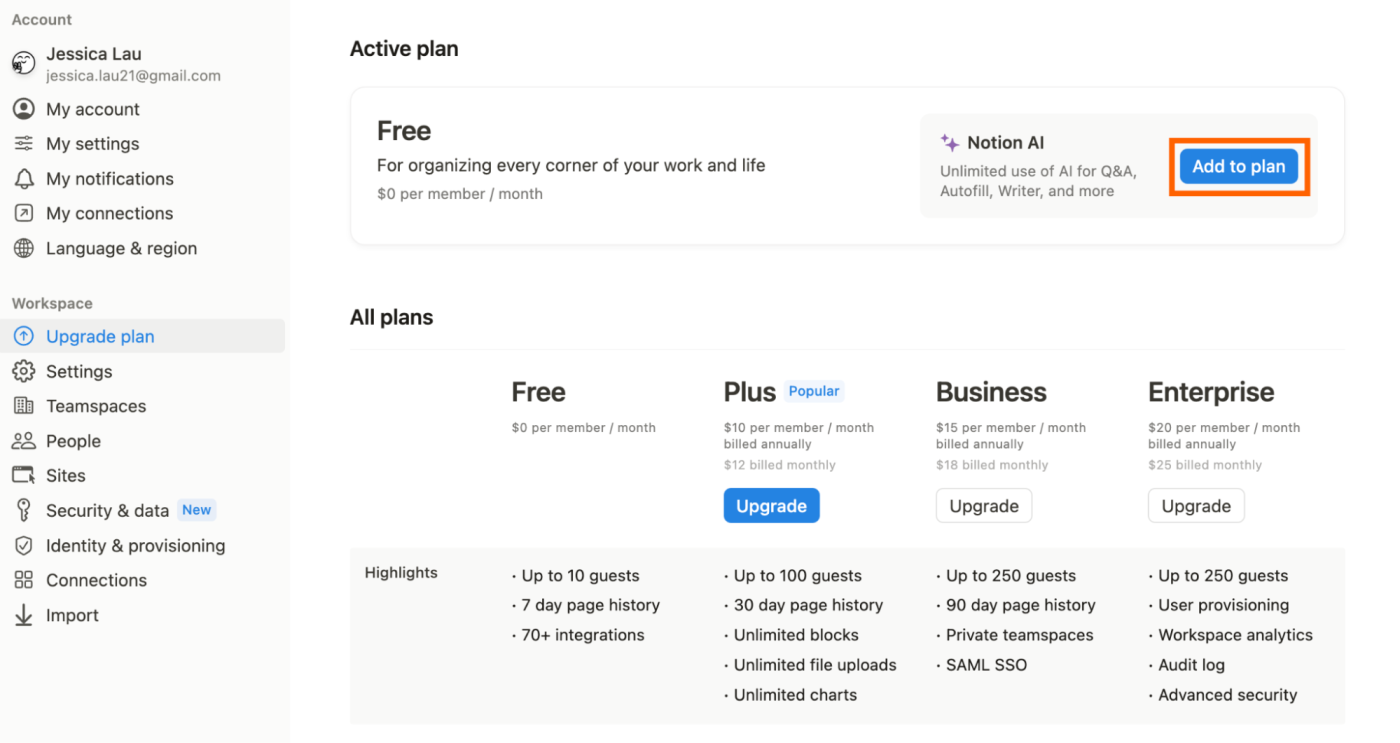
Click Upgrade plan at the bottom of the sidebar.
-
In the pop-up that appears, click Add to plan (it’s next to Notion AI).
-
Fill in your payment details.
-
Click Upgrade now.

You can also try out Notion AI for free. As long as you have a Notion account, you’ll automatically get 20 free AI responses.
2. Trigger Notion AI
You can access Notion AI in a number of ways.
-
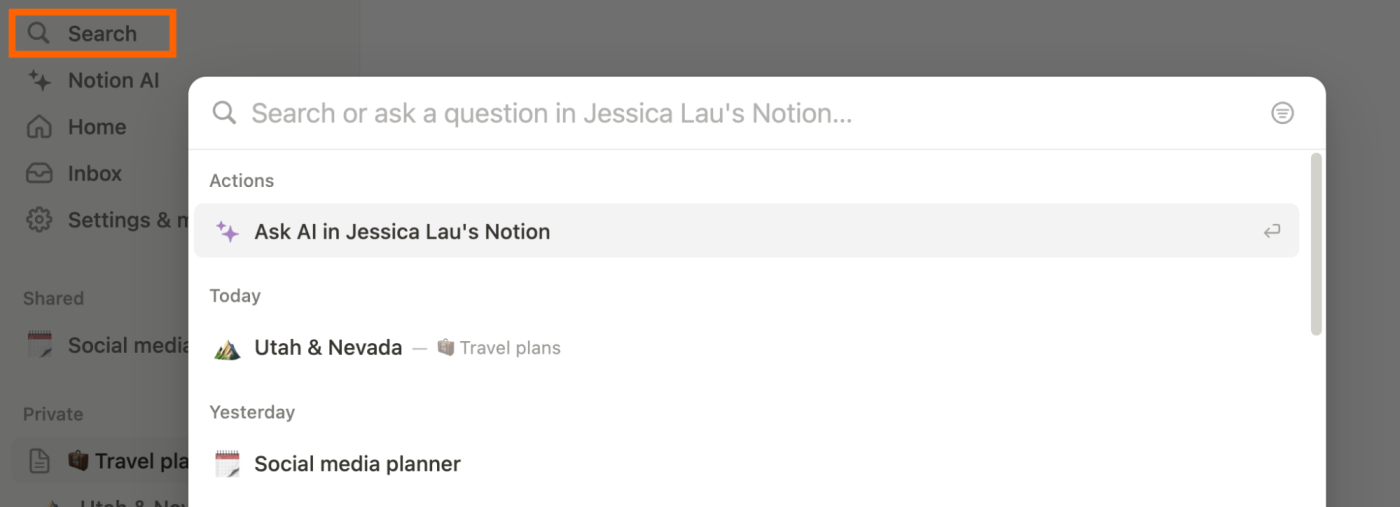
Use the Search bar. Click Search in the sidebar, and enter your question in the search bar for Notion AI to answer.
-
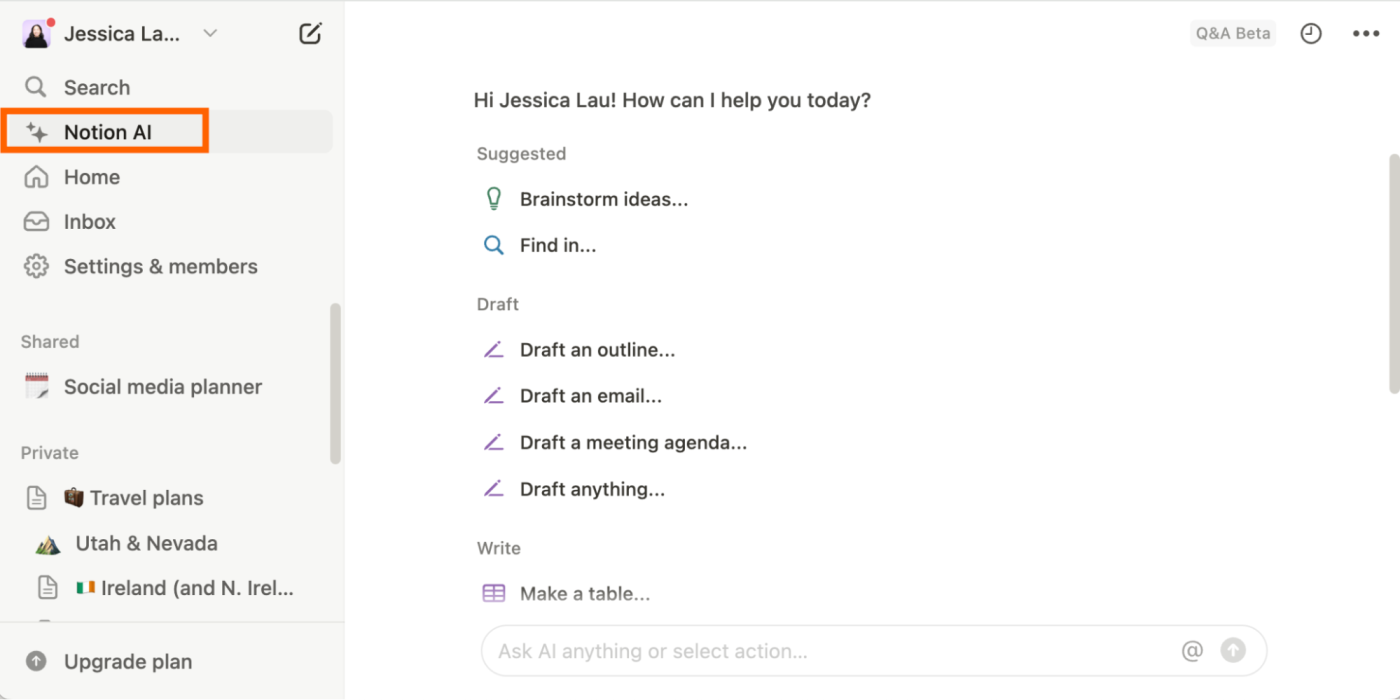
Use the Q&A feature. Click Notion AI in the sidebar to start a new chat. Choose from one of the suggested AI actions or enter a prompt in the message bar.
-
Open a Notion AI chat from your page. Click the sparkle icon on the bottom-right corner of any Notion page to start a new Notion AI chat.
-
Select Ask AI from a block menu. Click the menu icon (it looks like a 2×3 grid of dots) next to the block you want Notion AI to help you with, and click Ask AI. Enter your prompt or choose from one of the suggested AI actions.
-
Use the slash command. Type
/ai,and select an AI action. If you want Notion AI to edit your content, you need to first highlight the text or block you want it to edit, and then type/ai. Choose one of the suggested AI actions. Or click See more to enter a specific prompt.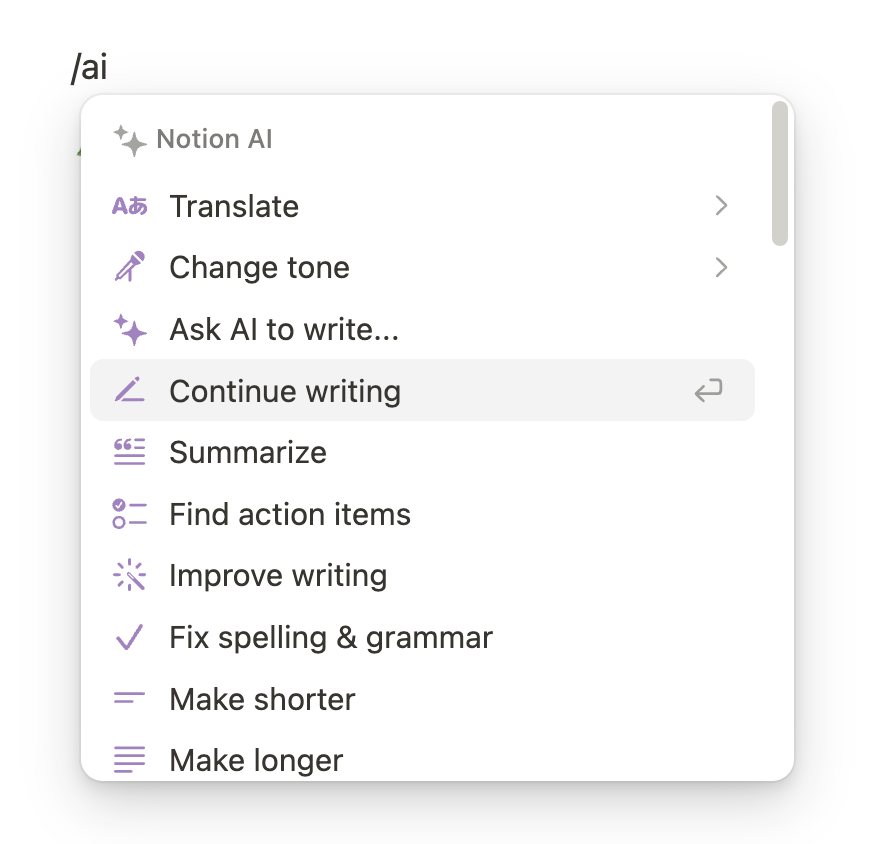
-
Use your keyboard shortcuts. If you’re using Notion on the web and you’re on one of your pages, press
command+J(on Mac) orCtrl+J(on Windows) to bring up the Notion AI menu and message bar. If you have the Notion desktop app, presscommand+shift+K(on Mac) orCtrl+Shift+K(on Windows) to start a new chat—you don’t even need to be inside the app to do this.


3. Interact with Notion AI’s response
Depending on how you triggered Notion AI, the way you interact with its response will vary.
For example, if you’re using the Q&A feature, here are your options.

-
Copy the last response. Click Copy to copy the last response to your clipboard. Then you can paste and share the text as you normally would.
-
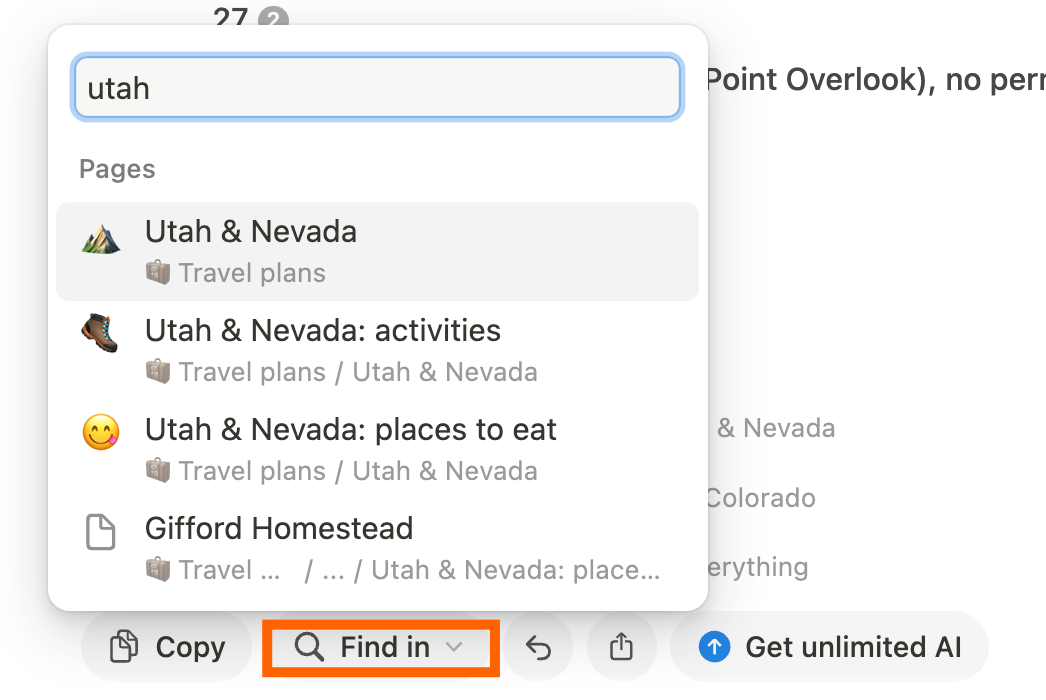
Change Notion AI’s source data. By default, Notion AI will scan all your workspaces for any relevant data to inform its response. If you want it to pull data from a specific page, click Find in, and enter the page name. The only drawback here is that you can’t select multiple pages at once.
-
Ask Notion AI to generate a new response. Click the Try again icon, which looks like a curved arrow pointing left, to get the AI to generate a new response to your previous prompt.
-
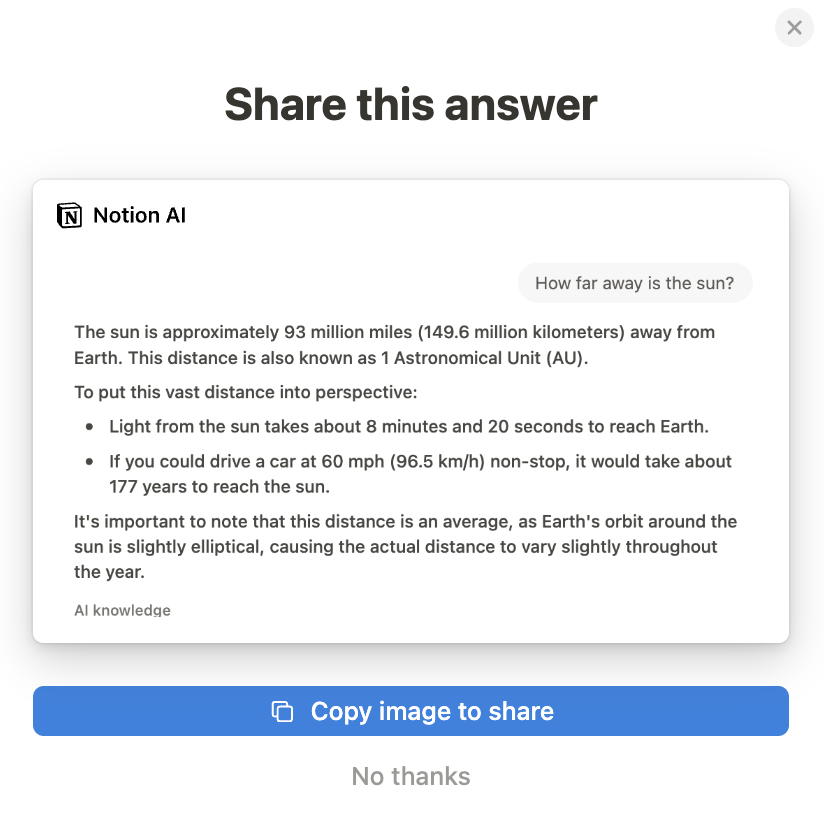
Share the response. Click the Share icon, which looks like a box with an up-facing arrow, to share an image of the most recent prompt and response. In the pop-up that appears, click Copy image to share, and then share the image as you normally would.


It’s not obvious that you can revisit past Q&A chats, but you can.
-
Click the ellipsis (
...) in the top-right corner of your Q&A chat window. -
Click View history.
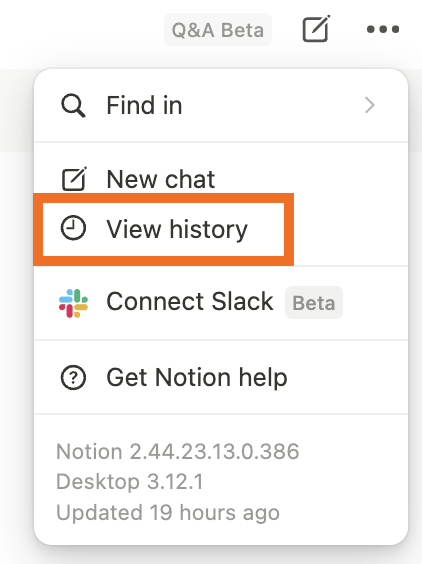

Notion will display your entire conversation history in the Notion AI sidebar.

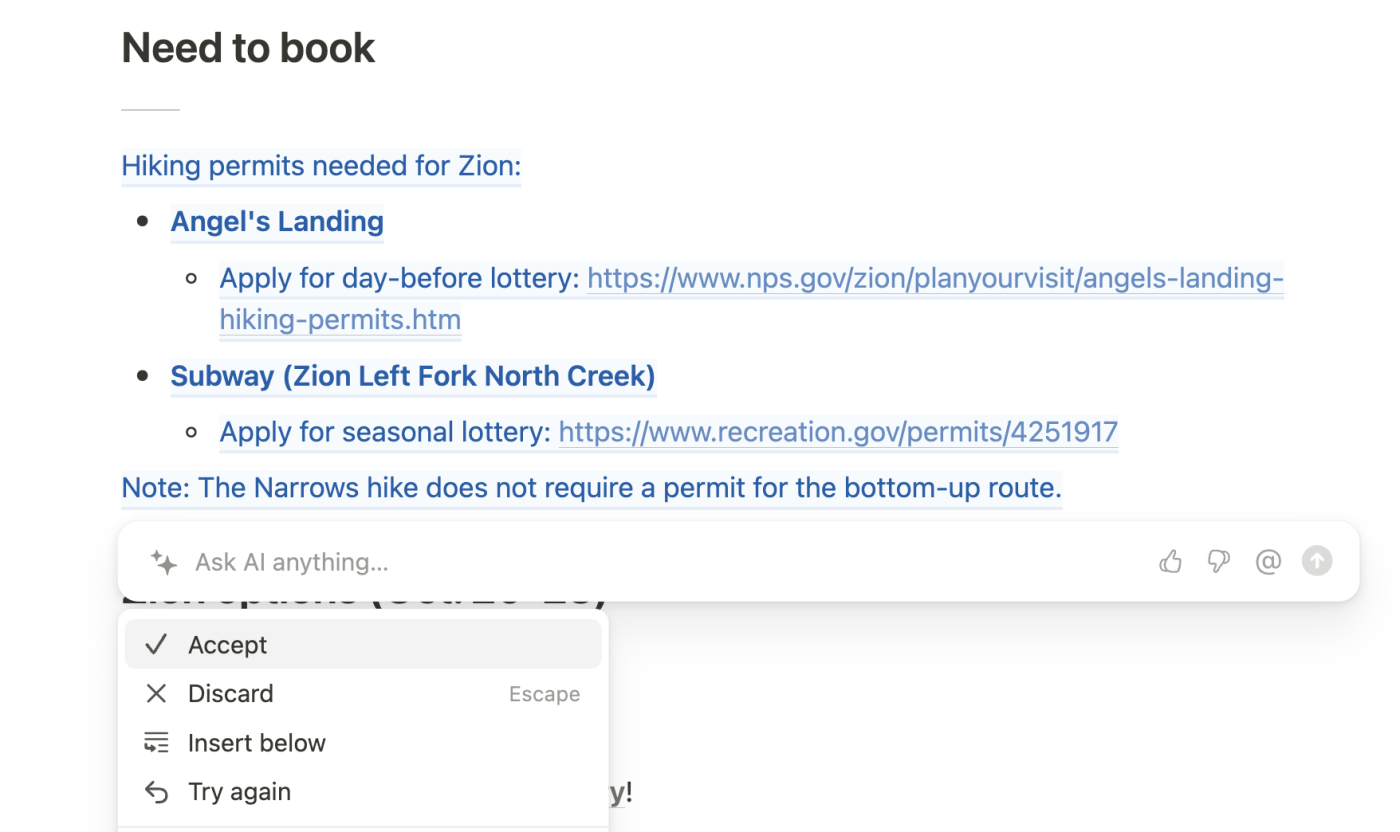
If you’re using Notion AI in one of your pages, your options are a little different.
-
Accept or discard the response. Click Accept or Discard to keep or delete Notion AI’s output.
-
Insert Notion AI’s response. Click Insert below to add the AI’s output to your page. How does this option differ from accepting an AI response? It doesn’t. Or, if it does, it’s not obvious to me.
-
Ask Notion AI to generate a new response. Click Try again to get the AI to generate a new response to your previous prompt.
-
Like or dislike the response. In the message bar, click the Helpful or Unhelpful icon (it looks like a thumbs-up or a thumbs-down) to tell Notion AI what you think of its response. This feedback will help the AI improve for future responses.

Use cases for Notion AI
Now that you understand the basics of how to interact with Notion AI, let’s look at different ways you can use it in your daily workflows.
Since there are endless possibilities for Notion AI—more than I could list here—I’ll share a few examples of each category in action.
Brainstorm ideas
When you write for a living (like I do), you’re bound to run into writer’s block. Notion AI can help you get the creative juices flowing. For example, you can ask it to come up with a list of email subject lines, article ideas for a specific topic, a list of the best hiking trails in a specific national park—the list goes on.
Here’s an example of Notion AI’s response when I prompted it to write an email promoting an article about how to use Notion AI.

Once Notion AI spits out the first draft, you can choose from one of the suggested AI actions, including Make longer or Try again. Or you can enter a specific prompt in the message bar.
Edit existing content
You can use Notion AI to edit existing content within your pages. Here are some of the pre-loaded AI actions you can apply to any content block: Improve writing, Fix spelling & grammar, Make shorter, Make longer, and Change tone. You can also prompt the AI to define specific words, provide synonyms or antonyms, or translate entire pages of text (this is available only for supported languages).

The only downside to editing with Notion AI? If you want the AI to improve your writing and you need it to take into account your company’s brand voice or style guidelines, you’ll have to manually include those directives every time you interact with it—there’s no way to upload knowledge sources or program it to remember the specifics of your brand voice to inform future responses.
Summarize content
Let’s say you use Notion to capture your team’s meeting notes. You could review your notes, line by line, to draw the key points and compile a list of action items to share with everyone. Or you can prompt Notion AI to do the heavy lifting for you.
If you want to take things further, you can also ask Notion AI to turn your key points into a high-level summary.
Analyze large text-based data sets
Notion AI can also scan through your pages to provide a different kind of summary. For example, if you store customer feedback in a Notion database, you can prompt the AI to reference that database and do things like generate an overall audience sentiment or count how many times a specific pain point was mentioned.
Ask questions (about your content)
You can ask the AI questions about the content contained within your workspaces (as shown in the example below). But the AI’s knowledge isn’t limited to just these sources. Since it’s powered by GPT, along with various other large language models (LLMs), it can also answer questions about almost anything using GPT-4’s general knowledge of the world.

Autofill database properties
AI Autofill speeds up the process of updating your databases with important information, including summaries, key points, and item labels. For example, if you use Notion AI to track all your projects, you can use the AI custom autofill option to generate a summary of potential blockers for a given task (as shown in the example below). Or, you can have it automatically assign each item with a specific status like draft, in progress, or complete using a Select property type.

The way to use AI Autofill varies depending on the type of property you want it to update. For step-by-step instructions, check out Notion’s guide to using Autofill.
It’s worth mentioning that while I’ve gotten decent, if not vague, outputs using the custom autofill option, the same can’t be said for getting it to accurately assign me items with the appropriate status (or any other label). Notion’s help guide also says that you can use AI Autofill for Select and Multi-select property types, but when I tried, it wouldn’t allow me to use the AI for multi-select properties.
Automate Notion
Notion AI is a powerful tool for pulling data from your workspaces, so you can get the answers you need faster. But first, you have to get that information into Notion. When you connect Notion with Zapier, you can automatically send data from other apps to your Notion workspace and vice versa. For example, you can add new calendar events or items in your read-it-later app to databases in Notion. Learn more about how to automate Notion, or get started with one of these workflows.
Zapier is the leader in workflow automation—integrating with thousands of apps from partners like Google, Salesforce, and Microsoft. Use interfaces, data tables, and logic to build secure, automated systems for your business-critical workflows across your organization’s technology stack. Learn more.
Related reading:
This article was originally published in March 2023 by Ellie Huizenga. The most recent update was in August 2024.