There aren’t many things more terrifying than the notification that you’re running out of email storage. The good news: Gmail has mass delete features that allow you to do a clean sweep of everything instead of essentially cleaning up spilled rice grain by grain. Follow this guide for step-by-step tutorials on how to reach the dreamland that is inbox zero.
Table of contents:
How to mass delete emails on Gmail
Feeling brave? Here’s how to delete all of your emails in Gmail.
-
Log in to your Gmail account.
-
Check the box at the top of your inbox, to the left of the refresh button. This will select all the emails displayed on the first page.

-
Click the blue text that reads Select all X conversations in Primary.

-
Click the delete button, which looks like a trash can.
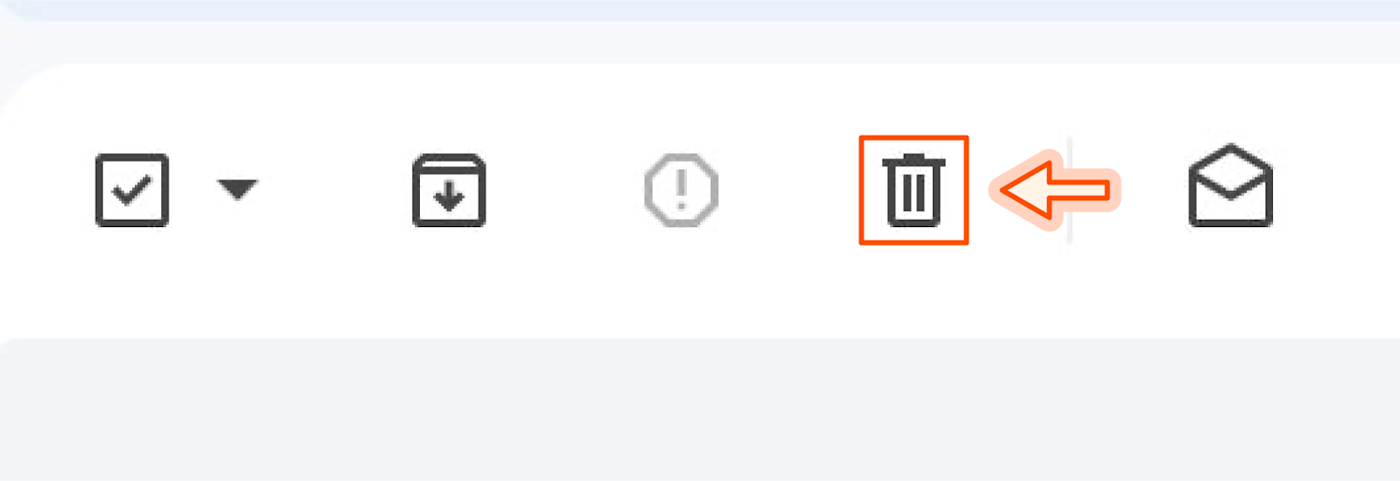
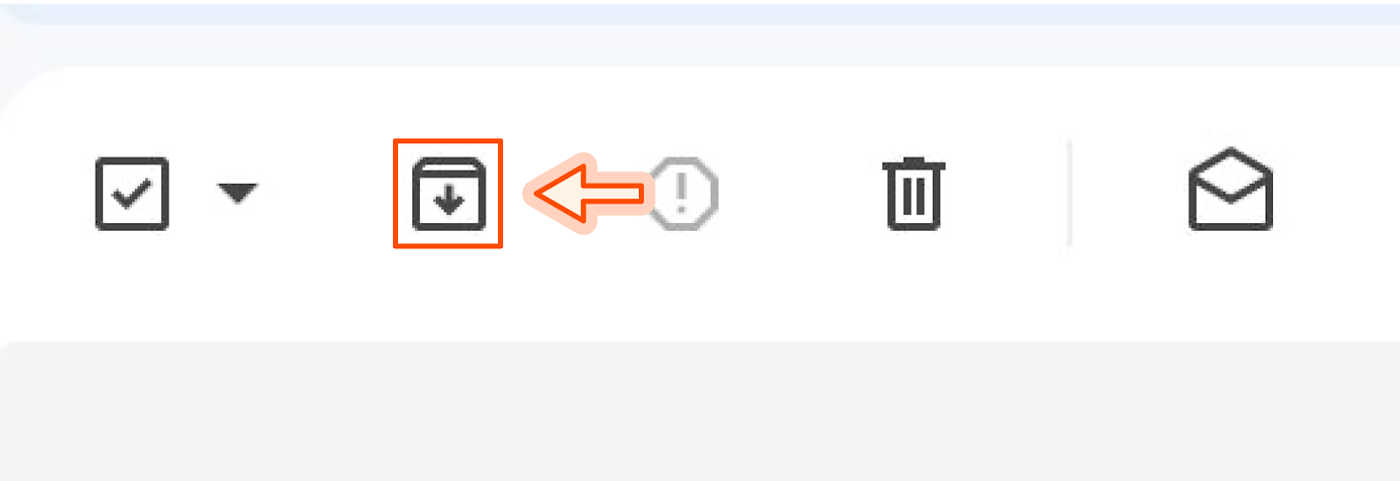
(You could also click the archive button (a folder with a down arrow) if you just want to hide the emails and still be able to access them).
And that’s it! Say hello to your shiny new inbox. To help keep it bright and shiny, consider blocking emails from users whose emails you know will go straight to the trash anyway.
How to mass delete a certain type of email on Gmail
If you aren’t looking to banish your entire inbox to the Trash folder, there are ways to clear out specific emails.
Maybe you know all emails from a certain sender are trash-worthy, or emails from a decade ago are good to be deleted. Here’s how to delete certain types of emails in bulk.
By Gmail category
-
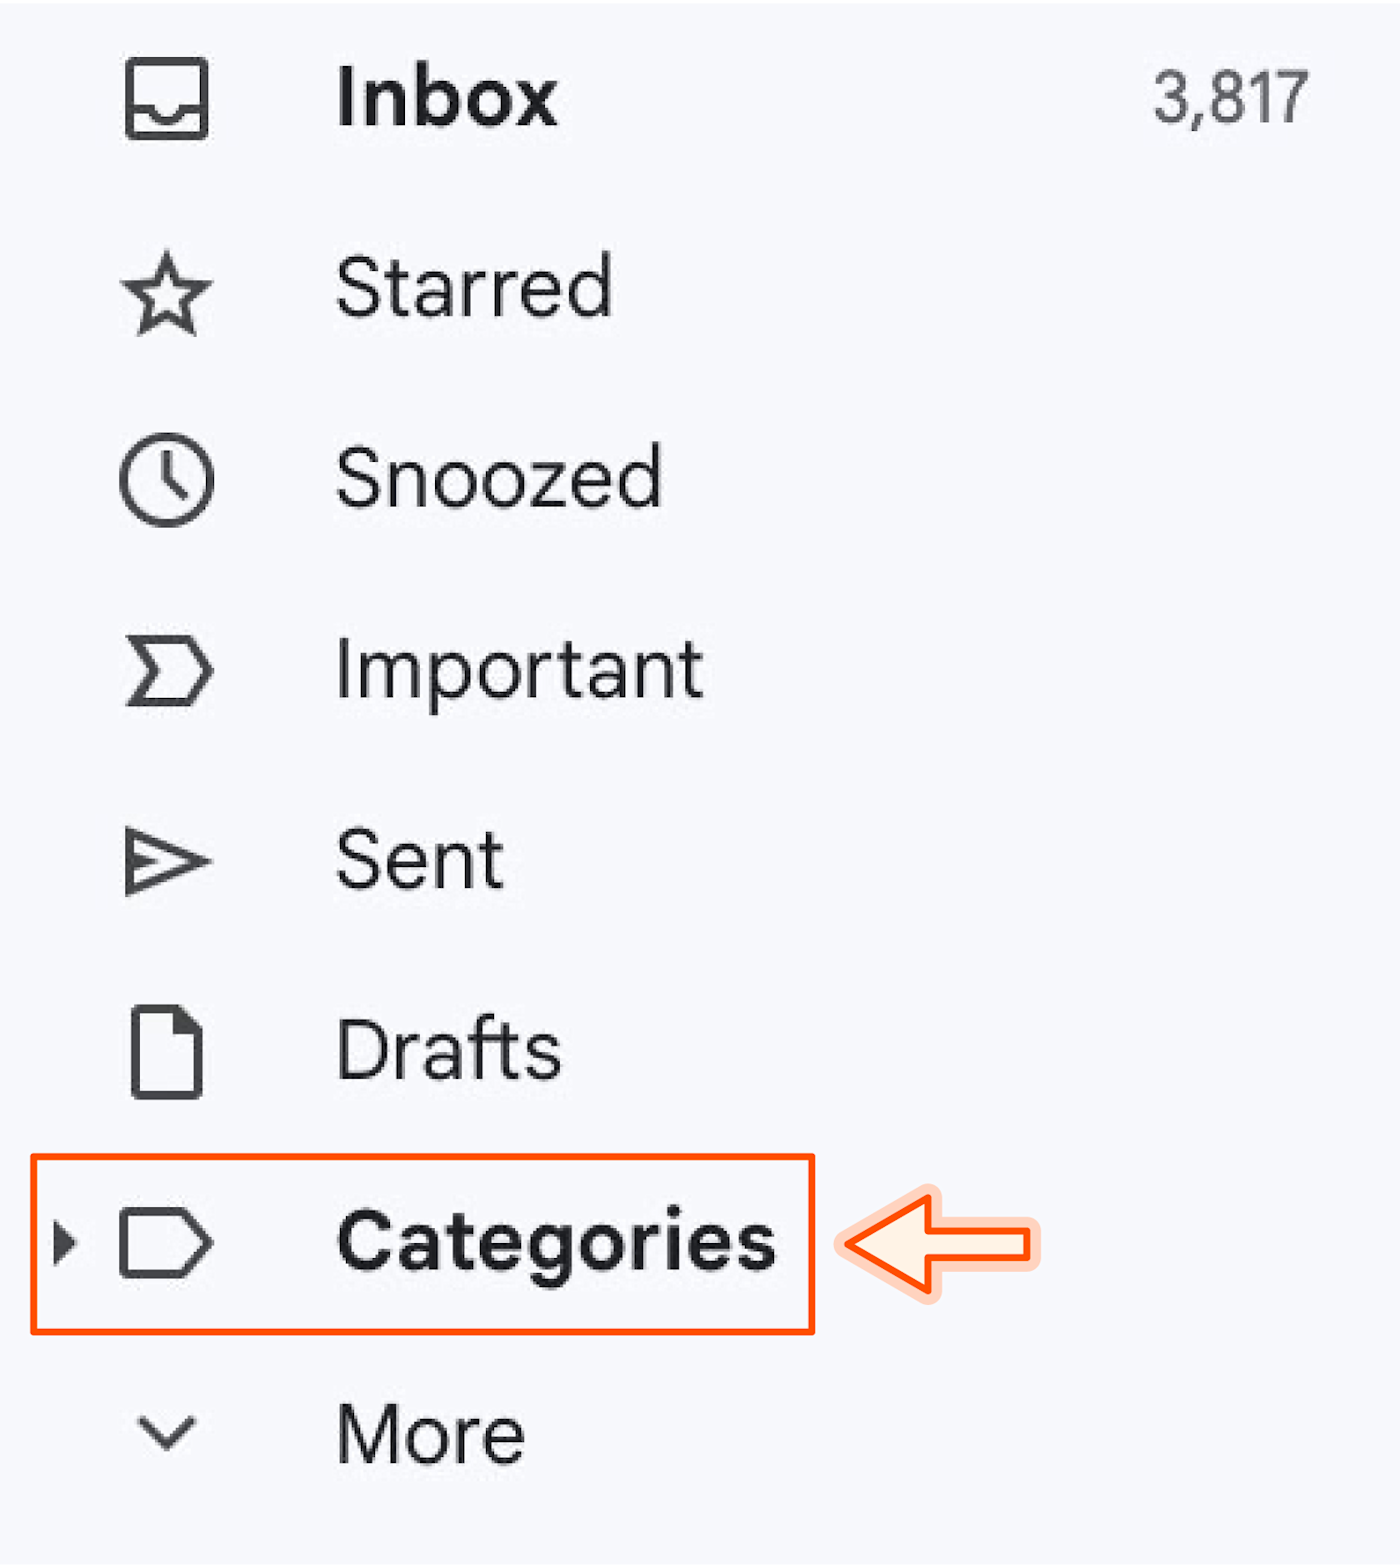
Click Categories on the left-hand sidebar to drop down more options.
-
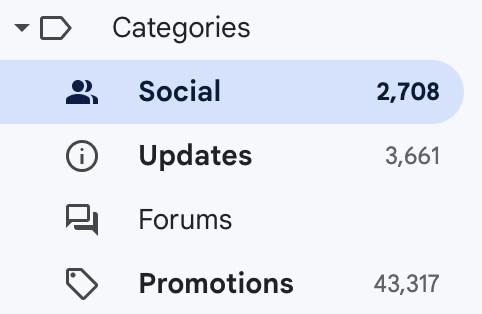
Select a specific category (Social, Updates, Forums, or Promotions) that you want to clean up.
-
Check the box at the top of your inbox.
-
Click the blue text that reads Select all X conversations…
-
Click Delete or Archive.
By label
-
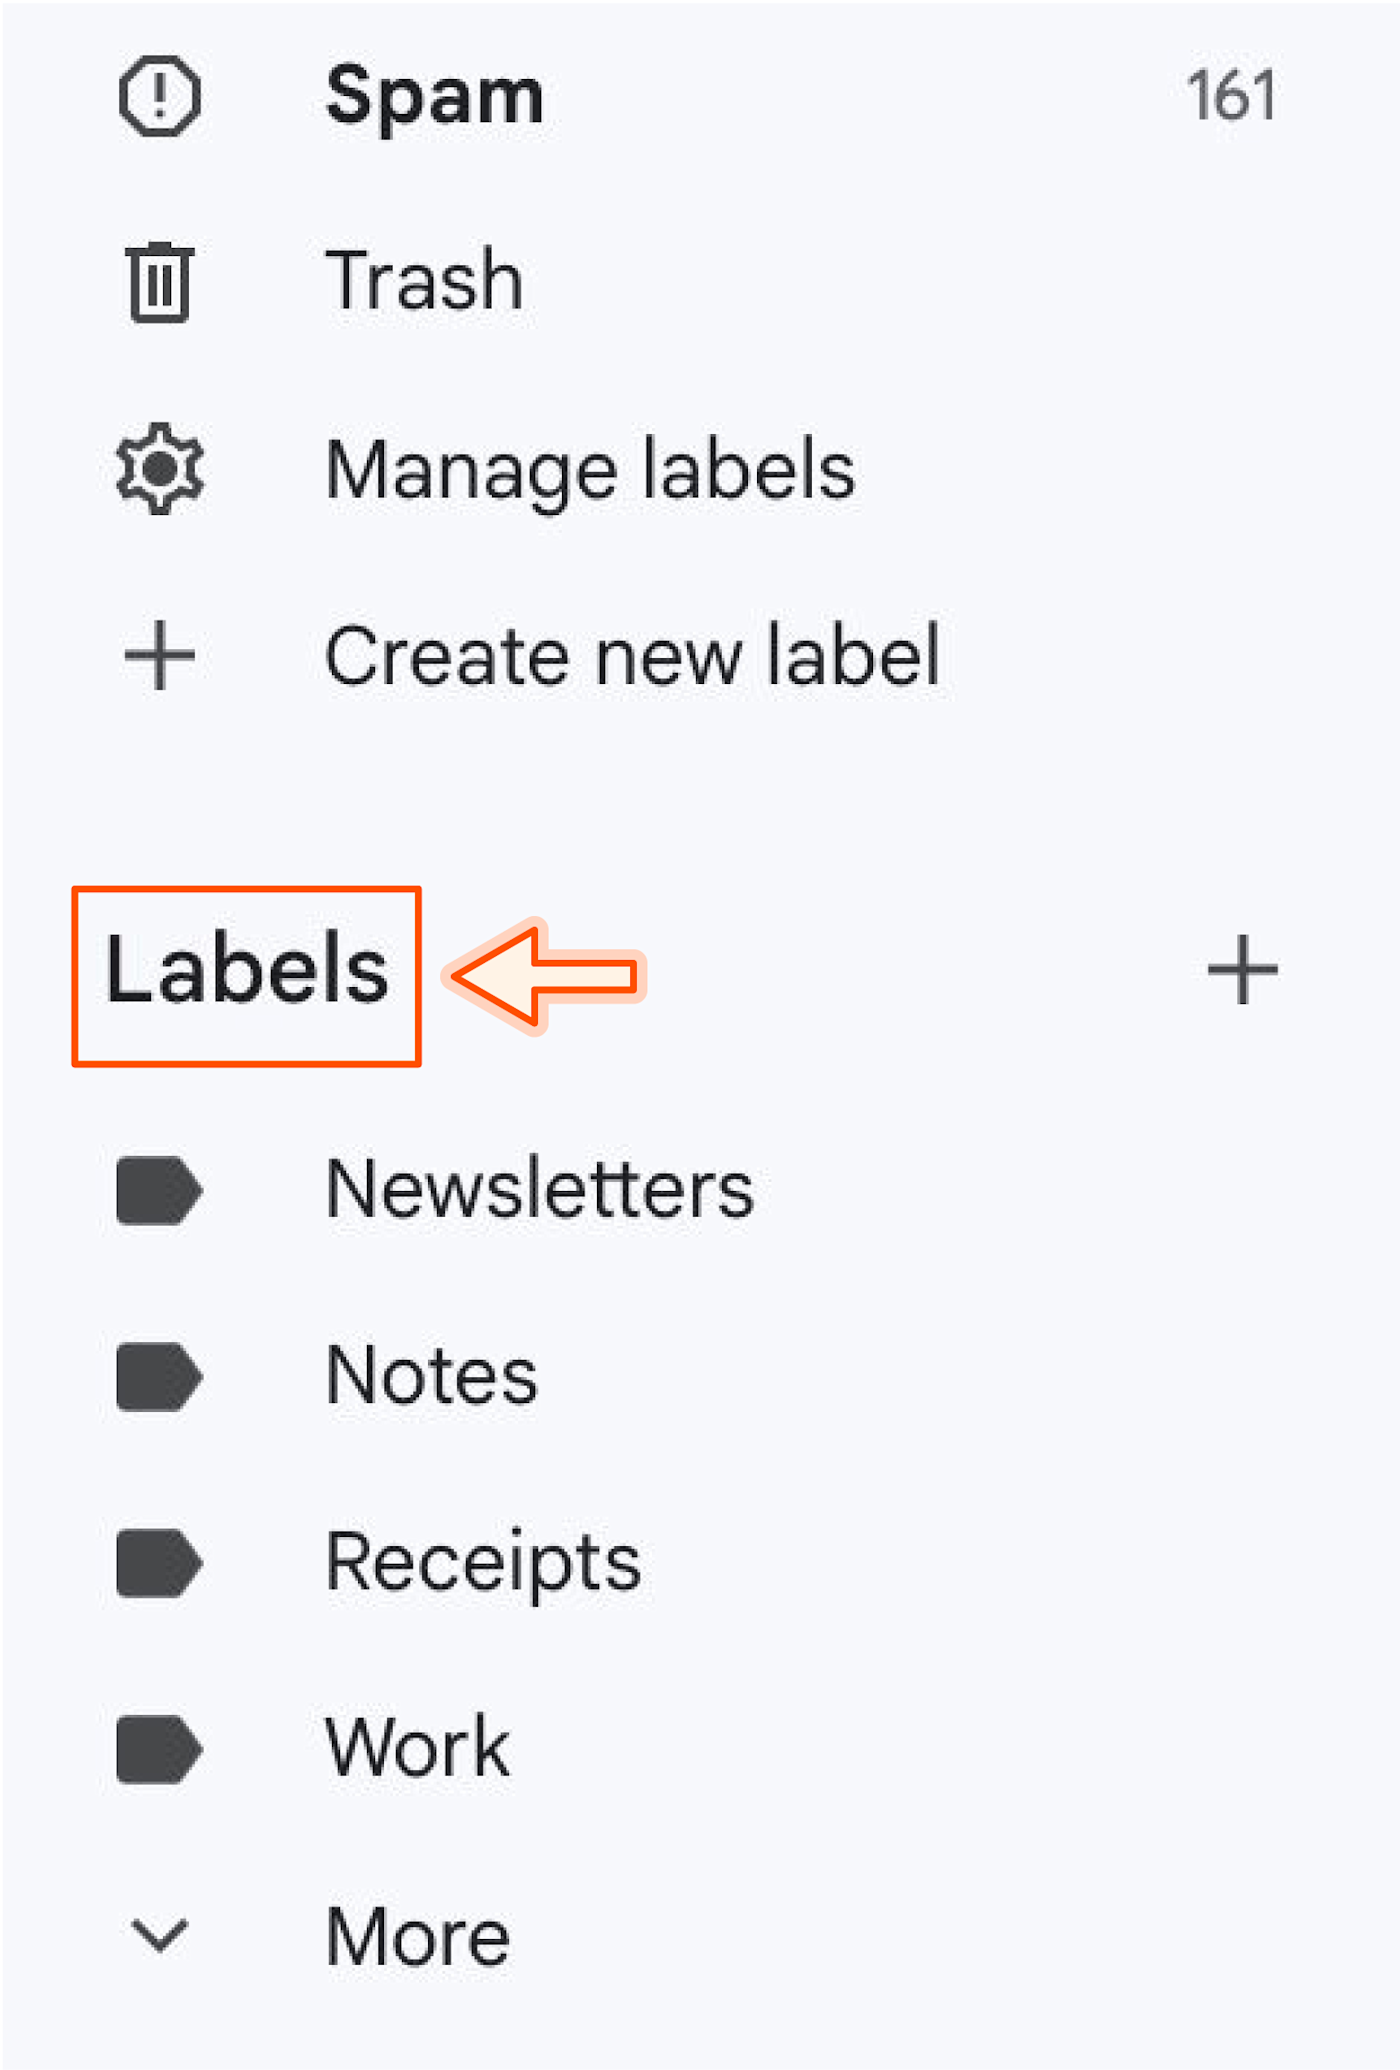
Click Labels at the bottom of the left-hand sidebar.
-
Select the label you want to clear. By now, you know the drill: check the box at the top of your inbox, click the blue text that reads “Select all X conversations…” and click Delete or Archive.
By date range
-
To delete emails before a certain date, type the date in the search bar in this format:
before:YYYY/M/D.
To delete emails after a certain date, type the date in the search bar in this format:
after:YYYY/M/D.
To delete emails in a certain date range, type the date range in the search bar in this format:
after:YYYY/M/D before:YYYY/M/D.
-
Hit Enter or return.
-
Here we go again: check the box at the top of your inbox, click the blue text that reads Select all X conversations…, and click Delete or Archive.
By sender
-
Type the sender’s email address in the search bar in this format:
from:person@domain.com.
-
Hit Enter or return.
-
Check the box at the top of your inbox, click the blue text that reads Select all X conversations…, and click Delete or Archive.
By read/unread
-
To delete all unread emails, type
is:unreadin the search bar.
To delete all read emails, type
is:readin the search bar.
-
Hit Enter or return.
-
Follow the steps to mass delete: check the box at the top of your inbox, click the blue text that reads “Select all X conversations…”, and click Delete or Archive.
How to mass delete emails on the Gmail app
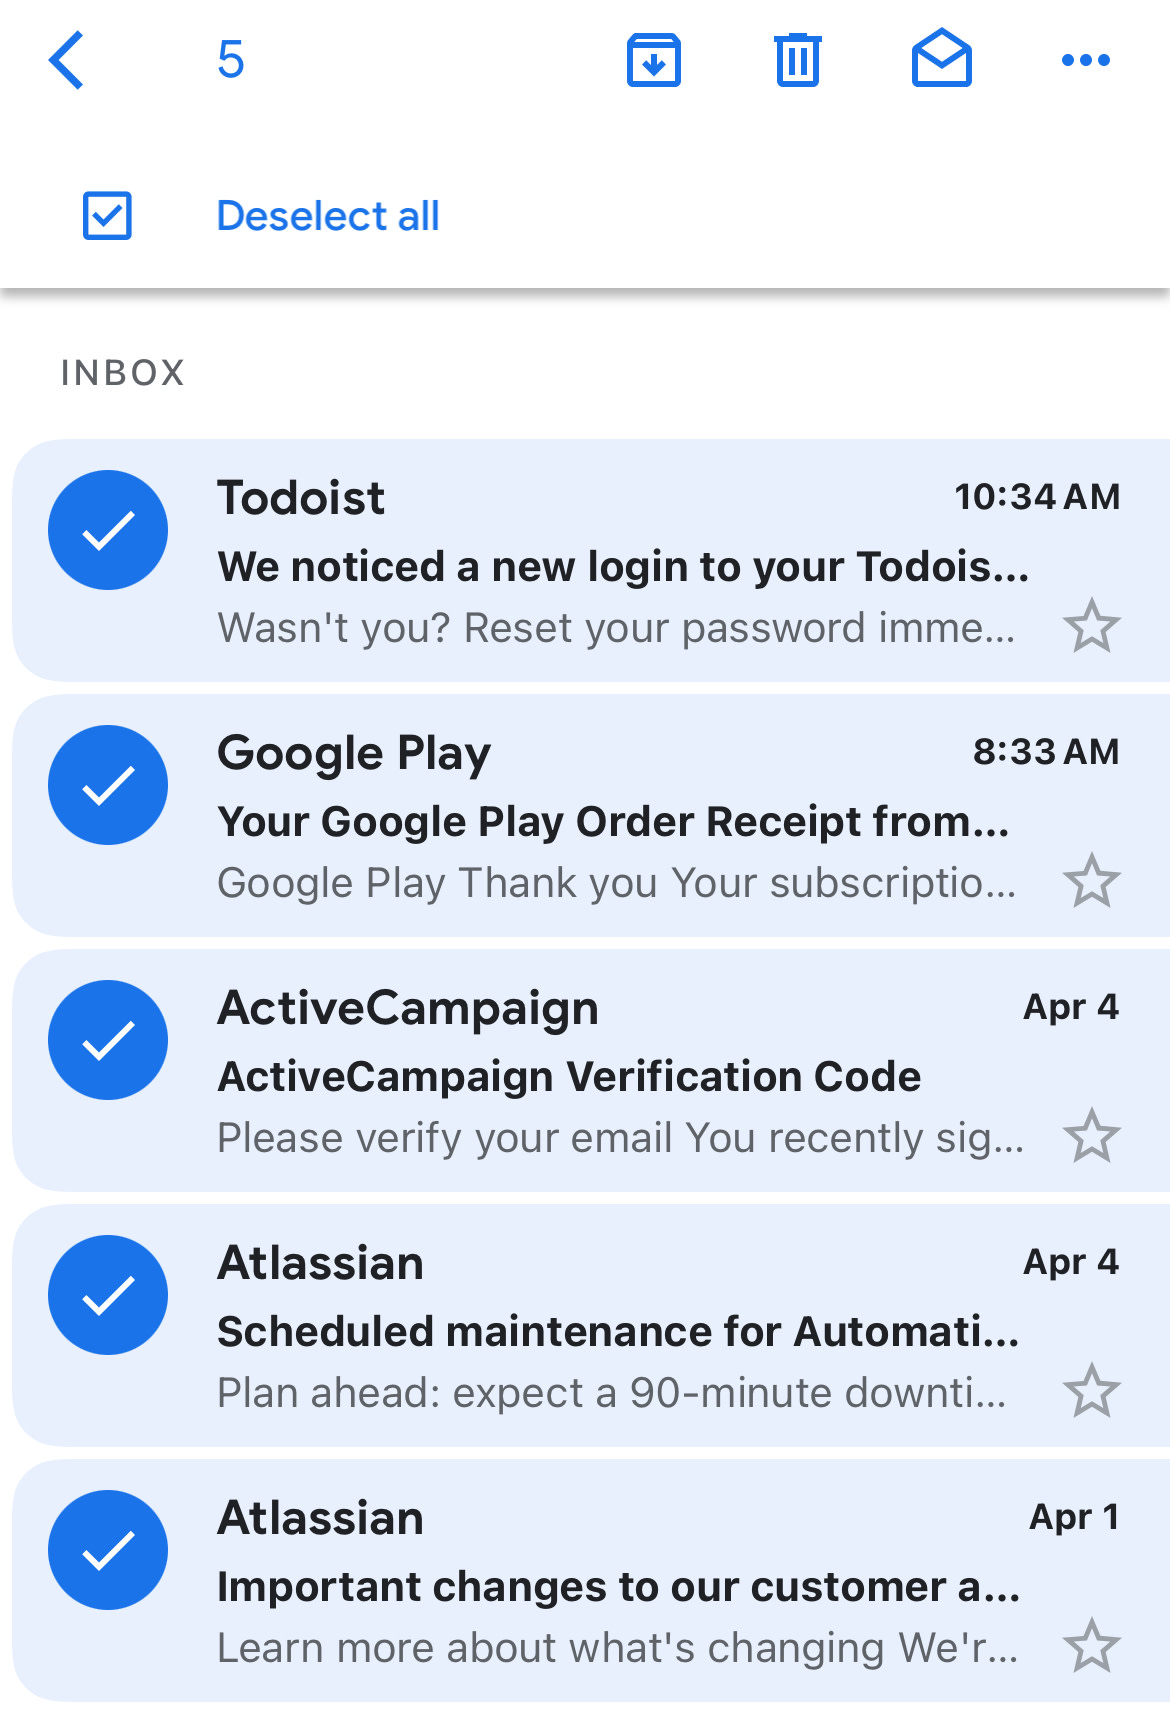
Somehow this seemingly simple action had been impossible in the Gmail app until recently, but thankfully, deleting all your emails is now just a few taps away. Here’s how it works for both iOS and Android.
-
Tap and hold any email.
-
Tap the Select all box that appears at the top.
-
Tap the delete icon.
Automate Gmail to get more done
Now that you’ve deleted your Gmail emails en masse, you can continue to keep things tidy. Start by setting up these space-saving Gmail filters. Then automate Gmail with Zapier so you can spend less time in your inbox.
You can use Zapier to automatically send emails when tasks are updated, save new emails to spreadsheets, save attachments to cloud storage, and anything else you can think of. Learn more about how to automate Gmail, or get started with these pre-made workflows.
Mass delete on Gmail FAQ
If you’re in the trenches of cleaning out your emails with no end in sight, or you’re paralyzed with fear of deleting something important (hi), take a deep breath and check out the answers to these common questions about mass deleting emails.
How do you permanently delete emails on Gmail?
When you delete emails in Gmail, they first get sent to a separate Trash folder. Emails in the Trash folder will permanently delete after 30 days, or you can delete them for good sooner yourself. Here’s how.
-
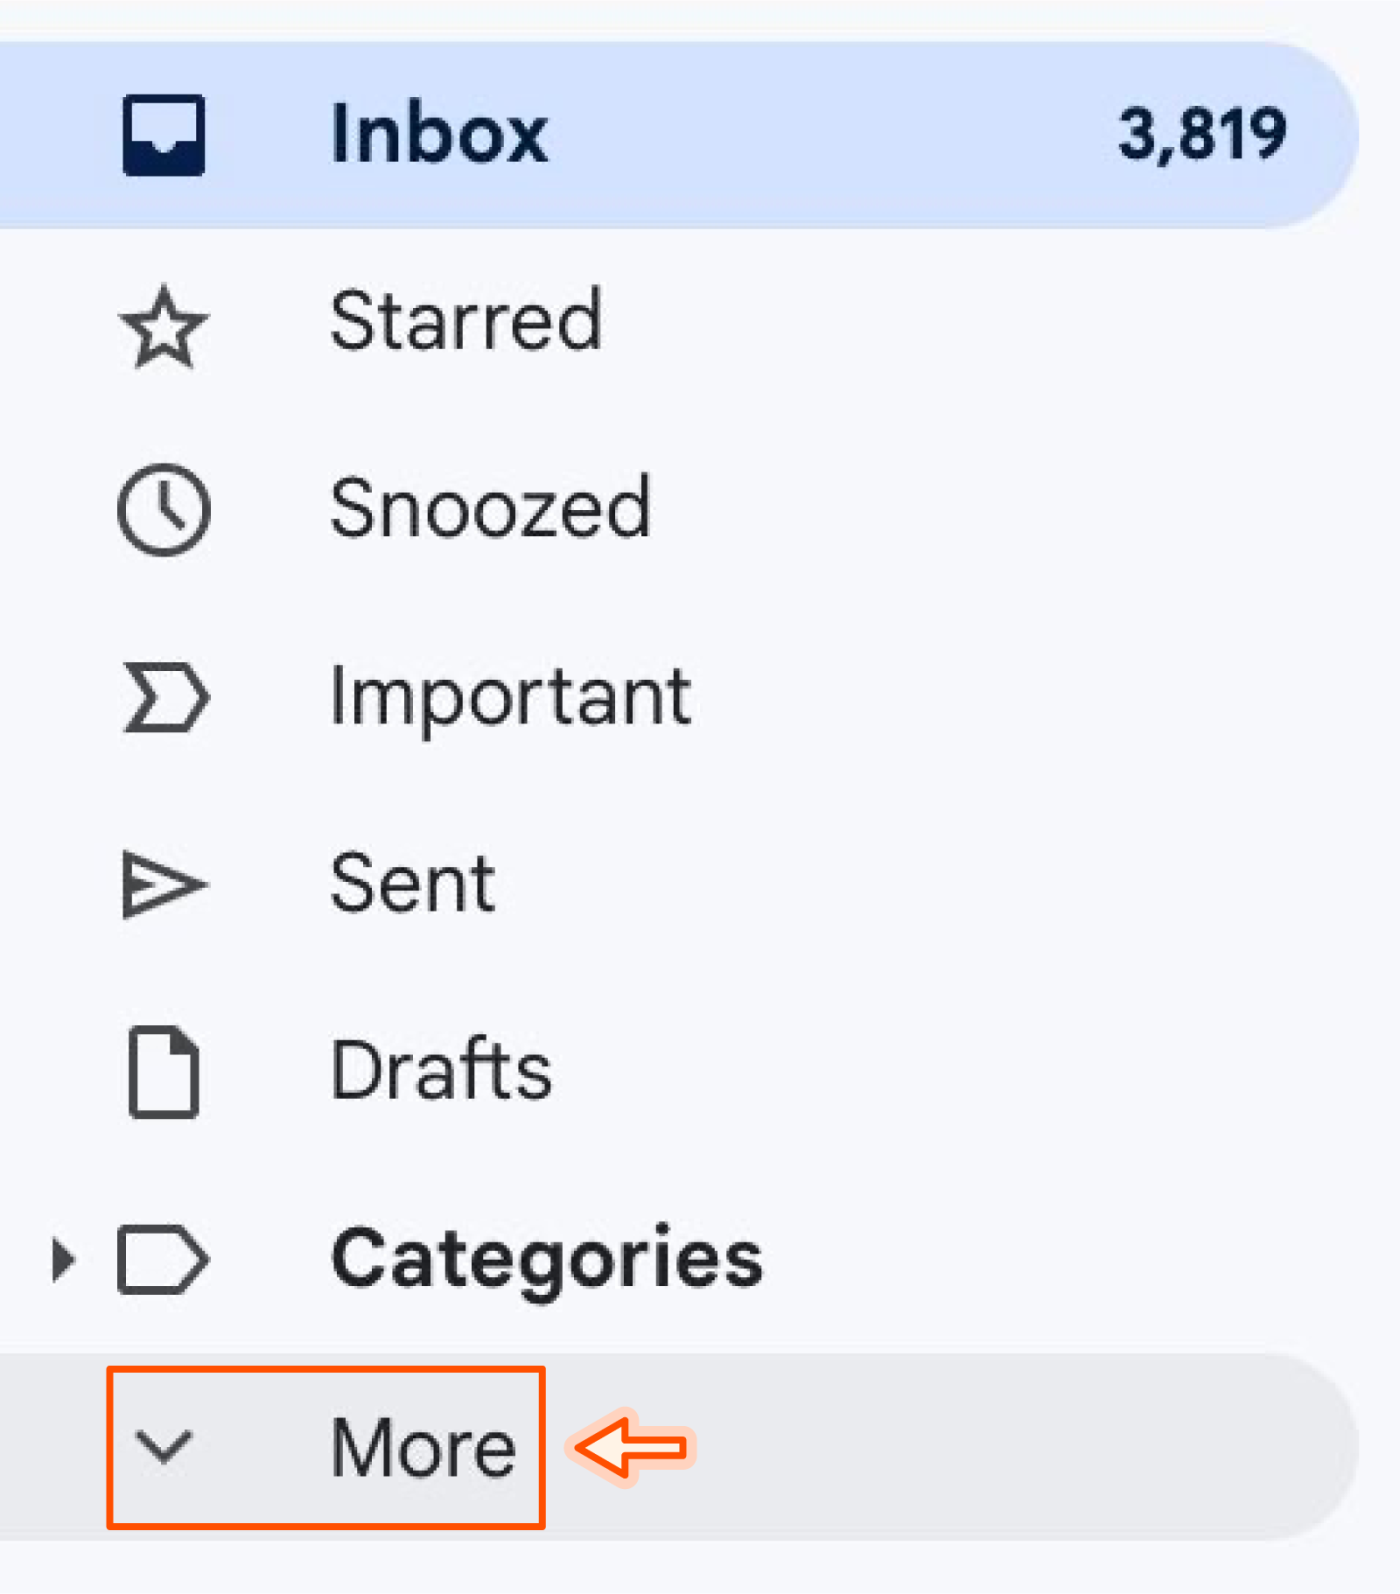
Click More in the left-hand sidebar to drop down more options.
-
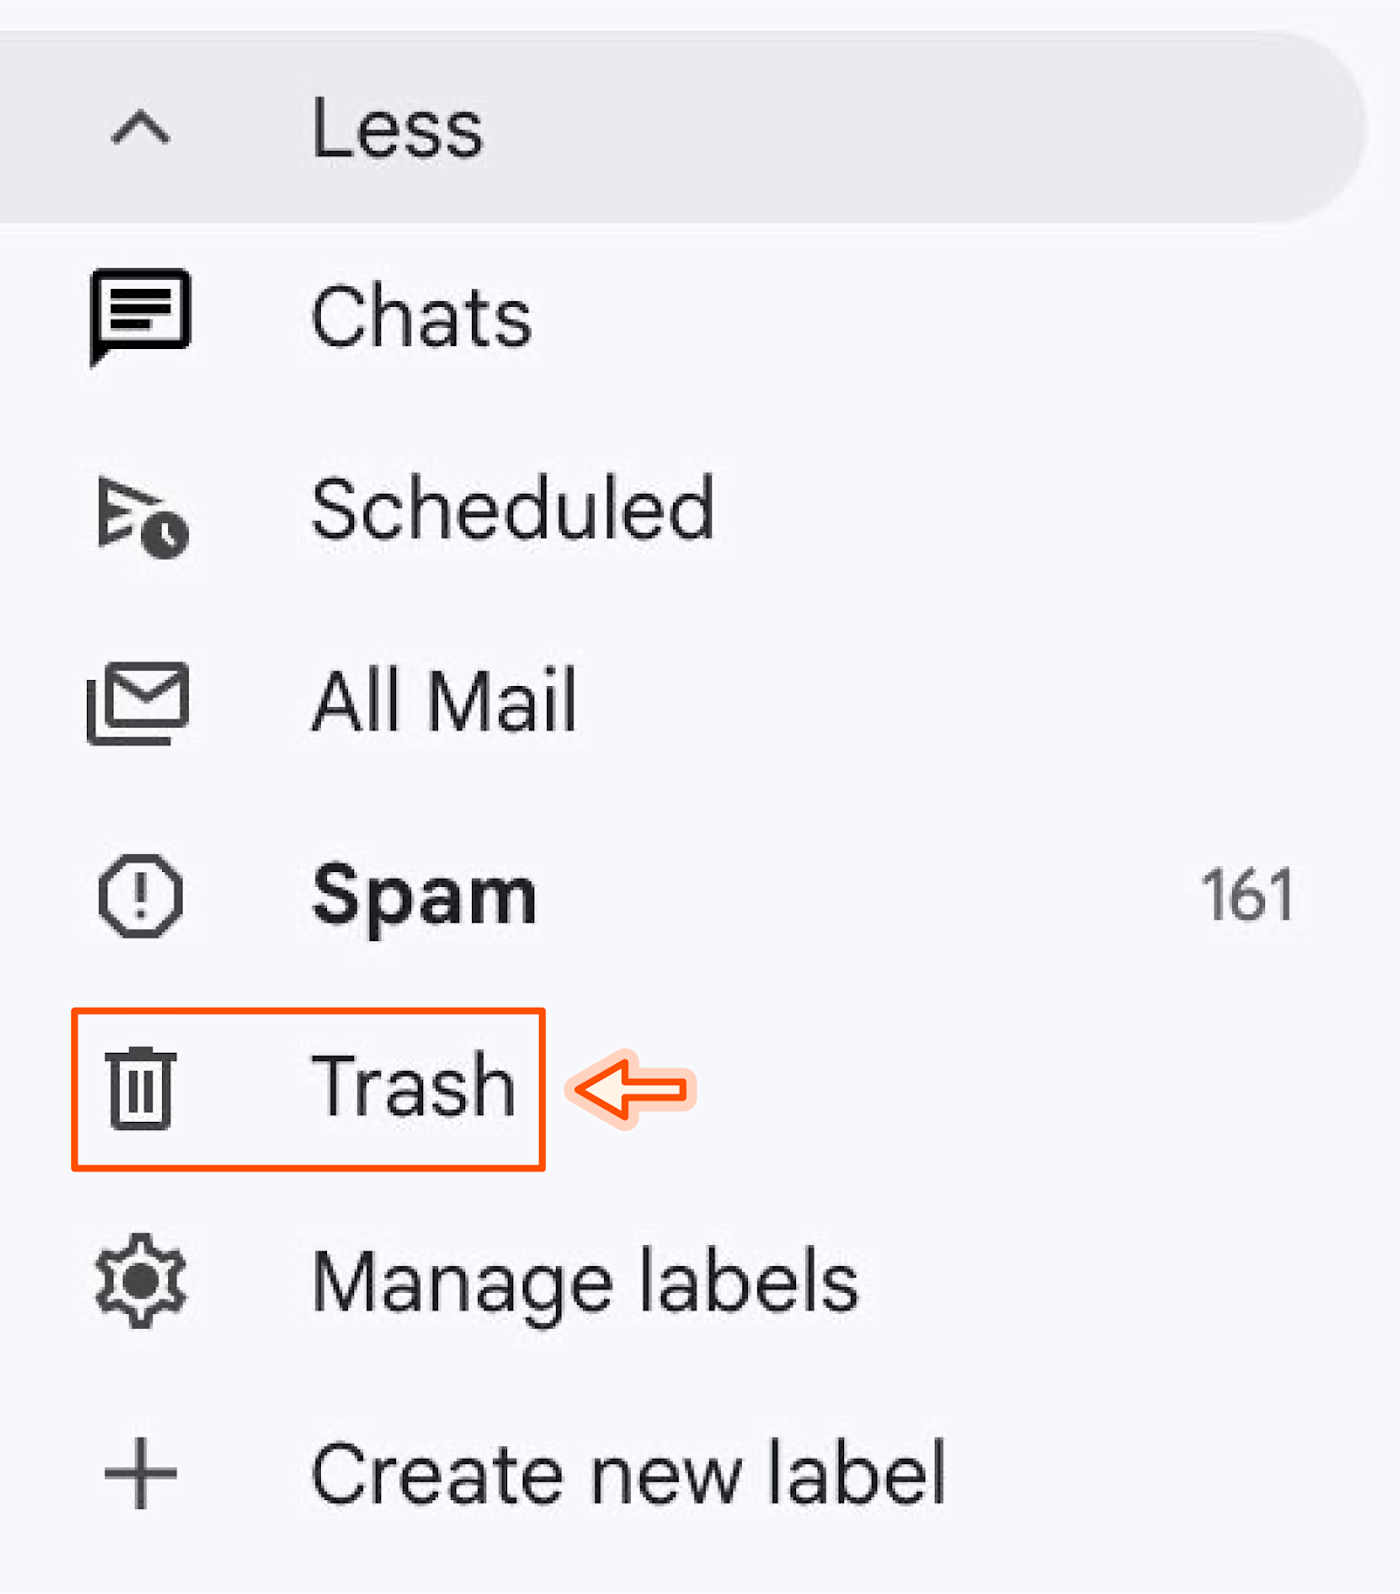
Click on Trash.
-
Click Empty Trash now to permanently delete emails in the Trash folder.

Can you recover deleted emails on Gmail?
If you’ve already followed the above steps to permanently delete emails in the Trash folder, your emails can’t be recovered (sorry—don’t hate the messenger). If you haven’t done that step yet, here’s how to recover your emails.
Recover select emails:
-
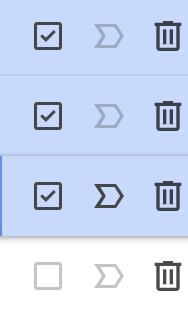
If you only want to recover select emails in the Trash folder, check the boxes next to those emails.
-
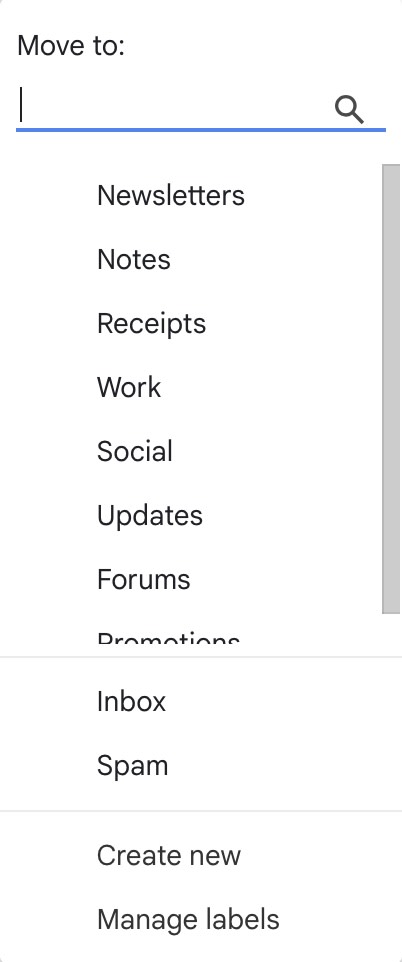
Click the Move icon (a folder with a right-facing arrow).

-
Choose the folder you want to move the selected emails to.
Recover all emails:
-
If you want to recover all emails in the Trash folder, check the box next to the refresh button.

-
Click Select all [quantity] conversations in Trash.

-
Click the Move icon (folder with a right-facing arrow).
-
Choose the folder you want to move the selected emails to.
How do I quickly clean my Gmail inbox?
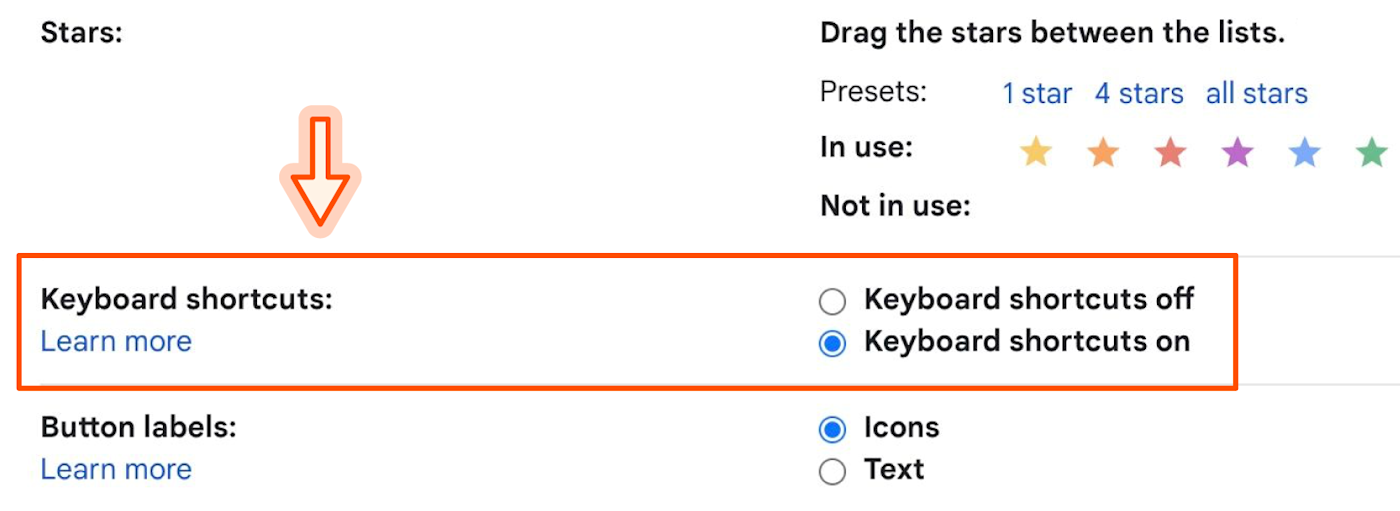
Another way to quickly delete emails on Gmail is to use keyboard shortcuts. First, make sure you have keyboard shortcuts enabled.
-
Click the Settings icon (gear in the top-left corner).
-
Click See all settings.
-
Navigate to the General tab (default).
-
Scroll to Keyboard shortcuts, and make sure the setting is toggled on.
Now you can use the following keyboard shortcuts to quickly optimize your Gmail experience:
-
Mass delete emails: Press * and a on your keyboard simultaneously to select all emails on the current page. Then press # to delete the selected emails.
-
Archive emails: Press * and a simultaneously to select all emails on the current page. Then press e to archive the selected emails.
How do I delete Gmail messages in bulk on my phone?
-
Hold your finger down on an email you want to delete.
-
When it’s selected, tap the Select all option that appears at the top if you want to delete all the emails.
-
To delete emails selectively, tap the rest of the ones you want to delete to check them all.
-
Tap the Delete icon.
How do I mass delete emails from Gmail by year?
-
In the search bar at the top of your inbox, type
after:YYYY/M/D before:YYYY/M/D. -
Fill in with the applicable dates to pinpoint a single year (or other date range).
-
Select all the emails that show up, and click the Delete button.
Related reading:
This article was originally published in April 2023. The most recent update was in April 2024.