One of the greatest benefits of using Zapier to automate your work is that you don’t need to use code. You can build Zaps (our word for automated workflows), forms, chatbots, and tables without knowing any programming language.
There may come a time, however, when you need to do something a little more advanced. Perhaps you know exactly what you want to automate, but Zapier’s existing actions or triggers can’t make it happen. Or maybe you’re getting information from App A, but it’s not in the right format for App B, and it would take lots of steps to get there otherwise.
That’s where Code by Zapier comes in: it’s a built-in tool specifically for adding the “code” back into “no-code” so you can fully customize your workflows to fit your unique business needs. And here’s the twist: developer or quite the opposite, you don’t actually need to know a lick of code. Thanks to the built-in AI generator, you just tell it what you’re trying to achieve, and it’ll write those snippets for you in seconds. Intrigued? Let’s dive in.
New to Zapier? It’s workflow automation software that lets you focus on what matters. Combine user interfaces, data tables, and logic with 6,000+ apps to build and automate anything you can imagine. Sign up for free.
Jump ahead
What is Code by Zapier?
Code by Zapier lets you add custom code to your Zaps so you can perform specific tasks that go beyond the pre-built triggers and actions provided by Zapier’s existing integrations.
Code steps act just like any other trigger or action, with one important difference: you tell those steps what to do in Python or JavaScript. These extra instructions within your Zaps can come in handy when you need to do something more advanced that Zapier might not natively support. You might, for example, use code steps to implement complex lookup tables, process line items, clean up raw data like XML, or retrieve dynamic dates from your data.
When used as a trigger, Code by Zapier typically processes input data or checks for specific conditions to decide if the workflow should start. As an action, it allows you to write code that will interact with data coming from the trigger or a previous action step. Actions using code can process information, rearrange data, or retrieve data from an API before sending it on to later steps in your Zap.
Note: Zaps work one step at a time, starting with the trigger at the top. Make sure that your Code action is placed below the trigger or action that gathers the data you want to use and above any actions that might need the data it outputs.
And, as we mentioned, if you don’t know how to write code or you get stuck, you can use AI directly within the Zap editor to generate code snippets by simply describing what you’d like to do.
In essence, code steps allow you to fully customize your workflows and take your business processes to the next level.
Key features include:
-
Custom scripts: Write JavaScript or Python code to run custom logic or operations not supported by standard Zapier integrations.
-
Data manipulation: Transform, format, or modify data from previous Zap steps to meet specific requirements.
-
Variable support: Use variables to store and manipulate data within your scripts, making your code more dynamic and adaptable.
-
Built-in Python utilities: Store and retrieve data between Zap runs with StoreClient, send HTTP requests with the request utility, and use the print utility to debug your function during execution.
-
Built-in JavaScript utilities: Store and retrieve data between Zap runs with StoreClient, use callback functions to handle tasks that take time to complete, make HTTP requests with the fetch utility, and debug your function with console.log.
-
AI code generator: Describe how you’d like to customize your trigger or action (in plain English), and AI will write the JavaScript or Python code for you.
-
Testing and debugging: Run your Zap via the dashboard to confirm the behavior you expect and check your Zap History for information around your code steps’ input data, output details, and logs.
What you can do with Code by Zapier
With Code by Zapier, the possibilities are endless. While most use cases will depend on your unique business challenges, here are a few popular examples:

Advanced text formatting
Automatically adjust the format of your trigger step data by splitting, reformatting, or removing text to fit the needs of your receiving app.
Examples:
-
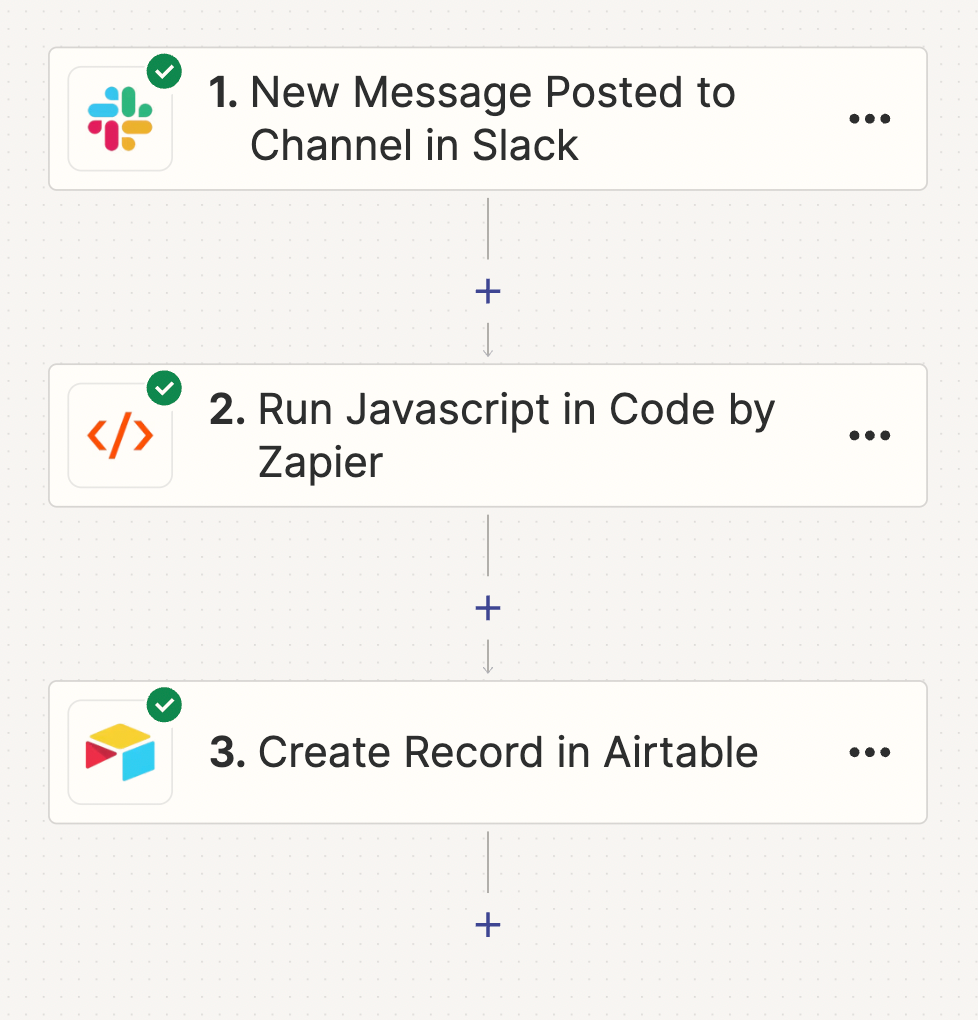
You want to remove user mentions from a Slack message so you can send the clean text to Airtable as a task. Use code steps to remove the username and reformat the data so that it’s easily readable in an Airtable entry.
-
You need to convert a blog post in Google Docs into HTML so you can add it straight to your content management system. Use code steps to automatically transform the plain text and make sure all the necessary tags and structures are correctly applied.
Note: If you want to make one small change to text, try using Formatter instead. Code steps are for you if you need to make more specific text adjustments, such as splitting, formatting, or removing text, or if you want to combine multiple adjustments into a single step that might otherwise require multiple Formatter action steps.
Fix dates and advanced date calculation
Automatically retrieve dates from your trigger app and use code steps to parse, transform, and reformat them to match the required format for the receiving app.
Examples:
-
You want to calculate a deadline date for regular tasks created in Airtable to a specific weekday (like Monday) after the request date. Use code steps to parse the date and ensure that if the input date is already a Monday, the code sets the date to the following Monday.
-
You want to change the format of specific dates into three different formats to ensure compatibility with the receiving app. Use code steps to reformat a date to YYYY-MM-DD, find the last day of that month, and output it in YYYY-MM-DD, and the month and year in MMMM YYYY format to produce July 2024.
Tip: If you run into trouble, coding communities like Stack Overflow or the Zapier Community are great for getting help from other coders to fine-tune your code or troubleshoot.
Extract and parse data
Automatically process individual line items from a list or extract multiple pieces of information (like email addresses) at once within a single step.
Examples:
-
You receive a list of subtasks from Asana, and you only want to work with those tasks named “draft copy” and “edit copy.” You can use code steps to filter tasks out from the list and send them to another app.
-
You want to extract a document ID from a Google Doc URL and the record ID from an Airtable record in a single step. Add a code step that uses advanced regex (regular expression) to find and extract IDs in one go.
-
You want to extract multiple email addresses from an app so you can perform actions on them individually. Use a code step to trigger multiple downstream actions for each extracted email, so that each one is handled separately.
Note: If you need to perform actions on line items, Looping by Zapier allows you to run actions on every single line item in a list. But if you only want your Zap to perform actions on specific items, code steps are better suited for full customization.
Make JSON API calls
Use JSON API calls to automatically fetch and process data from various sources, allowing you to extract and reformat information for use in other applications.
Examples:
-
Automatically fetch weather data for a specified location using a JSON API call. Extract relevant information such as temperature, humidity, and weather conditions, then format and send this data to a Slack channel for daily updates.
-
Automatically fetch the latest news articles for a specified topic using a JSON API call. Locate articles and breaking news headlines from news sources and blogs across the web and share them with your team in a Slack channel.
Note: Do you need to receive data from an API as soon as something occurs or gets updated—like a new lead in your CRM? If that app doesn’t integrate with Zapier, try using webhooks instead.
How to get started with Code by Zapier
Want to try out a code step?
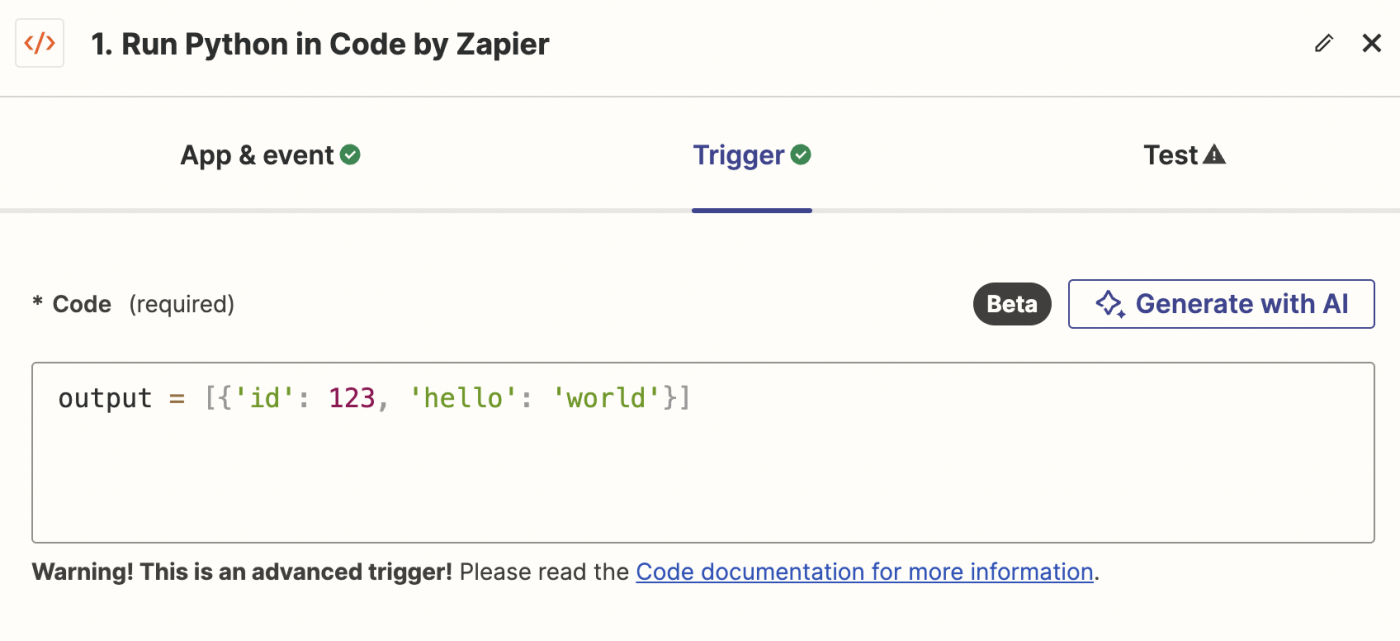
To use Code as a trigger, follow these steps:
-
In the Zap editor, click the trigger step, then search for and select Code by Zapier.
-
Click the event dropdown menu and select Run Javascript or Run Python, then click Continue.
-
In the Code field, enter your JavaScript or Python code.

-
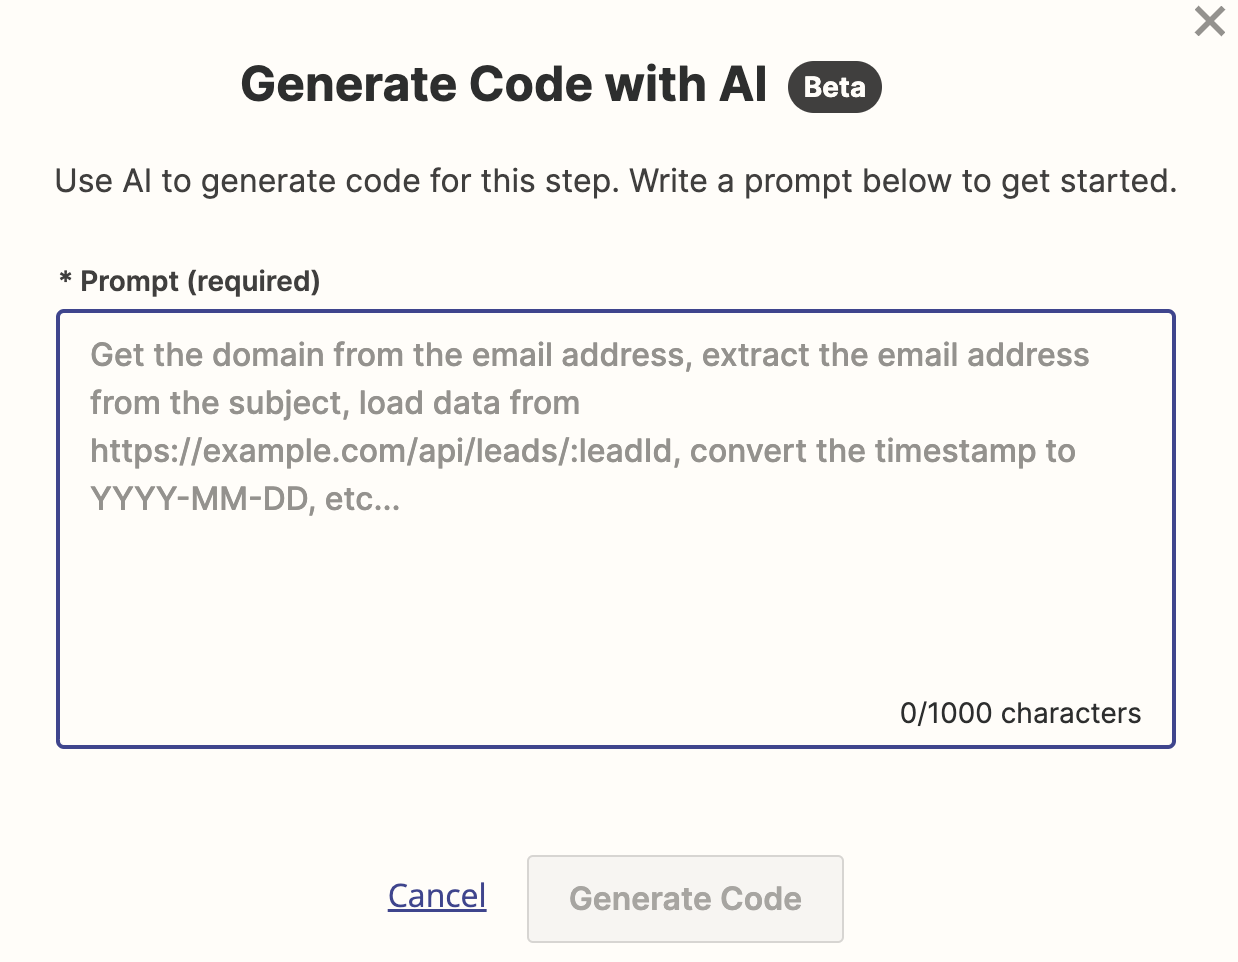
If you’d like AI to write code for you, click Generate with AI. In the dialog box, enter a prompt that describes your desired code. Click Generate code, then click Use code.

-
Once you’ve finished adding your code, click Continue to test your code step. If your code is valid, the step will show it was successful and display the data.
-
Now it’s time to add an action. Search for and select your action app. Connect your account, set up the action step, and test the action.
-
Once you’ve finished adding your action step(s) to your Zap, remember to turn it on.
To use Code as an action, follow these steps:
-
In the Zap editor, click the trigger step, then search for and select your trigger app and the trigger event. Connect your account, set up the trigger step, and test the step.
-
Once you’ve finished setting up your trigger, click the +icon to add a new step.
-
Search for and select Code by Zapier.
-
Click the event dropdown menu and select Run Javascript or Run Python. Then click Continue.
-
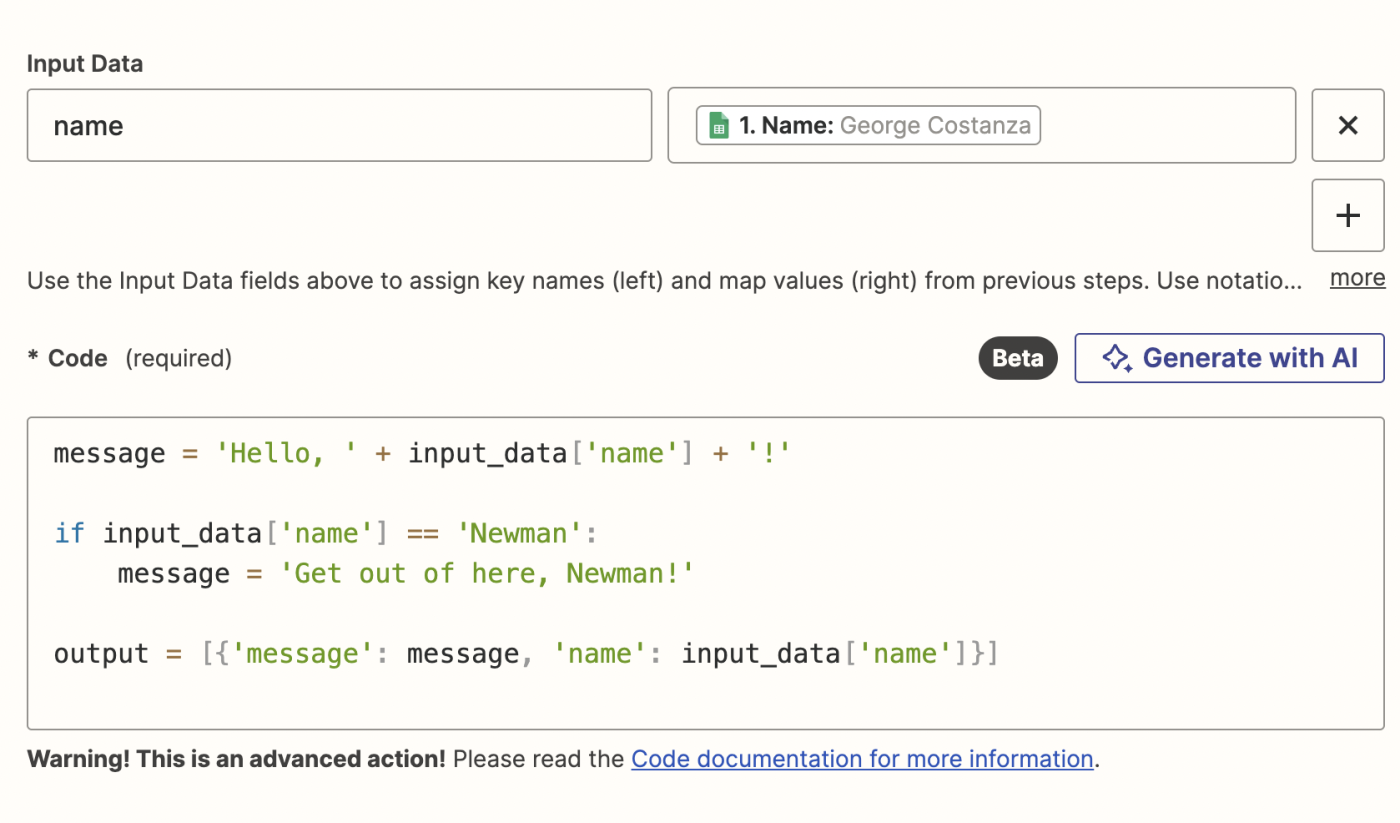
In the Input Data field, provide a key name and map the data from your trigger step. In the Code field, enter your JavaScript or Python code.

-
If you’d like to use the AI option, click Generate with AI. In the dialog box, enter a prompt that describes your desired code. Click Generate code, then click Use code.

-
Click Continue, then click Test step. If your code is valid, the step will show it was successful and display the data sent.
-
Once you’ve finished adding your action step(s) to your Zap, remember to test and turn it on.
For more information on setting up code steps in your Zap, check out our JavaScript or Python help guides for step-by-step instructions.
Use code steps to power your business’s growth
With Code by Zapier, you can customize your workflows so they automate complex tasks, integrate seamlessly with any API or custom application, and ultimately, solve problems unique to your business.
By adding that extra layer of code, you can transform your data in ways standard integrations can’t.
Ready to try it out yourself? Build a Zap with code steps now and start powering your business today.
This guide was originally published in May 2022 by Tyler Robertson. It was most recently updated in July 2024 by Elena Alston.