File management hasn’t changed much in the last few decades. Yes, your files may sync to the cloud—but as a Windows user, at some point, you’re probably still digging through your documents and downloads in Windows File Explorer.
Here’s the good news: the classic Windows File Explorer tool is much more powerful and flexible than it first appears. And with a few quick clicks or keystrokes, you’ll find some incredibly useful features that’ll supercharge your Windows file management experience.
Windows File Explorer tip #1: Preview files in a sidebar
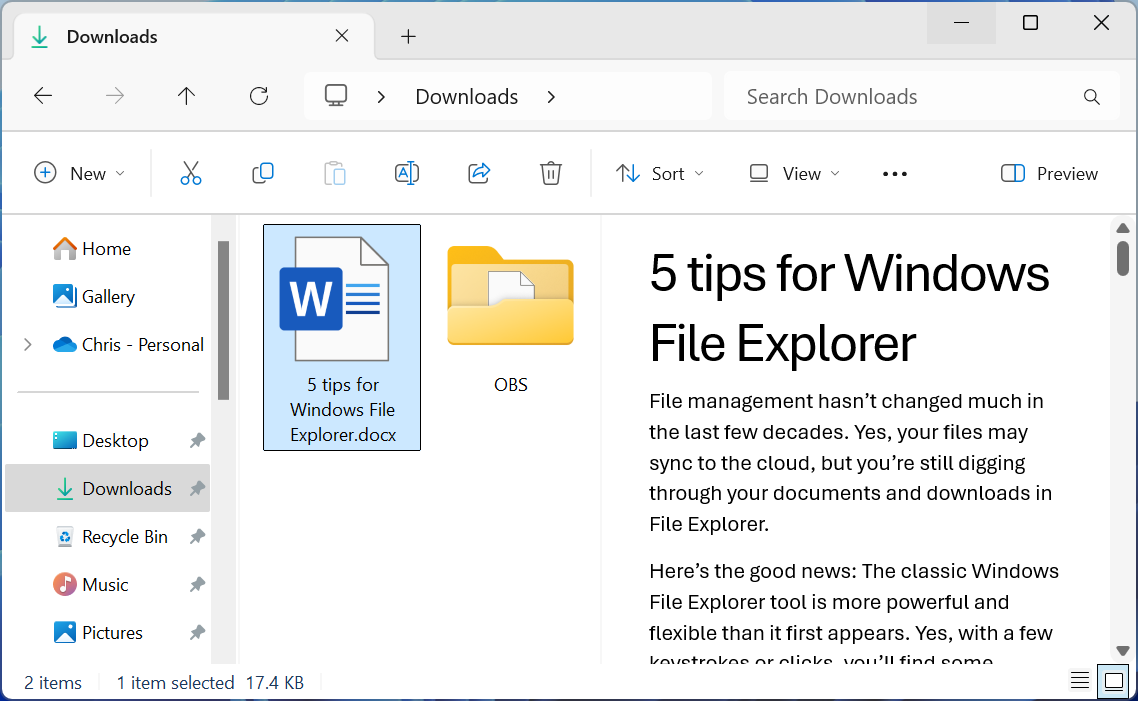
File Explorer has a handy Preview pane, which is hidden by default. It will show full images, PDF files, Word documents, Excel spreadsheets, text files, and more in a sidebar. You can see the contents of many files without even opening them, just by clicking them in File Explorer.

To activate the Preview pane, press Alt + P in File Explorer. On Windows 11, you can also click the View button on the toolbar, and select Preview pane. On Windows 10, click the View tab on the ribbon at the top of the window, and then click the Preview pane button.
Then, when you click a file (like a Word document) in File Explorer, you’ll see it in the preview pane. To see a larger preview, click and drag the vertical bar between the preview pane and file list to widen the pane.
Windows File Explorer tip #2: Choose what happens when you drag and drop
Normally, Windows automatically decides what happens when you drag and drop a file in File Explorer. In most cases, Windows will move whatever you’re dragging from its original location to wherever you drop it.
But what if you want to create a copy of a file—or create a shortcut? You don’t have to resort to right-clicking and digging into the context menu.
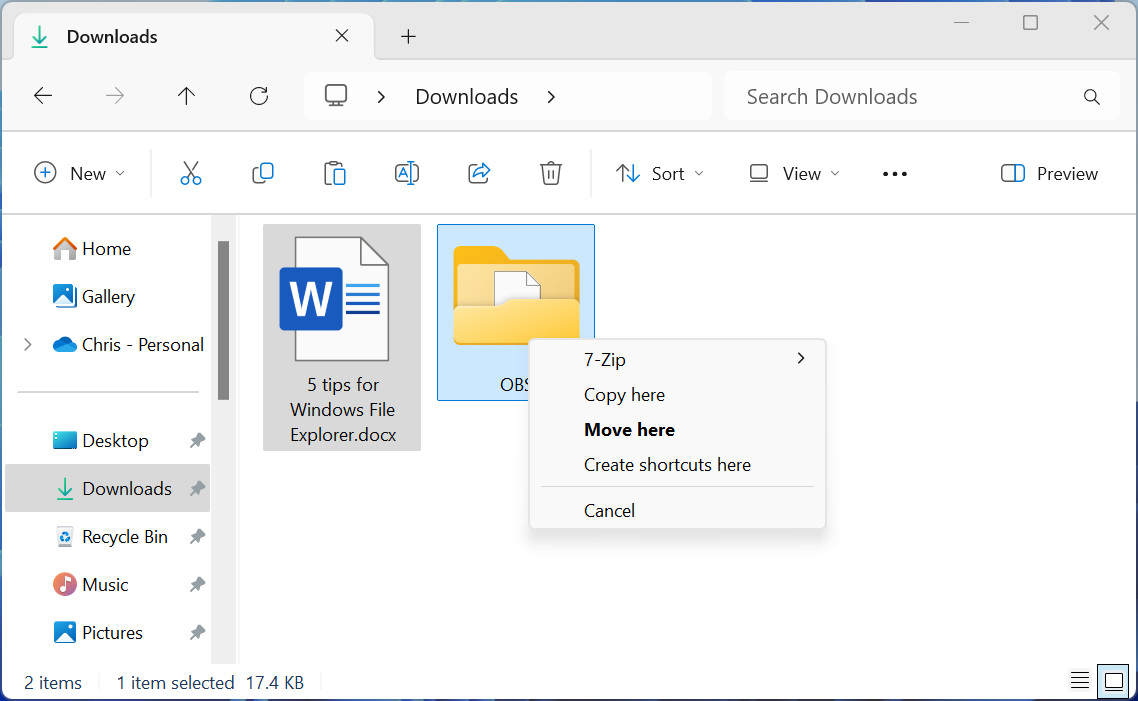
Instead, perform a right-click drag-and-drop. This is exactly what it sounds like: instead of left-clicking, position your mouse cursor over the file or files, click the right mouse button, and hold it down. Then, move the file or files to wherever you want them and release the right mouse button.
Windows will show you a menu of options, including Copy here, Move here, and Create shortcuts here. Click the action you want to perform.

Windows File Explorer tip #3: Put those File Explorer tabs to use
Microsoft gave File Explorer a big upgrade in Windows 11, with a new design and a long-awaited tab bar. And you’d never know it, but those new tabs work a lot like browser tabs. Here are some tips:
-
To open a new tab, press
Ctrl + Tor click the + button on the tab. -
Right-click a tab to find options like Duplicate tab and Close other tabs.
-
To close a tab, press
Ctrl + W. (This is a great way to close lots of tabs fast in your web browser, too!) -
To quickly open a window in a new tab while browsing your files, middle-click it in File Explorer—or right-click it, and select Open in new tab.
-
You can also use drag-and-drop to move tabs between windows and to move files between one tab and another.
While I’m a big fan of tabs and a big fan of File Explorer, it’s easy to overlook this feature since we Windows users lived without it for so many years.
(This is the only tip here that works only on Windows 11, by the way—unfortunately, Windows 10 doesn’t make the same sort of File Explorer tabs available.)
Windows File Explorer tip #4: Rename piles of files fast
Want to quickly rename lots of files? There’s a keyboard shortcut for that.
With a file selected in File Explorer, just press the F2 key on your keyboard, then type a new name and press Enter.
For even faster renaming, press the F2 key to start renaming a file, type the new name, and then press the Tab key. File Explorer will rename the file with your chosen name and immediately start renaming the next file in the folder, letting you quickly fly through a list of files and name them.
The F2 key can also function as a quick way to rename groups of files. To rename multiple files, select all the files you want in File Explorer. Then, type a name and press Enter. File Explorer will use your selected name and add a number. For example, if you name the files “My Project,” you’ll get files named “My Project (1),” “My Project (2),” and so on.
Want more productivity-boosting PC keyboard shortcuts? I’m constantly discovering new ones and sharing old favorites in my free Windows Intelligence newsletter.
Windows File Explorer tip #5: Filter folders full of files
While File Explorer has a convenient search box that works better than you might expect, it also has some little-known filtering features to help you dig through huge folders filled with lots of files.
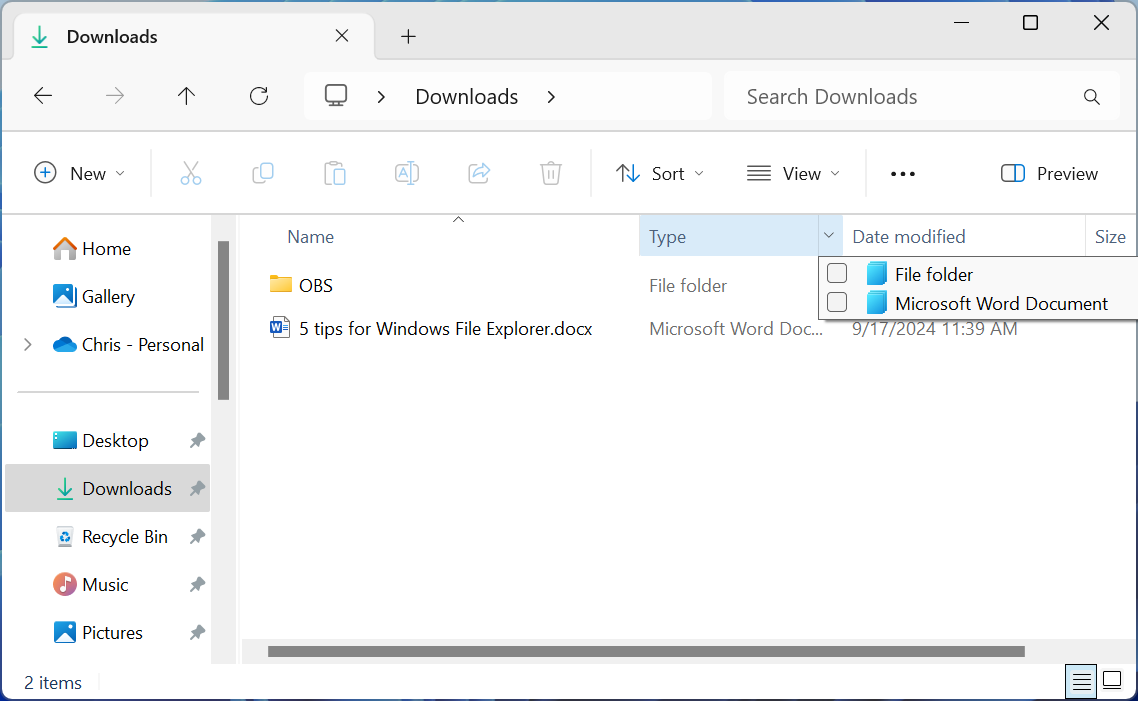
To filter files, first switch to the details view: Right-click an empty spot in the folder and select View > Details or press Ctrl + Shift + 6.
Then, position your mouse cursor over one of the headings at the top of the list of files in the folder. You’ll see a little arrow to the right of each column. Click the arrow, and select a filtering option. For example, you could click the arrow to the right of Type and choose a file type. Then, you’d see only files matching that file type in the folder.

This is just scratching the surface of what you can do with Windows File Explorer. Like the rest of Windows, you may be surprised to discover an especially useful option that’s been waiting for you just a few clicks away for decades. Hey—better late than never.
Related reading: